Sunday, January 27, 2008

Joni's lamb tagine

On Friday night, I enjoyed a lamb tagine. This in itself is surprising. Yet more surprising is the fact that this is the second time in two weeks that I have enjoyed a lamb tagine. The surprise lies in the 'enjoyment' factor. You see, I always claim to dislike Moroccan food. How can I sweep an entire nation's cuisine under the carpet, I hear you ask in horror? Someone interested in food could surely not be so short-sighted.

My dislike of Moroccan food stems from two of my major food 'hates'. There are not many foods that I dislike but two of them are fairly deeply linked with the food of Morocco. Horror number one is the combination of fruit and meat. There are exceptions (pork with apple sauce, duck with plum sauce). But not very many. Dried fruit is a particular issue. I love it in cakes and pastries, but stir a few sultanas into my coleslaw and I come over all funny. Put pineapple on top of some ham on a pizza and I turn a whiter shade of pale. So you see, whilst I love the idea of a slow-cooked lamb casserole simmered in spicy juices, the addition of sultanas, dates or (heaven forbid) apricots sends shivers down my spine.

Food hate number two is mint. I can't stand it. In any form. Even a tiny spring garnishing my restaurant dessert is too much. So, couscous with handfuls of chopped herbs stirred through? Delicious. Throw mint into the equation though, I'm in foodie hell.

However, I am taking it all back. Did you hear that? I am TAKING IT ALL BACK. I am of course ridiculous in thinking that all Moroccan food involves dried fruit and mint. I knew that already. But secondly, I have to congratulate my dear friend and hostess with the mostess, Joni, for cooking me a tajine that I actually enjoyed. And, what is more, it involved dried apricots. And yes, I really enjoyed it. So much so that I actually found myself asking for the recipe. So much that I actually found myself cooking it for myself.
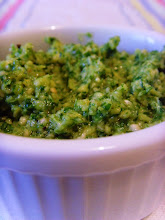
The heady blend of spices complemented the lamb beautifully - it was so gorgeously aromatic.

I am not sure how 'authentic' the recipe is but it is well worth trying. As you can imagine, I am no expert on Moroccan food. It does have a fruity sweetness to it (next time I think I'll use a little less honey) but it is really very good. Joni's version was rather better than mine - she cooked it at a lower heat for longer and she also added more spice. I have put in the quantities specified in the recipe she gave (I know she added more) and I leave it to you to decide how spicy you want it. I added a little more too, but next time I'll definately up the chilli and paprika in particular.

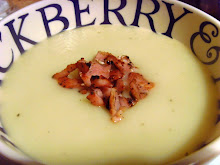
I served the tagine with couscous with huge handfulls of chopped flat-leaf parsley and coriander stirred through. For those less fussy (and more authentic), throw in chopped mint! Thanks Joni for a great recipe.


Joni's Lamb Tajine
Serves 6-8
(not sure where the original recipe came from - anyone who recognises it, do please let me know so I can credit appropriately)

1 tbsp sunflower oil
900g neck fillet of lamb, or boneless shoulder or leg
2 large onions
3 fat garlic cloves, crushed
175g dried apricots, quartered
1 tsp ground ginger
1tsp ground cinnamon
1tablespoon ground paprika
1/8 tsp hot chilli powder
1 generous pinch safron soaked in 3 tblsp hot water
2 tbsp honey
800g tinned chopped tomatoes
Half a pint of stock (approx.)
chopped parsley and coriander to garnish

1. Pre-heat oven to 160C.

2. Heat oil in large casserole or tagine and brown lamb in batches. When nicely browned, remove with slotted spoon and put on one side.

3. Add onions and garlic to pan on a low heat, stir and then cover for around 10-15 minutes until soft.

4. Increase heat and add spices including saffron and soaking liquid - give a good stir.


5. Add apricots, honey, tomatoes and lamb. Add some of the stock to loosen the mixture - you might want to add just a little and top it up during the cooking. You don't want it too 'saucy' but equally you don't want it to dry out.

6.Bring to the boil, season with salt and pepper, cover and cook in the oven for at least two hours. Garnish with lots of parsley and coriander and serve with couscous.
Notes - Next time, I think I might add some vegetables to the tagine - probably courgette and peppers.

Friday, January 25, 2008

Hot smoked salmon on toast - lunch at my desk

I am always on the look out for interesting lunch ideas for the week that take (almost) zero time to prepare. I leave home at 7am and so rarely feel in the mood for making anything in the morning. Equally, when I get home at night, it is supper and not tomorrow's lunch which occupies my mind. All too often I end up grabbing a sandwich from M&S at the station on the way to work. Fine, but hardly cost effective! And it tends to get a bit monotonous having sandwiches every day...

Mondays are usually good. Having had time at the weekend, I've generally managed to make something satisfying and nutritious to take with me on Monday morning. Fridays are the best though, as I work from home, which means that I can actually use some kitchen appliances to prepare myself something a little more... interesting. It still has to be speedy, of course. I am conscious that when working at home, I must be at my desk as much as possible and not taking advantage of the flexible arrangement I have been lucky enough to get.

Last Friday, I decided to make this tasty snack combining hot smoked salmon and cheese on toast. It was delicious, quick, easy and nutritious.

I flaked the hot smoked salmon into a bowl and added some creme fraiche, horseradish, snipped chives, finely chopped spring onions and freshly ground pepper.

Feeling reckless, I then decided to throw in some chopped avocado. I then preheated the grill to high and lightly toasted some brown bread on each side. Once toasted, I piled the salmon mixture onto the toast and topped with freshly grated Cheddar cheese.
I then grilled on high until the cheese was nicely melted and served with a tastily-dressed salad. Very delicious and all completed in around ten minutes. Perfect!
This would probably be good with smoked mackerel too - I might even mix a little Dijon mustard into the cheese for an added kick.


Tuesday, January 22, 2008

Milk chocolate fondue


I recently had a clear out of my cupboards and found to my surprise that I was the owner of no less than four fondue pans. Yes, really. FOUR. I mean how many fondue pans does a woman need? Especially one who hasn't made a fondue for around five years. I've slimmed the collection down to three - one large for 'big' fondues and two small chocolate fondues - useful for putting one at each of the table and thereby avoiding major spillages.

The fondue is a funny one. A throwback to the eighties, is it really a socially acceptable thing to serve unless you are within spitting distance of a ski slope? Yes, yes and yes again. There is something quite divine about a gorgeously melty cheese fondue dripping off hunks of French bread. I was also suitably impressed when I had dinner with a certain friend recently who professes to be hopeless in the kitchen (total rubbish, I suspect) and she served up the perfect fondue bourguignonne - strips of the best fillet of beef which we cooked ourselves in the hot oil of the fondue. Served with superb thin chips (from the freezer) and a range of scrummy sauces and salads, it was great fun and truly divine.

Cheese is good. Beef is better. But chocolate is surely the champion. What could be better than throwing a few bits in a pan to melt and then using bits of fruit and marshmallows as vehicles for the wickedly indulgent chocolatey goo? Surely the easiest (and most decadent) pud in the world and one that even the 'no, I won't have dessert' crowd cannot resist. By the way - I have never understood the 'no, I won't have dessert' crowd. Just to make that quite clear!

This is a milk chocolate fondue - I prefer it to dark. Whilst I usually use dark chocolate for my desserts, milk chocolate seems more suited to this rather frivolous pud. Dark chocolate is somehow too... serious. Too... grown-up on this occasion. The lemon might sound like an odd addition and whilst I restrain from saying that it is essential (recipes should never be set in stone), I would like to suggest that it is... a very favourable addition.

For dipping, you could go down the fruit route (...like how that rhymes?). Bananas and pear are my favourites. But if you like the strawberry and chocolate thing is up your street, then strawbs would be perfect. Cherries, perhaps too. If you chill the fruit in the fridge for a while before serving, the sauce will 'hold' better too. Marshmallows are also a winner.

The original recipe comes from Le Creuset's 'Fondue Cookery', written by Wendy Vale. It came with the first of

Milk Chocolate Fondue

Serves 4 (fairly small servings)

125g milk chocolate (I used Green and Black's)

25g unsalted butter

1 tablespoon golden syrup

2 teaspoons finely grated lemon rind

4 tablespoons whipping cream

1. Break the chocolate into small pieces and place in a chocolate fondue pan* together with the all the other ingredients.

2. Stir over a very low heat until smooth and glossy.

3. Transfer fondue pan onto the stand above lighted candle flame. Be sure not to let the mixture boil. It should be warm, not hot.

4. Serve with a selection of irresistible dippers.

* A chocolate fondue pan uses heat from a candle rather than a full burner - this prevents the fondue from getting too hot. It is fine to use a regular fondue pan - just keep the heat as low as possible and keep and eye on the situation! No fondue pan? No problem - just melt in a small saucepan, bring to the table and eat whilst still warm. On the off-chance there is any left over, it is delicious on ice cream.

**Trig over at Aiden Brookes, Trainee Chef tagged me for the 7 random facts meme. Thank you. I did this one a wee while ago - you can read my seven facts here.

Sunday, January 20, 2008

Pot Roast Pheasant with Celeriac Mash

As is becoming obvious, I am very keen on almost all kinds of game. Venison, pigeon, guinea fowl, pheasant, partridge all rate highly in my book. I love those strong, deeply savoury, gamey flavours. Occasionally it can get a bit much - I had grouse for the first time this year and think the bird I tasted was a little too gamey for liking. The flavour was so strong, I could barely taste anything else all evening!

Pheasant, though, is a great favourite of mine. When I tire of chicken, I turn to this little bird for something with a little more... oomph to it. The one major challenge that comes with cooking game is keeping the meat moist. Pheasant is naturally lean and this means that it can dry out quickly if you don't pay it a little attention. If roasting, be sure to cover the top with plenty of bacon and if possible go for a young hen rather than a cock which tends to be a little tougher. How do you know if the bird you have is hen or cock, old or young? Generally, you don't of course if you are buying your birds plucked and ready to go. Look for smaller birds - you may not get so much meat, but you will find them more suitable for roasting.

The alternative is to find some other way to cook them. Enter stage left the pot roast. I have never pot roasted anything before but have always wanted to give it a try to ring the changes. I like the idea of everything being in one... pot. The benefits for lean birds are obvious - you add liquid to the pot and put a lid on top which leads to a gentle steaming of the meat. All the liquid in the bottom keeps everything nice and moist, plus it makes for delicious broth-like juice to pour over the meat. What took me so long to discover this method? It really is superb. I think I will try it with chicken next time, though I imagine the remaining liquid would be quite greasy.

Pot-Roast Pheasant with Celeriac Mash

Serves 3-4 depending on size of birds

2 pheasants, plucked with giblets removed

2 oz butter

2 tablespoon oil

5 shallots, skinned and halved*

2 leeks, trimmed and sliced

4 cloves garlic

2 small handfuls of Chanteray carrots, washed and trimmed

2 sticks of celery chopped

4 rashers streaky bacon

handful of thyme

bay leaf

250ml dry white wine (a dry riesling is good)

250ml chicken stock

For the celeriac mash -

1 small celeriac, peeled and cubed

3 medium floury potatoes, peeled and chopped

1 0z butter (approx)

2 tablespoons cream (approx)

1. Pre-heat oven to 180C. Melt half the butter and half the oil in a non-stick frying pan or a large casserole. Brown the birds on all sides.

2. Meanwhile, in the large casserole in which you intend to cook the pot roast, brown the shallots and bacon in the remaining butter and oil. When nicely coloured, add the birds to the pan and sit them on top of the shallots.


3. Throw in the leeks, carrots, celery, garlic cloves, thyme and bay leaf. Season with plenty of pepper plus a little salt (though remember that the bacon is salty). Pour over the wine and stock. Bring to the boil and then place the lid on top and place in the oven for forty minutes.


4. Around 15-20 minutes before the end of cooking time, place the celeriac and potatoes in a pan of cold salted water and bring to the boil. Boil for around 12 minutes or until very tender. Drain and mash with butter, cream, salt and pepper. You may like to use a hand blender for this if you want a smooth mash as it is hard to mash the celeriac by hand. Place lid on pan to keep warm.

5. Remove pot roast from oven and check that pheasants are done (insert skewer into thickest part of thigh and ensure that juices run clear). If so, remove from the pan and place on carving board to rest for 5-10 minutes.

6. Carve the pheasants and serve the meat on a bed of celeriac mash, with the broth and vegetables spooned over the top.

*A tip for peeling shallots - boil the kettle and pour boiling water over the shallots. Leave for around a minute before draining and running under cold water. The skins will now peel off much more easily.

Notes - this is quite a rustic style of dish and would be nice served in big bowls. You could, I suppose, make the juice into something a little more gravy-like by thickening it with a blend of flour and butter and serving the meat with more traditional roast accompaniments (roast potatoes, bread sauce etc). But it is delicious served just as it is.

Wine notes -
I drank this with the same wine that I used in the pot - a dry riesling from Alsace. But it would also be good with a pinot noir, perhaps a nice juicy one from New Zealand.

Thursday, January 17, 2008

Rhubarb and ginger crumble

When I visited Borough market last weekend, I was very excited to see colourful stems of early forced rhubarb from Lincolnshire. I adore rhubarb - that glorious colour really cheers up the winter months. But has anyone ever tried to photograph rhubarb? Knowing my fellow food bloggers, the answer here is probably yes. And not just yes, but 'yes, with great success'. I failed completely - the bright pink colour of the skin appeared to be having some sort of argument with my usually fairly obliging camera. No matter how many shots I took, I couldn't seem to make it look 'real'. As I grew increasingly frustrated, I took a moment to remind myself that this is just a hobby after all and that life is too short to worry about photographing rhubarb.

Fortunately for us all, I had more success when it came to cooking with the rhubarb. Because I don't have nearly enough cook books (!!), I decided to buy another, the other day. Seduced by the gorgeous photos of puddings that I'd actually want to eat (and cook), I bought a copy of Annie Bell's mouthwatering 'gorgeous desserts'. In this wonderfully tempting book I found the perfect recipe for a rhubarb and ginger crumble. Ideal comfort food. All that was needed was the custard (for rhubarb simply HAS to have custard, doesn't it?). I just love a proper British pud.

Rhubarb is brilliant with ginger - I've had savoury dishes which combine the two which have also been good. This was one of the best crumbles I've had in a long time and I can't wait to pick up the next batch of rhubarb.

For the original recipe along with dozens of other delectable desserts, do buy the book. Here is my version.

Rhubarb and ginger crumble
(serves 6)
800g trimmed rhubarb
200g self-raising flour, plus 2 tablespoons
200g demerara sugar
2 knobs stem ginger
100g ground almonds
175g unsalted butter, chilled and diced

1. Pre-heat the oven to 180C. Wash the rhubarb to clean and then chop into 3cm pieces. Roughly chop the ginger.

2. Toss rhubarb in a bowl with the 2 tablespoons flour, half the sugar and the ginger. Arrange over the base of a 2 litre ovenproof dish. Sprinkle over 2 tablespoons of water.

3. Combine flour, remaining sugar, ground almonds and butter using your hands* until it ressembles coarse breadcrumbs.

4. Scatter mixture over the rhubarb and bake for 30-35 minutes until golden and crisp and the juices are bubbling up at the sides.

5. Serve with custard.

*You can make crumble in a food processor but I have always found that I get a better result when I rub the mixture together by hand. If you do want to keep your mitts clean, then by all means use the whizzer, but take care to stop the blade before the mixture turns to dough.

Notes - this is also superb cold, eaten straight from the dish!

Tuesday, January 15, 2008

How do I love thee Borough Market? Let me count the ways...

How do I love thee? Let me count the ways.
I love thee for thy fruit and veg and meat
The quality of which cannot be beat,
For the best end of lamb and ideal fish.
I love thee for the clatter and clamour
Of market traders, by sun and candle-light.
I love thy seasonality, as I strive to get it Right;
I love thee purely, thy beef I shall Braise.
I love thee with a passion put to use
In my old kitchen, and with my childhood's faith.
I love thee with a love I doubt I'll ever lose
With my lost rolling pin, --- I love thee with the hunger,
Smiles, meals, of all my life! --- and, if God choose,
Next time I'll buy more cheese from your cheesemongers.

So, I think that Elizabeth Barrett Browning had the edge (mind you, she probably spent more than five minutes thinking it up), but I'm hoping that my first (and undoubtedly last) foray into poetry will give you an idea of just how much I love the fabulous Borough market. I can be there in 25 minutes, yet I don't go nearly often enough. I love the hustle and bustle of the crowds that descend on Saturdays, I love the contrasting smells that fill the air and I love the passion held by each market trader. I love to watch people greedily biting into Ostrich burgers, fresh-as-a-button scallops and freshly shucked oysters...


I love the free samples. I love the weird and wonderful ingredients. I love the enthusiasm. I lovet that there is a stall entirely devoted to the products of the Orkney Islands...


I love that you can buy a chorizo burger or a gourmet sausage in a bun. That you can buy a huge vat of olive oil or the teensiest drizzle of truffle oil. I love that I always buy twice as much as I intended to. I love the setting, in the shadow of Southwark Cathedral...

Most of all, I love the sheer diversity and variety of this colourful and noisy market. Everything you could want to eat from the smelliest cheese...

....to the freshest of fish....

... to the featheriest of fowl...

I was lucky to leave with a bunch of the first of this year's forced rhubarb. I made a wonderful rhubarb and ginger crumble - what a treat. The recipe will follow of course. But I thought I'd just leave you today with a word on the wood pigeons that I bought last week at the Clapham Farmer's Market. I decided that I would keep it simple and roast one of the birds for my supper and serve it with roasted potatoes, Chanteray carrots and parsnips (and the requisite peas, of course).

The key with any small game birds is keeping the meat nice and moist - they dry out really quickly. The woodpigeon was small enough to wrap the entire birdie in streaky bacon. I pulled out the giblets (retaining them for the gravy) and stuffed a little onion and thyme inside the cavity, along with a knob of butter.

I then roasted at 200C for around 40 minutes. I removed the bacon for the final 5 minutes to brown the skin a little. There was a little juice which I used, with the giblets, to make a deliciously rich gravy. The meat was delicious but there was quite a lot of work involved for a relatively small amount of meat. I think that next time I might remove the breasts rior to cooking and cook them quickly to serve as part of a salad. It was a good meal overall though - I should have made some bread sauce to complete it however.

I still have one wood pigeon to go, so would love to hear of any ideas you may have to ring the changes with the next one. I'm leaving you today with the glorious sight of the Houses of Parliament at sunset which I enjoyed when I decided to walk home along the river from Borough Market.

Saturday, January 12, 2008

(Key) Lime Pie

When is a pie not a pie? When it is a tart, of course. I have never really understood why certain American desserts are called pies. To me, a pie has a lid. Either of pastry or potato usually. For me, anything without a lid is surely a tart? I checked on wikipedia for the definitive answer and it looks as though I am half right but also half wrong. That's ok. I need to learn to be less pernickety about these things.

I have an aunt who lives in South-West Florida, on the Gulf coast. I visit her every couple of years and always look forward to the wonderful fresh fish and great restaurants in her area. Her proximity to the Keys means there is often a hint of the Caribbean in the cooking around her parts too. It also means that my favourite dessert is on almost all restaurant menus. I just adore Key Lime Pie. In fact, I am borderline obsessive about it. Each visit I make it my mission to track down THE Key lime pie to beat all Key lime pies. My aforementioned pernickety nature comes into full swing in this task (I'm a Virgo, after all). My search for creamy lime perfection knows no bounds. At the end of my last visit I was feeling unsatisfied - I hadn't had a really 'great' pie during the whole visit. With just moments to spare before I was due to head for security at the airport, I ducked into one of Miami's top airport hotels, took myself to the restaurant and ordered a slice. I wolfed it down whilst watching the planes taxi-ing on the the runway. It was one of the best to date!


I have never attempted to re-create my favourite dessert. There are several good reasons for this. Firstly, a fairly major spanner in the works is the lack of Key lime availability over here. Key limes are different to the regular Persian limes that we get over here. They are smaller and have a more yellow skin. They taste a little different too with a higher acidity. Sadly, they have a very short season and you just can't get them over here. You can buy bottled Key lime juice, but it just doesn't seem quite right to me. I want the real deal.

Second problem is the crust. It just has to be a Graham Cracker crust. Whatever wikipedia may tell me, I am just not prepared to concede to the claim that this biscuit is like a digestive biscuit. It is most definitely different. Available in some specialist stores this side of the pond, they are not exactly easy to come by.

So, for years, I have lived an unsatisfied life. Unable to indulge in my favourite dessert without a seven hour flight to Florida. Probably better for my waistline this way (which, trust me, needs all the help it can get).

However, on Thursday, I had a change of heart. I needed to make a dessert to take to a winetasting I was hosting last night. I decided I'd have a stab at the pie of my dreams despite the lack of the two 'key' ingredients (...like what I did there with the 'Key')! I struggled to find a recipe that looked right - some piled meringue on top (wrong), some smothered it with cream (double wrong). To me, Key lime pie should be pure, simple unadulterated sweet and creamy limey interior and crunchy crust. No embellishments are needed. Sweetened condensed milk is an essential ingredient. As, I suspect, are eggs. Plus something to make the crust crunchy.

I (perhaps foolishly) eshewed the various Floridian recipes that I found. I couldn't get the exact ingredients so decided it was better to go with a British recipe that compensated for the lack of correct ingredients. It was Delia, in the end, who looked most promising on the subject. She soothed my lime-induced fears, assuring me that other varieties of lime would do just as well. Crucially, she added grape nuts to the crust for added crunch. Sounded like a winning formula! I got busy, squeezing those limes.

I followed her recipe pretty much to the T. I find it hard not to dabble though and so did throw a little ground ginger into the base too. I considered using ginger nuts for the base, as in my Jamaican crunch recipe, but I changed my mind as I wanted to be as close to the original as possible. Ginger doesn't usually feature in a Key lime pie, so I'd add only a smidge to mine.

How did it turn out, I hear you ask? Good question. Was my dessert nirvana achieved? I'm sad to report, not quite. It was good. It seemed to go down very well with those who ate it. There were lots of clean plates. But (with the exception of one), they hadn't tasted the real McCoy. It was a delicious pie. But it wasn't a Key lime pie. It lacked the proper tang of my dream pie. Perhaps next time I'd add more lime juice, or perhaps the juice of a lemon or two, to up the acidity. The grape nuts sure made the base crunchy, but I thought a little too crunchy. It was also very... yellow. I used organic eggs with very yellow yolks - I guess that is why. The pie of my dreams is paler and creamier. Perhaps less eggy. I'm just not sure.

Anyway, the fact remains that this is a delicious dessert that I'd make again. I'll just call it 'lime tart' perhaps...

For the original version of Delia's recipe, click here. My version follows here...

(Key) Lime Tart

Serves 8

For the base -

100g butter

175g digestive biscuits

50g grape nuts

1 teaspoon of ground ginger

For the filling -

1 tablespoon of finely grated lime zest (around 3 limes)

Juice of 5 large limes

3 large egg yolks

1 large tin condensed milk (397g)

1. Pre-heat oven to 180C. Bash up the biscuits, either in a plastic bag with a rolling pin, or in a food processor. Tip into a bowl with the grape nuts and ginger and mix together.

2. Melt the butter and pour into the biscuit mix. Stir until evenly coated.

3. Press into a loose-bottomed 9 inch flan tin. Bake in the oven for 10 minutes until crisp and golden.

4. Meanwhile, prepare the filling. Add the lime zest to the egg yolks and whisk with an electric handwhisk until thickened (around 2 minutes). Add the condensed milk and whisk for a further 4 minutes. Finally, add the lime juice and whisk briefly to mix.

5. Pour the filling into the biscuit base and then bake in the oven for 20 minutes until just set. Lightly press a finger in the centre to check. Be careful not to overcook. It shouldn't brown in any way.

6. Remove from oven and cool. Cover with cling film and chill until needed - it should be served chilled and not straight from the oven. Decorate with a little creme fraiche, if you wish. And maybe a little strip of lime zest (not lemon as in my pictures - I ran out of limes!).

Thursday, January 10, 2008

Smoked trout with rosti potatoes and horseradish cream


Do you remember Timmy Mallet's word association game 'Mallet's Mallet'? I play this game in my mind regularly when it comes to food. Just mention 'lamb' to me and I think immediately of 'leeks' (must be my Welsh roots). Duck? Peas. Cod? Spinach. Pears? Almonds.

It is not that I have to have leeks with lamb - I had lamb chops on Monday in fact, smothered in harissa and served with sweet potatoes and survived unscathed - but, in my mind, the two compliment each other so well that I find it hard to serve one without the other. I try to head towards the green beans, but something draws me back to those leeks almost every time...

Smoked fish is another case in point. Just one whiff of the stuff launches me headfirst into the fridge, rummaging for horseradish. Brilliant combination whether it be smoked mackerel, trout or salmon, if you ask me.

In this dish, I've plunked for smoked trout. I prefer it to smoked salmon generally. Unless we are talking about really good, upmarket, expensive smoked salmon. I find a lot of smoked salmon to be rather lacking in flavour. You have to hunt around a bit, I think. Smoked trout tends to hit the spot more often for me. To enjoy at its best, take it out for the fridge around 15 minutes before you want to eat it. The chill from the fridge kills some of the flavour.

No proper 'recipe' on this occasion - that would seem somewhat pompous, I think. I am sure we are all capable of this easy assembly job. Perfect for lunch or a light supper. But would also make a great dinner party starter if served in a slightly smaller portion.

Smoked trout with rosti potatoes and horseradish cream


Coarsely grate peeled, waxy potatoes (enough to shape into one patty each per person). Place grated potato in a colander with a plate underneath and sprinkle with salt. Leave for 15 minutes. The excess moisture will be drawn out by the salt.

Meanwhile mix together creme fraiche and horseradish. You could grate fresh horseradish, but a little good sauce from a jar works fine. For every heaped tablespoon of creme fraiche, add a teaspoon of horseradish. Stir in some snipped chives and lots of ground black pepper.


Return to your potatoes and squeeze out the liquid in a clean tea towel. Shape into patties and fry on each side in a little oil and butter until golden and crispy (around 5 minutes each side).

Place the rosti on the plate and top with slices of smoked trout. Spoon over some of the creamy sauce and serve with salad (avocado is good) and a chunk of lemon or lime.

Monday, January 07, 2008

Chicken and Chives


I've always thought that January was a rotten time to make resolutions. In particular those involving eating healthier. January is such a miserable month - cold, damp, grey and uneventful when compared with the joyous month of December. I always crave comfort food at this time of year, not salads. Save the salads for spring and summer when the sunshine puts one naturally in the mood for these kind of lighter meals. The British seasons understand this perfectly - I don't see any lettuces or tomatoes flourishing in the garden at present. Comforting root vegetables and tasty game are flavour of the month instead. I'll save my salad days for when the salad actually tastes good!

Yesterday, I took a trip to my local farmers' market, just of the Abbeville Road in Clapham South. It runs very Sunday from 10am to 2pm (very civilised, I've always thought). Though quite small, there are always a good selection of tempting stores. Just look at this bread for starters...


I picked up a whole goody bag of game - some pheasants, a couple of wood pigeons, a pack of pheasant breasts and some diced venison. All are safely stowed away in the freezer for the time being, but you can expect some nice game recipes in the weeks to come. I've not cooked wood pigeon before - if anyone has any bright ideas, then do let me know. I generally cook for one so thought they would be the perfect size.

Anyway, I had a chicken breast to use up before I started on the game. I decided to use a recipe of my mother's that I've not eaten for a long time. The sauce may be on sweet side for some - it depends on the brand of grape juice you use - but I think it is rather delicious. As usual for the mid-week, it is very speedy and easy to whip up. I'm not quite sure where it came from originally - it is one of those written in a splattered kitchen folder that I have.

Chicken and Chives - serves 4

4 chicken breasts
1oz butter
1 teaspoon oil
8 fl oz white grape juice
6 1/2 fl oz double cream
handful of chives, chopped
1 tsp cornflour

1. Fry chicken in butter and oil to seal in a non-stick pan.

2. Pour on grape juice and simmer 15-20 minutes.

3. Blend cornflour with cream.

4. Pour cream into pan and heat until almost boiling. Snip chives over the top and mix well.

5. Serve chicken breasts with the sauce poured over the top. Good with mash and green beans.