Monday, November 22, 2010

Chocolate and pear crumble


We have been rather overloaded with pears this year - the tree in the garden was positively groaning in them and they seemed to ripen all at exactly the same time. We picked the lot and left them in the cool shed whilst we pondered their fate. We ate a few here and there and used them in various puddings but the greatest thing we did with our pears was this fantastically warming chocolatey crumble.


Chocolate and pear is a fairly classic combination. I've never been entirely convinced by the pairing myself. I'm a bit funny about chocolate with fruit in general. My only true exception is chocolate and orange which I adore but sadly my husband hates orange so it is a combination I don't get to enjoy all that often. He loves chocolate and pear though. His favourite pudding is something he calls 'chocolate pear upside down pudding'. I've tried to recreate this fondly-remembered childhood pud but sadly I find myself lacking. He always declares it 'very good', but 'not quite what my mother used to make'.

I'd decided to leave this well alone and move on but then I spotted an interesting sounding recipe in a newly acquired Aga cook book. The 'Aga Bible' by Amy Wilcock is an excellent tome for anyone new to Aga cooking (or for new ideas for those who've had one for years). It has plenty of advice and a good mix of classic and more imaginative recipes. This crumble is much like a regular crumble only the 'crumble' has the very welcome addition of cocoa powder and grated dark chocolate. The result was spectacularly good. I'd love to say that 'this is terribly rich so you'll only manage a small helping' but I'll tell you now that even though it was rather sweet and rich, I greedily devoured two helpings.  Best served with vanilla ice cream or regular cream.

Chocolate and Pear Crumble
Serves 6


Ingredients:
100g chilled butter, plus a little extra for greasing
6 ripe pears (I used Conference)
1 tsp ground ginger
80g plain flour
60g ground almonds
100g golden caster sugar
3tbsp cocoa powder
75g chilled dark chocolate

1. Lightly grease a deep medium-sized ovenproof dish with butter. Pre-heat oven to 180C.

2. Peel, quarter and core the pears before chopping into chunks, popping in the prepared dish and sprinkling with ginger.

3. Using a food processor, whizz together flour, almonds, sugar and cocoa until blended. Cut chilled butter into small pieces and add to processor. Pulse until you have crumbly breadcrumb consistency.

4. Coarsely grate the chocolate into the processor and give another whizz. Pour/spread crumble mix over the pears.

Conventional cooking:
Bake for 25 minutes until golden brown.

2-door Aga:
Put dish into Aga roasting tin and hand on 4th set of runners in roasting oven. Cook for 20-25 minutes and then transfer to simmering oven and cook for a further 20-25 mins or until the fruit is tender.

4-door Aga:
Cook on 3rd set of runners in baking oven for 35-40 minutes.

Tuesday, November 16, 2010

My favourite Christmas cake

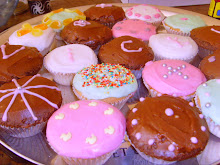
Christmas Cake in disguise!

It is with a mixture of apprehension and excitement that I await Christmas this year. It will be my first Christmas as a married woman and the first that I will be the one hosting the festivities. It will be the first Christmas I will spend with my in-laws. It will also be the first Christmas I have spent away from my parents and family.

My mother has always played the most integral part in my Christmas. She is the sort of woman who does Christmas properly. She is the sort of woman who has five sets of Christmas placemats. The sort of woman who, over the years, has amassed a collection of 'special' dishes which come out only once a year. There is a special platter for the turkey, bowls featuring a Holly design for holding the brandy butter, a festive plate for the Christmas pudding and glasses etched with reindeer to delight her grandchildren (...and children for that matter). This may all sound rather kitsch, but I can assure you it is not - my mother's Christmas manages to be both artistic and tasteful whilst also being great fun.


My mother has been 'doing' Christmas for around fifty years so it is hardly surprising that she has perfected the art. Her tree is always beautifully decorated (red, silver and green only), there will be a lovely wreath on the door, a festive swag running up the staircase and a stunning flower arrangement in the centre of the dining table. Each year is the same and this is what I love. The familiarity of annual traditions, our Christmas Day routine (stockings, church, Champagne and smoked salmon, present opening, lunch...) and the joy of being with the people who know you the best.

The idea of a Christmas without all of this is quite alarming . Even more alarming is the fact that I want 'my' Christmas to be equally glorious yet I have none of the experience (or Christmas accessories) that my mother has accumulated over the years. Despite this level of alarm, I am actually looking forward to Christmas is my own home. I'm looking forward to staying put, not having to travel and just enjoying spending time with my husband in our new home. I'm looking forward to decorating the house 'our' way (though the red and silver theme is fairly ingrained) albeit on a very limited budget. And fortunately, my mother is willing to spare one of the sets of placemats!


I'm not entirely in the dark. I have cooked the Christmas lunch before and with some success. I have also been in charge of the Christmas pudding for the past few years - this has been made and is safely stored away maturing ahead of the big day. For my foolproof recipe, please see this link. I've also made a Christmas cake before - I followed Delia's recipe and enjoyed the results but (guess what) it didn't quite match up to my mother's cake. To be fair to Delia, I actually prefer a slightly lighter-coloured cake to the traditional very dark fruit cake. The recipe that my family swear by is actually taken from an old wedding cake book. My sister is a professional wedding cake maker and this is the cake she uses for her cakes. It really is the nicest fruit cake I know of - beautifully moist, sticky and reasonably boozy yet quite pale rather than treacley-black.

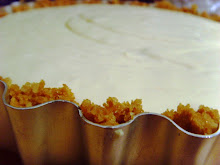
The cake is best made at least three weeks in advance and left to mature nicely until ready to ice. An important part of the maturation is the addition of a soaking mixture which is drizzled over the cake sporadically whilst it matures.

The recipe is for one quantity of cake mixture. Underneath the ingredients I have listed the number of quantities according to the size and shape of your cake tins. This is also useful if you are making several tiers of a wedding cake. I made a 9 inch square cake and used 6 quantities of mixture. Unless you have digital scales, you may find it easier to use pounds and ounces to measure the ingredients - I give both!

My favourite Christmas Cake


Ingredients for one quantity of cake mixture. See below for guide to cake sizes.

2oz/57g plain flour
2oz/57g brown sugar
2oz/57g butter
2.5oz/71g currants
2.5oz/71g sultanas
1oz/28g seedless raisins
1oz/28g glace cherries
1.5oz/42g mixed peel
3/4 oz/21g ground almonds
2 tsp brandy or rum
1 large egg
pinch nutmeg
pinch mixed spice
pinch salt
1/4 lemon zest and juice

For 8 inch round, use 4 quantities of mixture and cook for approx. 3.5-4 hours
For 8 inch square, use 5 quantities and cook for approx. 4 hours
For 9 inch round, use 5 quantities and cook for approx. 4-4.5 hours
For 9 inch square, use 6 quantities and cook for approx. 4.5 hours

Soaking Mixture:
Equal quantities of rum, sherry and glycerine (or spirits of choice!). Glycerine is available from the chemist or, in small bottles, in the baking section of larger supermarkets. Add 1 tablespoonful per 1lb of cake when cooked.

1. Pre-heat oven to 140C. Line cake tin with a double layer of buttered greaseproof paper.

2. Clean the dried fruit by tipping onto a clean tea-towel and sprinkling with flour. Roll up in towel and agitate to release any bits of stalk/grit.

3. Halve the cherries then mix all the fruit together with lemon zest. Sift flour, spices and salt and set to one side.

4. Beat butter and sugar until light and fluffy. Gradually add eggs, beating after each addition. Stir in ground almonds and then fold in the flour and spices.


5. Add brandy or rum, fruit and lemon juice. Give everything a great big stir to combine ingredients thoroughly.

6. Transfer to prepared tin and place in center of oven. Below the cake place a roasting tin containing one pint of water. This will create sufficient humidity to keep the top of the cake moist and ensure level results in baking. Remove water after half the baking time (mind had evaporated by this stage!).


7. If the cake is browning too quickly, protect the top with a layer of foil or baking paper. Every oven differs and the timings are only a guide. My mother and sister tell me the cake usually takes much longer than the specified times in their ovens. In my oven, the timings seemed about right. Test the cake with a skewer to see if it is done.

8. When cake is ready, remove from oven and leave in the tin for 24 hours. After this time prick the top with a skewer, cocktail stick or knitting needle and sprinkle with appropriate quantity of soaking mixture (see above). Wrap cake in waxed paper for at least 3 weeks, topping up with soaking mixture if required.


As for decorating the cake... You'll just have to wait and see!

Monday, November 15, 2010

'Aga' drop scones


My new job has been eating into blogging and cooking time which means that getting used to the Aga is taking longer than I'd hoped. There have been a fair few disasters which, I have to admit, have had me tearing my hair out in frustration. My biggest gripe is that we struggle to keep a constant heat and, as we have to fill up with solid fuel once or twice a day, the kitchen is permanantly covered in a layer of black soot. Not very appetising!

However, there are aspects of this cooker that I already love and know I will miss terribly when we move. I love the instant heat - no pre-heating required here. Water boils instantly. Meat is sealed in moments. And the kitchen has a lovely warm glow. Having acquired an old Aga kettle we no longer need to use the electric version and the toaster is looking dusty in the corner too - crumpets and toast cook perfectly using the heat that is already there. But my favourite thing about the Aga involves the simmering plate (top right hand side) and a piece of Bake-o-Glide. Actually, we don't have Bake-o-Glide. It is fearfully expensive. We have some kind of supermarket imitation that does the job just as well. It is basically a non-stick, re-usable sheet of silicone (I think?!) which can withstand fairly high heat. We place it over the simmering plate and cook directly on it. Fat-less 'fried' eggs are a favourite - just crack an egg onto the non-stick sheet and lower (yes, really) the lid. A few minutes later, lift the lid to a perfectly-cooked, super-healthy egg. Butterless toasted sandwiches are a real hit - we favour a mature Cheddar and some onion chutney. Make the sandwich, place on the silicone sheet and put the lid down again. A few minutes later, flip the sandwich and repeat. Moments later you'll have a scrumptious, perfectly cooked toastie without messing up a sandwich toaster and without an ounce of butter smeared on the outside. Lovely!

The 'baking sheet-simmering plate method' is also a winner for all kinds of pancakes. Drop-scones (or scotch pancakes) cooked directly on the top are an Aga classic. I have a few Aga cookbooks which feature various 'Aga' classics. In slightly arrogant tone they refer to 'Aga' shortbread, 'Aga' drop scones, 'Aga' breakfasts and 'Aga' flapjacks. This makes it sound as though 'Aga' shortbread is vastly superior to any other kind - I'm not convinced by this but at least it makes me laugh! Anyway, the drop scones are a hit with me. I've made them several times in various guises. For pudding with maple syrup and pears or bananas. For an indulgent weekend breakfast with honey and berries. For a dinner party starter with added herbs and served with smoked trout and horseradish cream.

Here is the recipe I have used. I believe it is a Mary Berry recipe. Feel free to vary the batter. Good additions include cinnamon, raisins, blueberries or fresh herbs. An Aga is not necessary - these will be equally delicious cooked on a griddle or in a good non-stick frying pan! Please excuse a selection of terrible photos - light was awful and I was in a hurry to eat them.

'Aga' Drop Scones

Ingredients

4oz self-raising flour
1oz caster sugar (omit if making savoury pancakes and season with salt and pepper)
1 large egg
1/4 pint milk

1. Mix flour and sugar together and create a well in the centre.

2. Crack egg into the well and mix with a wooden spoon to combine.

3. Add the milk a little at a time, stirring between additions, until you have a smooth batter.

4. Lightly grease a frying pan, griddle or the top of the simmering plate on an Aga. If you have a solid fuel Aga like us, place a piece of non-stick silicone liner over the simmering plate. Drop tablespoonfuls of batter onto the pan or liner and leave to cook until bubbles begin to form on the surface. Carefully flip the drop scones with a palette knife and cook the other side. This should only take a minute or two.


5. Remove cooked scones from heat and keep soft in a clean tea-towel until ready to serve.


Tuesday, November 02, 2010

Timbale of trout and dill


I've just started a new job which is exciting but also rather tiring, particularly as we've had guests staying every weekend recently. I feel like I'm permanent sheet-washing duty! Anyway, I haven't had much time to blog but we are excited to have finally got our Aga working. We haven't quite got the hang of the re-fuelling as yet - my husband seems able to keep it going but as soon as he goes away with work it mysteriously goes out. I do my bit - riddling and emptying the ash pan, filling it up with anthracite and hoping for the best. But it seems not to like me much...!

When it has been working, we've been enjoying Aga classics such as the fatless 'fried' egg, fantastic butter-less toasted sandwiches (honestly) and wonderful drop scones cooked straight on the top of the simmering plate. I'll be reporting on these treats later in the week but firstly, I wanted to share this lovely little starter that I made the other night.

It emerged out of leftovers - as the best things often do. We don't often have a starter but I had some leftover trout which needed eating and wasn't enough for a main course. It took moments to throw together but looked impressive and tasted fantastic. An inpromptu starter for us but something I'll do again for a dinner party perhaps.

It was so simple that I hardly feel it requires a recipe. I used a 'cheaty' ingredient which was a jar of dill and mustard sauce I had in the fridge - the sort that you serve with gravadlax. I'm addicted to it and love it with all smoked fish too. You can make your own very easily too - there are plenty of recipes on the web, such as this one. To make your starter look attractive, use a big biscuit/cookie cutter or a timbale mould.

I use the word timbale in the loosest sense possible. I think it really refers to things that are baked in a circular mould. I find a regular round biscuit cutter can make all sorts of things look dinner party-ish. Rice, mashed potato, ratatouille, mousses all look strangely accomplished when served in a neat little shape like this!

This starter is the base for many. You could use leftover salmon, for example. Or try cooked chicken bound together with a little mayonnaise, curry powder and mango chutney. Smoked mackerel with creme fraiche and horseradish perhaps? The world is your oyster!

Here is the basic recipe...

Timbale of trout and dill
Serves 2

Ingredients:

1 small fillet cooked trout
2 tbsp dill and mustard sauce
1 inch piece of cucumber
half and avocado

1. Halve cucumber across the middle and scrape out the watery seeds. Chop into smallish cubes.

2. Peel avocado and dice.

3. Combine trout, sauce, cucumber and avocado in a bowl with salt and pepper. Add a squeeze of lemon juice if you think it needs a little more acidity (depends on the sauce). You may need a little more or less sauce in order to bind the ingredients together.

4. Push the mixture into a circular mould or biscuit cutter on a serving plate and refrigerate for half an hour if you have time.

5. When ready to serve, remove the mould carefully. You should be left with a nicely shaped mixture. Arrange some salad leaves on the plate, if desired. Garnish with dill or chives.