Monday, January 31, 2011

Nigella's Chocolate Orange Loaf Cake


Like her or not, almost everyone has something to say about Nigella. Men I know who are usually uninterested by cookery are almost all enthusiastically appreciative of her talents! Women tend to me more divided. Some find her sultry ways in the kitchen irritating and demeaning. Some wish they were like her. Some wish they actually were her.

I think she is just a tiny bit marvellous. And I'm prepared to tell you why....

1. She is a cook, not a chef. She understands the home kitchen and the home cook.

2. Her books are so much more than a collection of recipes - they are a good read and often have the ability to make me laugh out loud.

3. A sense of fun pervades her food - she doesn't take herself too seriously.

4. If you've got it, flaunt it. Nigella has. And she does.

Approving of my admiration for Nigella, my husband kindly bought be her latest tome for Christmas. For various reasons, I wasn't able to follow 'Kitchen' on the television so was particularly pleased to discover the new recipes.

I'm a sucker for cake and so it was no surprise that it was a cake which first caught me eye. A chocolate orange loaf cake, to be precise. After the excess of Christmas, I couldn't really find a good excuse to bake such a thing, especially as we are trying to healthy ourselves up a bit after a few months of totally over-doing it on the food front. But then I spotted an announcement on Maison Cupcake about a new event celebrating the wonders of Nigella; Foreve Nigella. The theme for this month is 'seduced by chocolate'. It was clearly meant to be.


Donning the frilliest, kitschest apron I own, I set to work. (I had glanced briefly at the silk negligee but the thermometer showed minus two, so the thought was shortlived). The cake is a simple one to make, using mainly storecupboard ingredients and cocoa rather than chocolate. I love a simple cake now and again, don't you? This is not to say that I don't love icing and buttercream and layers and chocolate scrolls and decorations. I do. I assure you that I do. But sometimes, something a little plainer hits the spot. And makes me feel a little less naughty. After all, cake without icing is practically a health food, is it not? And this one contains oranges so it really must be good for me, no?

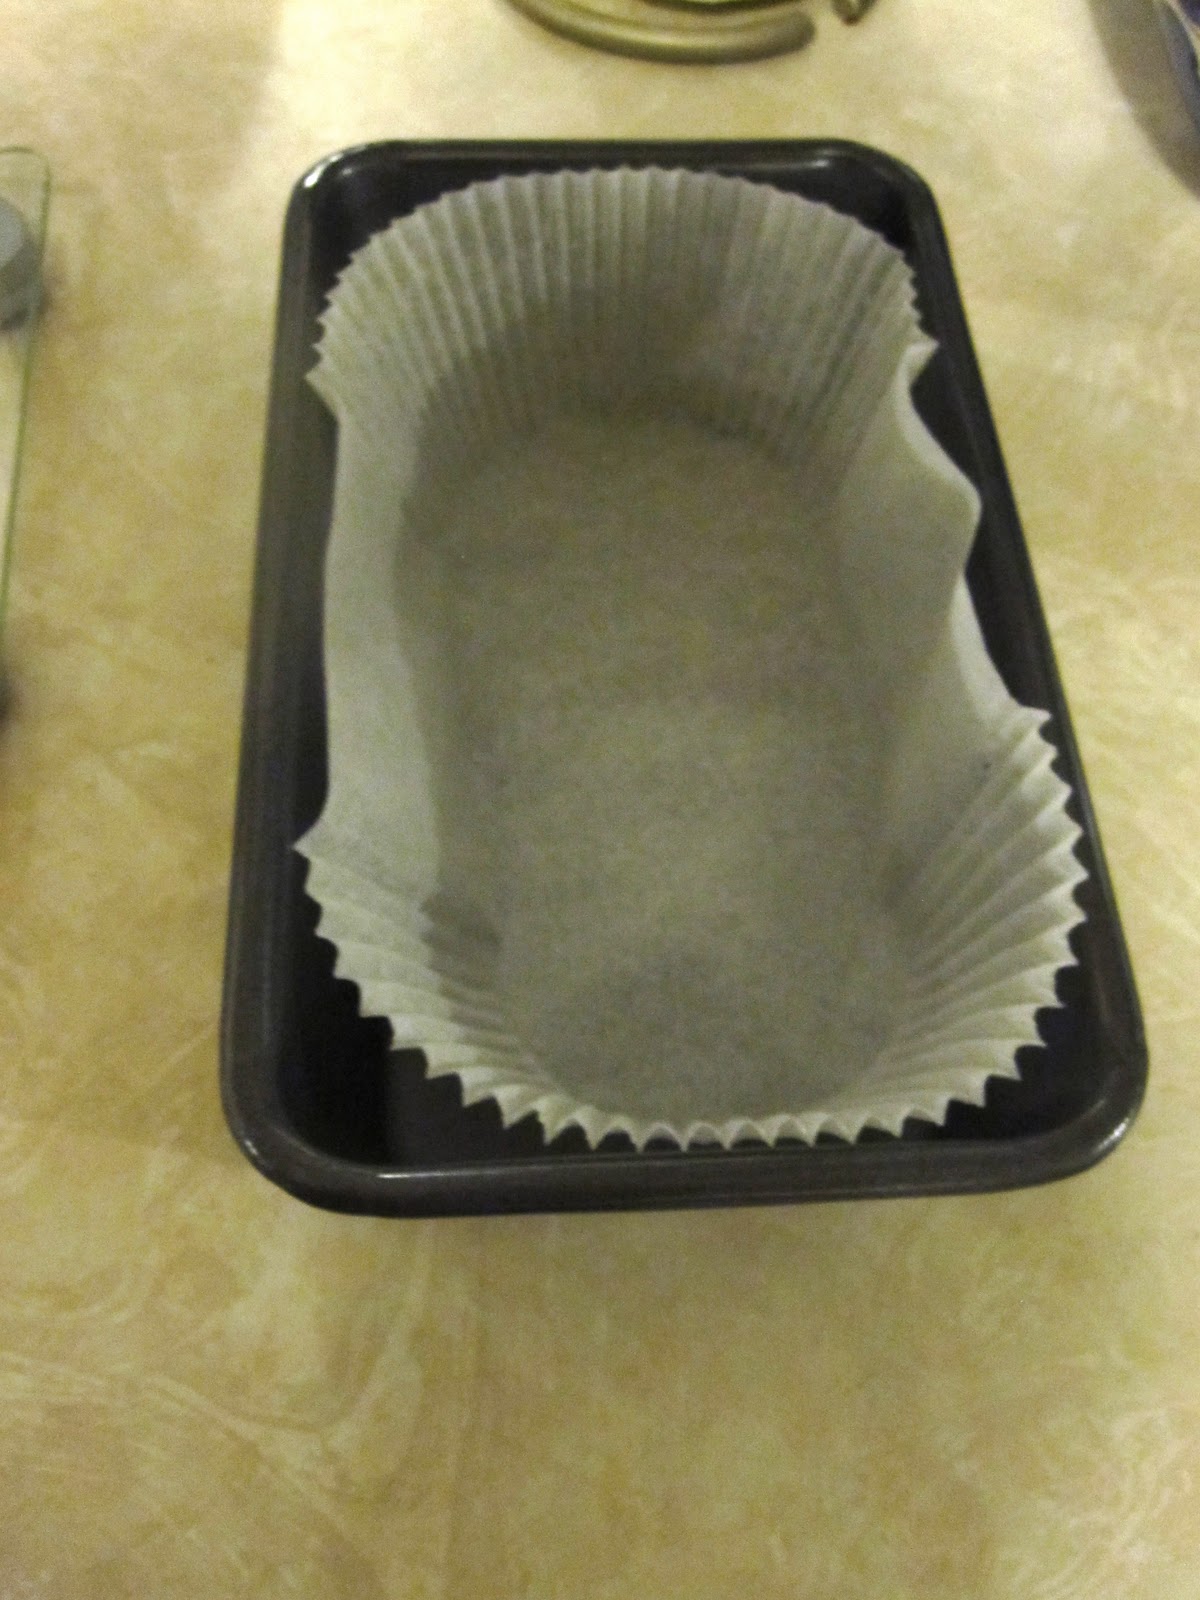
Anyway, having read the instructions, I set to work. If I were Nigella, I would have reached for my shiny Kitchenaid mixer. But I'm not. So I didn't. Instead I used my Kenwood. Not quite so beautiful perhaps, but equally effective. I whizzed and mixed, and then poured and scraped the contents into a loaf tin lined with my new loaf-tin-liners. I'm particularly pleased with these and I'm sure that Nigella would approve - she likes a shortcut as much as the next man.


Having seductively licked a bit of the mixture off my finger, I popped the cake-to-be in the oven and waited. The waiting was quite difficult, I must admit as this cakes smells WONDERFUL as it bakes. Upon removal, the cake looked and smelt divine but I managed to wait until it was cool before greedily gobbling down two slices before bed. Not good as I was planning to take the cake as a present for my mother the next day. Nevermind. She understood and between us, we enjoyed the remainder.


What can I tell you? Nigella triumphs again. This is a very delicious bake - the orange is a subtle and welcome addition to this otherwise plain cake. It is also lovely and light. I'll definitely be making this again. The theme for this month's challenge suggests that I should be making a chocolatey something to seduce my sweetheart for Valentine's Day. Instead I have seduced myself. I shall definitely be making this again.

Do you know your onions?


Recently I was contacted by the folk responsible for promoting British onions. To be honest, I was a little surprised that such a product should be in need of any form of promotion and was interested to discover an entire website devoted to this most humble of vegetables.

Humble,  maybe. Indispensible, certainly. Barely a day goes by in which I don't chop and onion to begin the base of a soup, stew, pie or roast. If I run out, I panic. Without onions, I am somewhat lost in the kitchen. To me, they are a vital flavour-adding essential which forms the bases of so many dishes I prepare.

Onions grow extremely happily here in the UK and buying British is something I try to do whenever possible. The British Onion people were kind enough to send me a box full of onions and challenged me to produce my perfect recipe for onion gravy. Along with a plentiful supply of onions, they included some storecupboard staples which I might like to use in my gravy. I was also encouraged to include my own 'secret' ingredients if it pleased me.

The challenge made me smile as it made me think of my husband who, given the choice, would have gravy with everything. Whilst I couldn't contemplate a Sunday roast without gravy and I do love a rich onion gravy with my sausages, I don't feel the need to have gravy with every piece of meat or pie that comes out of the kitchen. My other half does. Even shepherd's pie which to me seems most peculiar as it is essentially meat simmered in 'gravy' with potato on top.

So. I knew this challenge would make him happy. A very unscientific straw-poll amongst friends revealed that everyone has their own idea of the perfect gravy. Some like it thick, some like it thin. Some like it pale and some like it dark and glossy. Some like 'bits' in it. Some prefer it smooth. Which sort should I make?

I decided to please myself and make gravy in the way I most enjoy it. But then again I was stumped. The type of gravy I like with a roast chicken (pale, quite thin and made mainly with roasting juices, a splash of white wine and a touch of redcurrant jelly) is totally different to the gravy I like to pour over my sausages (thick, dark and glossy with lots of onions). How to decide what to make?

In the end, I present you with two gravies. One is the kind of gravy I make when I'm roasting meat - in this case, beef. The other is a rich onion gravy I made to serve with venison sausages and mash. Both were delicious. Both involved British onions. One used the onions as in a 'supporting role'. The other is entirely about the onions.

Firstly though, you might be interested to see inside that box...


There were familar ingredients I turn to regularly for gravy-making: Worcestershire sauce, Marmite and tomato sauce. There was also a pot of English mustard and an intriguing jar of mushroom ketchup. Sadly, I'm no longer able to eat mushrooms so this is something my husband will be experimenting with at a later date. I bet it would add an excellent savoury quality to the gravy though.

So first up, we have a plate of sausage and mash....


All that is missing is the onion gravy. Let's make some shall we?

Red Onion Gravy
Serves 2


Ingredients:

2 red onions
1 tbsp olive oil
2 small knobs of butter
1 tsp sugar
1 tsp Marmite
1 scant tbsp plain flour
350ml boiling water
1 tsp redcurrant jelly

1. Cut onions in half and slice. Heat oil and small knob of butter in a heavy-duty casserole dish. Add onions and sugar and sweat for a few minutes until just starting to soften.

2. Place lid on the casserole and continue to cook onions on a fairly low heat for around 15 minutes until really soft and sticky. Aga-users might like to do this in the roasting oven, rather than on the top.

3. Boil the kettle and pour approx 350ml boiling water over the Marmite and mix together to create 'stock'. Sprinkle flour over the sticky onions and stir well to incorporate. Gradually add the Marmite stock a little at a time, stirring well to combine after each addition and bubbling on quite a high heat. You may not need to add it all, you may need to add a little more, depending on how thick you like your gravy.

4. Add the redcurrant jelly and season well with salt and pepper. Bubble away for a 5 minutes and adjust seasoning to taste. If it seems too sweet for your liking, add a little Worcestershire sauce. If not sweet enough, add more redcurrant jelly.

5. Just before serving, add a little knob of butter and stir in. This is not essential but does make for a lovely, glossy gravy.

6. Pour into a jug and pour liberally over sausages and mash!


Gravy to accompany a roast:

This is the method I use most often. In this instance I was making gravy to accompany roast beef, but I've included alternatives for other roast meats...


Gravy-making starts before the roast even enters the oven! Chop an onion or two into quarters and, if you have one, a carrot into large chunks. Place these in the roasting tin and sit the joint on top. These vegetables will provide extra flavour to your gravy.

Once the meat is cooked, set aside to rest on a carving board, covered in foil.

Pour excess fat out of roasting tin (leave around 1 tbsp along with the juices) and set on top of the hob on a medium-high heat. Sprinkle over a tablespoon or so of flour and mix into the fat and juices, taking care to scrape up all the sticky bits from the bottom of the tin.

Add a good splash of wine. White for chicken, turkey, pheasant or pork. Red for red meats and other game. Bubble away, stirring and scraping all the while.

Next add stock. Often I will use water from the vegetables mixed with the relevant stock cube for this. If a poultry joint came with giblets, I boil these up whilst the bird is cooking to create a flavoursome stock.

Add stock slowly, stirring well between each addition. Quantity will depend on how much juice came from the roast and how many people you are serving. For this beef joint, I used about 400ml stock for four of us.

Once stock is added, add the 'extras'. For interest, this is a very rough guide to what I add depending on the joint:

Beef - 1 tsp Worcestershire sauce or 1tsp dark soy sauce, 1 tsp tomato ketchup and a 1/2 tsp of English mustard.

Lamb - 1 tsp Marmite and 1 heaped tsp redcurrant jelly

Chicken and feathered game, including duck - 1 tsp redcurrant jelly and 1 splash Worcestershire sauce

Vension - 2 tsp redcurrant jelly and splash Worcestershire sauce

Pork - 1 tsp Marmite, pinch dried sage

These additions are all dependent on taste. I always taste as I go and add a little of this or a little of that depending on what I feel it needs. If the gravy tastes bland, I add a little more of something! Remember to season with plenty of salt and pepper.

Strain the gravy into a jug so that you have a smooth gravy (though the onions and carrot to taste quite delicious as a cook's perk!).

Serve with roast meat and all the trimmings....

Monday, January 24, 2011

Banana ice cream with Dulce de Leche


With a chill wind whipping outside, ice cream may not be at the forefront of your mind currently. It certainly wasn't on my 'must make some soon' list. But last weekend, we had friends to stay and they kindly gave me a wonderful new cookery book dedicated to the art of creating iced desserts. This is surely the Bible of ice cream books.
Ice Creams, Sorbets and Gelati: The Definitive Guide

It seems to me that the authors of this hefty tome, Caroline and Robin Weir, have dedicated their life to ice cream. Not only does the book contain a quite staggering number of enticing recipes (over 400), it also indulges the reader in a history of ice cream and includes sections on equipment, accompaniments and the science behind ices. It is quite fascinating. Who could fail to be tempted by recipes such as 'Terry's Chocolate Orange Ice Cream', 'Grapefruit and Campari Sorbet', 'Pea and Mint Savoury Ice Cream' or 'Prune and Earl Grey Tea Granita'. Beautifully-illustrated not only with stunning ices but also with retro prints and ice cream adverts, this book really is a must for any ice cream lover.

At first I decided I'd pop it in the shelf to delve into at length once the weather started to improve. But then I noticed the browning bananas in the fruit bowl, destined for banana bread or muffins. Instead, I thought I would try a banana ice cream. There were several recipes to choose from, including a very tempting-sounding 'Roasted Banana Gelato' but I decided to start simple with a basic 'uncooked' recipe. This means that the ice cream does not have a custard base; rather, the ingredients are simply whizzed together in a food processor, chilled and then frozen. You don't have to have an ice-cream maker but I'm lucky enough to own one and I have to admit, it does make the process somewhat less labour-intensive.


The trick with this recipe is to be brave with your bananas. Be patient and wait until they are really brown and spotted on the outside. The riper the bananas, the better the flavour of the resulting ice cream! I made a couple of very minor adjustments to the recipe (due to the ingredients I happened to have to hand) and my version is below. The ice cream is a total triumph - so delicious. To make it a little more suitable for the chilly weather, I served  it with hot dulce de leche (Argentinian soft toffee made from boiled milk and sugar). I simply spooned a good dollop from a jar, heated it in a saucepan and poured it over the top. Delicious (though possibly  not so good for the January diet!).

Banana Ice Cream with Hot Dulce de Leche
Makes approx 1 litre

Ingredients:

4 very ripe bananas
1 tbsp lemon juice
200g golden caster sugar
1 tsp good quality vanilla extract
250ml semi-skimmed milk
250ml whipping cream, chilled
A good dollop of dulce de leche per person!

1. Peel the bananas and cut into rough chunks. Put into a food processor or blender and whizz together with the lemon juice, sugar and vanilla. Blend until smooth.

2. Pour in the milk and whizz briefly to combine.

3. Pour the mixture into a large jug or bowl and cover with cling film - place the cling film directly on top of the mixture and up the sides of the jug or bowl to prevent the mixture from browning. Transfer to the fridge and chill for an hour.

4. Once chilled, combine with the chilled cream. If you have an ice-cream maker, transfer to machine and churn according to machine's instructions. If not, transfer mixture to freezerproof container and freeze for 1-1.5 hours. Remove from freezer and beat with electric beater/food processor before returning to freezer for another 1-1.5 hours. Repeat the beating process (this is to minimise ice crystals and make for a smooth ice) and return to freezer again. Repeat at least once more - after the final beating, the ice cream should be returned to the freezer for another hour to become firm enough to serve.

5. Serve with warmed dulce de leche.

Notes: this would also be good with hot bananas roasted with rum and brown sugar!

Tempted?

Friday, January 21, 2011

Digestive biscuits for cheese


Whilst I would always choose pudding over cheese, I am quite partial to a good cheeseboard. A new cheese shop has just opened in our local town and we decided it would be rude not to investigate. We came home with a bag bulging with cheeses we hadn't tried before and were eager to test them out.

To accompany our cheeses, I decided to bake some cheese biscuits. Only I struggled to find a suitable recipe. None of my recipe books seemed to have one (and I have a LOT of recipe books) and the web was limited too. Or rather, it was hard to search for them as 'cheese biscuits' tends to produce lots of recipes for cheese-flavoured biscuits. I found lots of recipes for oatcakes but I have to confess that I loathe oatcakes. They taste, as my Grandfather apparantly used to say, 'like hanging your tongue out of the car window'.


Although I know it is far from sophisticated, I do enjoy a digestive biscuit with my cheese. Particularly with hard cheeses. I know it is frowned upon by cheese afficionados, but I like them. So there. I found a recipe and away I went...

The recipe can be found here. It worked pretty well although the dough was a little sticky and, at the same time, crumbly which made it hard to work with. Trying to cut shapes (I couldn't resist trying out my new labrador cutter), was challenging and I should have just stuck to circles. They smelt fantastic as they baked though and I was optimistic.


The taste? Well, I was a little disappointed if I'm honest. The flavour was really good but they were very heavy. I used a medium oatmeal and think pinhead or fine oatmeal would have given a better result. They worked well with the cheeses though - particularly with the blue which was a Colton Basset Stilton.

I would make these again, but next time I'll add a touch more flour (or less liquid) to prevent such sticky dough. I'll roll the dough thinner to make slightly more manageable biscuits.

Wednesday, January 19, 2011

Chipotle chicken wraps


I've got a bit of a thing for Mexican flavours at the moment and, in particular, an ingredient that is new to me: chipotle paste. For years I've been making Mexican-style dishes which, while good, lacked a really authentic Mexican flavour. Chipotle paste has changed all this. Made from smoke-dried jalapeno chilli peppers, it adds a fantastic smoky heat to dishes.

Over the past fortnight, I've made this tasty dish twice which shows how successful it has been! It is a fairly basic tomato-based chicken stew, enhanced by the addition of chipotle paste and lots of coriander. A very low-fat recipe which you could simply serve with rice. I preferred to serve it with tortillas, allowing people to help themselves to plain rice, guacamole and soured cream. The resulting wraps were rather messy, if I'm honest, but with lots of paper napkins on standby, noone seemed to mind.

Shredding the chicken is, I would suggest, crucial in the success of this dish. It somehow soaks up the sauce, making it more tortilla-friendly. It would work well with leftover roast chicken too, I suspect.


The original recipe is here on the BBC Good Food website, but I added regular bell peppers and doubled the quantity if sauce. The chipotle paste is fairly vital to the flavour of this dish - I found mine in Waitrose and it is made by Discovery. I'm looking forward to using it in other dishes - any suggestions?

Chipotle Chicken Wraps
Serves 4

Ingredients:

4 chicken breasts
1 medium red onion
1 large yellow bell pepper (or green, or red, or a mix!)
3 cloves garlic
1 tsp dark brown sugar
2 heaped teaspoons of chipotle paste (or more, if you like it spicy)
800g tinned chopped tomatoes
Fresh coriander
Small bunch spring onions

To serve:
Corn or flour tortillas (2 per person would be a 'sensible' suggestion, but you may find that hungry people want more! We managed 3 each.)
Guacamole
Soured cream

1. Chop onions into small pieces and fry in a little oil until soft and starting to turn golden. Slice the peppers and add to the pan, frying until starting to soften. Finely chop or crush the garlic and add this for the final minute or two.

2. Add the sugar and chipotle paste to the pan and stir well to coat. Pour in the tomatoes and then add the chicken breasts (whole and unbrowned). Cover with the tomatoey sauce as best you can and simmer gently for 20 minutes until the chicken is cooked through. Note: you can do this in the oven too. Stir occasionally and add a little water or stock if the sauce is drying out.

3. When the chicken is cooked, remove from the sauce to a plate and shred with two forks. Stir the shredded chicken back into the sauce and heat through.


4. Serve, scattered with plenty of coriander and chopped spring onions, either with rice or with rice, tortillas, guacamole and soured cream (and anything else that takes your fancy!).

Friday, January 07, 2011

Wine jellies


I have become a jam-jar obsessive. The pile of empty (as yet unwashed) jars that sits on the windowsill beside the kitchen sink threatens to take over the kitchen. My obsession with keeping empty jars 'just in case' started last year when preparing for our wedding in May. Wanting to put a foodie stamp on the day I decided that it would be quite brilliant to make jars of chutneys and jams to put in each place for guests to take home as a reminder of our special day.

Sounds good in theory, doesn't it? I had visions of dozens of jars topped with dear little brightly coloured fabric covers. My vision didn't actually extend to just how long it would take to make 200-odd jars of chutney. Especially as I had never before made a chutney.

My first challenge was collecting enough jars. Much as I am obsessed with condiments (ask my husband - half our fridge is dedicated to jars and it drives him quite mad), collecting 200 in a short space of time was always going to be a chore. So I asked friends and colleagues to help. Before long, our small London flat was overflowing with used jam-jars. In bags. In boxes. Loose on kitchen surfaces. I began to hate them. But then I made my first batch of chutney and I enjoyed myself. The chopping was a chore but I felt super satisfied with the results of my labours. Eight gleaming jars full of 'autumn fruit chutney'. Result.


The next batch was an apple and onion chutney and then I moved on to a more exciting-sounding 'rhubarb and date'. Before long I'd made around 50 jars and was feeling quite the domestic goddess. Whilst my husband liked the idea and even helped with some of the concoctions, he began to get somewhat irked by the way every cupboard in our kitchen was filling up with chutneys, leaving no space for 'real' food. I'd also had enough of all that chopping and begun to feel that I'd never hit my target. Urgent action was required...

Rhubarb and date chutney in the making!
The finished product
I consulted my trusty recipe book, 'Jams and Chutneys' by Thane Prince in the hope of finding something less time-consuming. This is where I discovered the joy of wine jellies. Simplicity itself to make, shiraz jelly was where I started. This gleaming jewel-coloured jelly looked stunning and proved to be delicious with cold meats and cheeses. Thane also suggests serving with scones - this would be great I'm sure as the jelly is very sweet.

From here I moved onto a Monbazillac jelly having adapted her recipe for Sage and sauternes jelly (which I'll try another time when I'm making smaller quantities!). This was an absolute triumph and quite stunning with blue cheese and, in a decadent moment, foie gras served on toasted brioche. It would also make a great partner to rich meats such as goose or duck but we didn't have enough left for that.

The final jelly we made was a Port jelly for which I followed the same 'template' as the Shiraz jelly. In fact, you could use the same method for any full-bodied wine. The Port jelly was a natural partner for Stilton and other blue cheese but also works well in place of redcurrant jelly when stirred into sauces and gravies.

The best thing about these recipes is that they take no more than half an hour from start to finish. They make super gifts too if you can bear to part with them!

Incidentally, this recipe book is quite brilliant. Packed with seasonal ideas for jams, chutneys, jellies, relishes and cordials, it is beautifully photographed and the instructions are very clear.

Remember to place some plates in the fridge or freezer in good time before you attempt these jellies so that you can test for a set.

Shiraz Wine Jelly (or Port Jelly or Chardonnay Jelly....)
Makes 1kg (approx 4 medium jars), recipe easily doubled

Shiraz Jelly in the making

Ingredients
750ml (1 bottle) full-bodied wine of choice
juice of 2 lemons
250g liquid pectin (available from most good supermarkets)
900g white granulated sugar

1.Place a couple of plates in the fridge to chill in plenty of time before you want to make the jelly. Also gather some jars and sterlize either by running them on the hottest setting in the dishwasher or washing in hot, soapy water and drying in a warm oven.

2. Take a preserving pan or very large saucepan. Add wine, lemon juice and pectin and stir to combine. Bring to the boil, whisking occasionally to combine ingredients.

3. Add the sugar and continue to stir over a low heat until the sugar has dissolved.

4. Once sugar has completely dissolved, bring to a full rolling boil and, using a slotted spoon, skim off any scum that rises to the surface.

4. Boil for 2 minutes, remove from heat and then test for a set by dropping a little mixture onto a cold plate, allowing it to cool and pushing with finger to see if it wrinkles. When it does, it is ready. If not, Return to the heat for another minute or so and test again. You may need to do this several times until it is set. For more information on testing for setting point do see here for the various methods.

5. When jelly has reached setting point, pot into hot sterilized jars.

Monbazillac Jelly - very similar recipe to above

Ingredients:

 750ml Monbazillac
800g white granulated sugar
250g liquid pectin

1. Combine wine and sugar in preserving pan and stir over low heat until sugar has dissolved. Increase heat and bring to rolling boil for 2 mins.

2. Turn off heat and stir in pectin then bring back to boil for a minute and start testing for a set as above.

Wednesday, January 05, 2011

Cornish Pasties


It is the New Year. I've spent the past few weeks over-indulging on a pretty serious scale. The time has come to reign it in, eshew the slab of Christmas cake for a health-giving platter of fresh fruit, abandon the crisps and dips for a carrot baton and leave the rich, hefty dishes of the festive season behind in favour of fresh and dainty salads. Sound familiar?

In theory, the idea of starting the New Year afresh with healthy options aplenty is a good one. But I've just never been much good at it. I mean, does a salad really appeal when the temperature is sub-zero?

January, for me, is perhaps the most depressing month of the year. The bright lights and glitz of Christmas have vanished without trace, everyone plods back to work and there seems to be little to look forward to. Unless you have some exciting holiday booked. Which I don't... So, I think January is a time to go easy on yourself. Save the dieting for the Spring when all seems more hopeful and cheery. The days are warmer and those lighter meals are just what the body craves. For now though, hunker down with some comfort food. Warming soups, stews and pies don't need to be swimming in fat but they deliver the satisfaction that we crave on these dreary, wintery days.

So, if you are looking for health food, I'm sorry to disappoint. Instead I bring you... The Cornish Pasty.

A few years ago, I wouldn't have imagined myself ever making such a thing. I like a Cornish Pasty as much as the next man (or woman) but it isn't really something I get particularly excited about. Enter my husband. If you asked him to describe his 'last supper', it might well include a pasty (along with roast beef, yorkshire puddings, all the trimmings, cheese galore and a syrup sponge pudding). When holidaying in Cornwall, he felt positively hard-done-by if a pasty-less day went by. He also taught me that there are pasties and pasties. Once I'd tasted a few, I bugun to take his point. There is a world of difference between a good pasty and an indifferent one. The quest for pasty perfection peaked my interest and I vowed to try and make one at home for him upon return.

Upon return from said holiday, it appeared that we'd eaten a few too many pasties and it seemed rather an indulgent treat to make at home (we were on a pre-wedding diet). I forgot all about it. Fast-forward 18 months and I was flicking through an old copy of Aga Living Magazine and came accross a very simple-sounding recipe for Cornish Pasties. The time had come to give them a whirl...

A little further research led me to another recipe in my Aga Bible book. I was then befuddled. The recipes were quite different and I was at a loss to know which to follow. One suggested skirt beef, the other rib-eye. Quite a difference, I thought. Rump would surely be more tender in the pasty but I'd always understood the pasty to be an... economical... treat for tin and copper miners. Skirt would fit better with this and certainly seems the traditional choice according to the interweb. We only discovered this after a trip to the supermarket though, so rib-eye it was!

Recipes differed on vegetable ingredients too. Potato, swede and onion are what we both feel 'should' be in a pasty so we stuck with this. Seasoning is key too - plenty of pepper in particular, and then add some more. Ours could have had more even though I felt like I'd overdone it.

As for the pastry, I went for the a simple recipe but the magazine suggested a pastry using half butter and half lard. I suspect this would have been better but was pretty pleased with mine. This recipe made vast pasties. A true feast. Next time, I'd make smaller ones. Otherwise, these were absolutely delicious. Not the best or most authentic perhaps, but pretty good for a first attempt!

Cornish Pasties
Adapted from Aga Living and Aga Bible

Makes 6 (or more smaller ones)

Ingredients:

For the pastry:

342g plain flour
226g butter, cold and cubed
1 free range egg
salt and pepper

For the filling:

250g skirt steak or rib-eye steak if you are feeling fancy (we were!)
300g potato, peeled and diced
150g swede, peeled and diced
2 medium onions, finely chopped
1-2 tbsp beef stock
salt and pepper
1 egg, beaten, to glaze

1. Make the pastry. Simply put ingredients in a food processor and pulse until it comes together in a ball. Only add a touch of water if it is very crumbly. You can also do this by hand, rubbing the butter into the flour and adding the egg to bind. Wrap in cling film and rest in the fridge for at least an hour. Bring to room temperature again before rolling out.

2. If cooking on a regular oven, pre-heat to 200C. If you are using the Aga, take a moment to revel in the lack of pre-heating required!

3. Chop meat into small cubes and brown in a little oil. Set to one side and add onions to the pan to soften for a few minutes. Add to beef. Add the stock to the pan and scrape up all the little bits - pour over the meat and onions. Add potatoes and swede and mix to combine. Season very well with plenty of salt and pepper.


4. Roll out the pastry and, using a 20cm plate, cut out 6 circles. Put some of the filling in the centre of each circle, brush the edge with beaten egg and bring the two sides of pastry together to form a semi-circle. 'Crimp' the edges of the pasty with your fingers to make a wavy edge* and transfer to a non-stick baking tray (ideally lined with Bake-o-Glide if using the Aga).

5. Brush pasties with remaining egg-wash so that the bronze nicely.

6. Bake...

Aga users: bake on floor of roasting oven for 20 minutes and then move to bottom set of runners with cold shelf on 2nd set to avoid over-browning for about 30 mins.

Conventional cooking: bake at 200C (fan) for 20 minutes and then turn down to 160C (fan) for a further 30 minutes.


*Traditionally, the crimped edge is not eaten. Miners didn't have the opportunity to wash their hands before eating their lunch and their hands were often ingrained with poisonous arsenic - the chunky edge was held during eating and then disgarded.

Happy New Year!

 
Boxing Day

I hope that everyone enjoyed the Christmas break. Despite my reservations about Christmas without 'my' family, we had a wonderful time and I'm pleased to report that it all went without a hitch. For the turkey, I used Nigella's brining method. I'm a total convert - I really think it results in a juicier bird, even if you cook it for longer than she suggests. We also pushed the boat out and went for a bronze turkey as we were a small gathering and the flavour was superb. It was equally good cold and sliced like a dream and the various dishes we made afterwards were superb, the slightly stronger flavour of the bronze turkey shining through. As well as a delicious turkey hash (Nigella again), an indulgent turkey and ham pie and a reviving thai green curry we also boiled up the carcass to make stock which is now all sitting happily in the freezer. I'm looking forward to the soup that will follow in the weeks ahead. Truth be told, I've never enjoyed a turkey so much and, whilst the initial outlay was eye-wateringly high, the number of meals it has provided makes it a very economical bird.

Enough about the turkey. We've all moved on, right? I was a little lax about taking photos of food over Christmas (mainly due to the fact that I was busy getting it ready for and serving it to guests who thought my camera habit a little odd). I was particularly pleased with our New Year feast though. We were just a small group of four which meant we could really enjoy cooking a special meal. My husband has suddenly got into making canapes and made an impressive trio on the night. We then served up oriental steamed seabass, followed by Persian slow-roasted shoulder of lamb and a very moreish chocolate and chestnut roulade.


Oriental Steamed Seabass

Chocolate Chestnut Roulade

Of all the nibbles that I've been offered this Christmas, the platter that enticed me the most contained these very simple cucumber canapes (please excuse the lack of accents - I can't seem to work out how to do them on blogger). Nothing fancy, but they really are very visually appealing (the less romantic could choose a star design instead) and surprisingly tasty, especially if you use on of those wonderfully nobbly, crunchy organic cucumbers whose skin you have to peel.

Cucumber Cream Canapes
Makes 20

Ingredients

1/2 cucumber (or a whole small nobbly, organic one)
200g cream cheese
10 thin white bread slices
3 tbsp finely chopped parsley (either type will do, we used flat-leaf as we had it to hand)
salt and pepper (recipe specifies white, we used regular black)

You will also need two cookie cutters of the same shape, one slightly larger than the other.

1. Cut the cucumber into slices - around 0.5cm thick, 1/4 inch.

2. Stamp out 20 hearts (or stars etc...) with the small cutter.

3. Spread cream cheese on the bread and then stamp out 20 hearts/stars with the larger cutter.

4. Place parsley in a small dish and dip the edges of the bread hearts in parsley. Top with cucumber hearts and sprinkle with salt and pepper.

Notes - we thought these were best served chilled. They can be made 3 hours in advance. Simply cover in cling film and pop in the fridge.