Thursday, November 29, 2007

The Great British Pudding Challenge - Chocolate pudding with orange ice cream


When Rosie over at Rosie Bakes a 'Peace' of Cake posted about the apparent demise of the traditional British pudding, I simply knew I had to join her in her efforts to keep the joys of the humble British pud alive. She urged food bloggers to join her this month in baking a traditional chocolate sponge and posted a rather good recipe for us all to follow. This all seemed fine and I was excited about the challenge but then I remembered that I live on my own. Who was going to eat this enormous steamed pudding that serves 6 people?! Sure, I entertain a fair amount but by the time I got around to making the pudding it was too late to make plans to invite people over.

I decided to play with the recipe a little and make individual puddings. Making one would have been too tricky. After all you can hardly divide 2 eggs by 6, can you?! So I halved the recipe and made three different puddings. To one I added chopped milk chocolate, to one Green and Black's Maya Gold which has a hint of orange and to the final one, I added a Lindt d'Or chocolate truffle right in the centre. What on earth possessed me? Well, I once enjoyed a pudding that hid one of these chocolates, gently melting in the centre.


In terms of steaming the puds, I placed them in a roasting tray half filled with boiling water and cooked them in the oven at 170C for around 35 minutes. The results? The Lindt d'Or one was disastrous but delicious. The chocolate melted to form a gorgeous sauce in the middle of the pudding, but unfortunately the top of the pudding remained firmly in the pudding mould. It didn't look pretty!

The one flecked with Maya Gold was my favourite, although again it didn't turn out too beautifully. I served it with a very creamy orange ice cream which I made in five minutes flat. Equal amounts of single and double cream (1 tumbler glass of each), freshly squeezed orange juice (3 large oranges), a little grated orange rind (of one orange) and caster sugar to your taste (around 2 oz). Whisk together and pour into an ice-cream maker. Gorgeously fresh and delicious but very creamy - you only need a small amount and wouldn't want a whole bowlful.


The final pudding with the milk chocolate was adorned with chocolate sauce made with melted dark chocolate, single cream, golden syrup and a smidge of butter. Again, it didn't turn out too well, but it tasted divine.

For those concerned about my ever-expanding waistline (I know I am), fear not. I did not eat all three puddings (although it was tempting). I had a taster of each. The Maya Gold version was my favourite with a little chocolate sauce poured over the top for good measure!

To participate in the next 'edition' of The Great British Pudding Challenge, hop over to Maria's blog for a delicious-sounding recipe for a Festive Steamed Pudding with cranberries and white chocolate.

Monday, November 26, 2007

Mincemeat and apple tart


Whilst browsing in the blogosphere a few weeks ago, a stumbled upon a post on Jeanne's 'Cooksister' blog about the latest theme for the food blogging event 'Waiter! There's something in my...'. This month's theme was to be the topless tart. How could I possibly resist. I love a good tart, be it savoury or sweet. I though awhile about my entry. What would I choose? So little time and so many tarts. Treacle tart is my speciality (or so I like to think) so it would be the obvious choice. I checked the cupboard for golden syrup and vowed to make one the following day.

Of course, all the best laid plans go to seed and I forgot all about the challenge. Until last weekend. I was babysitting for my sister's two little boys - aged 22 months and 8 weeks. I'm a little aged to receive babysitting money so my sister instead bought me a cookbook as a thank you gift. Knowing that I was to be in charge of this year's Christmas lunch for the first time, she thought that BBC Good Food Magazine's '101 Christmas Dishes' would be an appropriate choice. Too true. Within those pages, nestled in between 'Zabaglione Trifle Slice' and 'Pecan Toffee Meringue with Mulled Pears', was a rather tasty looking tart. Laid bare, in all its topless glory.


Better still, it had a mere five ingredients. This was fortunate seeing as I had left my entry rather late and was, therefore, rather lacking on the old time front. I set to it. So simple. Yet so pleasingly and festively delicious. A little slice of Christmas mid-November - it really got me in the mood for what lies ahead and made the kitchen smell wonderfully festive too. Even a non mincemeat lover was suitably impressed and left a very clean plate. Of course, you could make it far more complex and no doubt far more delicious by making your own mincemeat. I haven't done so this year. Maybe next year?

In order to enjoy this tart at its very finest, I recommend a good splosh of custard. Homemade or the lurid yellow stuff from Birds - both, in my mind, have their merits and therefore their place (no doubt the purists will disagree).


Ingredients (serves 6-8)


1 oz golden caster sugar
1 teaspoon cinnamon
1/2 teaspoon ground nutmeg
225g shortcrust pastry
410g jar mincemeat
3 small eating apples (Cox's are good for this)
a little milk or beaten egg

1. Pre-heat the oven to 220C. Peel, core and slice the apples and toss in the sugar and spice until well coated.

2. Roll out the pastry on a floured surface until the thickness of a pound coin. Cut a large circular shape (no need to be perfect circle).

3. Spread the mincemeat all over the centre of the pastry circle, leaving an inch or so as a border.

4. Arrange apples on top of mincemeat and then bring the pastry up around the edge of the filling, pressing together so that the sides stand up around the edge....


5. Brush the pastry with milk or beaten egg and then bake in the oven for 20 minutes until pastry golden and apples softened.


6. Serve hot or warm with ice cream, custard or cream.

Notes - the syrupy part of the mincemeat gets very hot in the oven, so be sure to take care with that first mouthful. I was far too greedy and took a bite as soon as it was out of the oven - big mistake... Next time, I think I might jazz up the pastry a little with some nuts - perhaps some almonds or walnuts lightly chopped so there was still a little crunch.


Please note - blogger seems to be playing up and telling me that exclamation marks are not permitted. So please note that I am not lacking in humour this evening, just unable to express my merriment...

Sunday, November 25, 2007

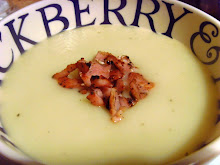
Leek and potato soup with mustardy toasts and bacon bits

I love making a big batch of soup at this time of year. It seems like the right sort of thing to be doing on a cold day. It is also a handy lunch for work - I freeze individual portions and take them to work still frozen solid (no worry about leaks or spillages) and by lunchtime they have defrosted, ready to pop in the microwave. Only trouble with this one though is that I can hardly start frying bacon and grilling cheesy toasts to go with it!

Once I had made this leek and potato soup last week, I simply knew that I had to combine it with bacon, cheese and mustard in some form. Delicious!

Leek and potato soup with cheesy mustard toasts and bacon bits

Serves 4

1lb potatoes, peeled and diced small

1lb leeks, finely sliced

1 medium onion, finely sliced

3 tablespoons sunflower oil

2 pints vegetable (or chicken) stock

6 rashers smoky bacon

8 slices of baguette

Good handful grated Gruyere or other hard cheese of choice

2 tblsp grainy mustard

1. Heat oil in a deep saucepan and add leeks, onion and potatoes - sweat until translucent and potatoes are starting to soften.

2. Add stock and bring to boil. Simmer for around 50 minutes.

3. Ten minutes before soup is ready, cut bacon into small bits and fry until crispy.

4. Smear mustard over the baguette slices and top with grated cheese. Grill until bubbling and golden.

5. Blitz the soup in a blender or use a stab-mix - blend until smooth. Add more stock if too thick. Season to taste. Serve with bacon bits and cheesy toasts. Stir in a little cream if you prefer a creamier soup.

Friday, November 23, 2007

Moroccan style lamb chops with chickpea mash


'Beauty comes from within' should clearly be the strapline for this dish. Try as I might, I could not seem to get a decent snap of this tasty supper. The lamb chops were brown. The chickpea mash was... brown. Even the char-grilled courgettes failed to perform for the camera. So apologies for the photos. Think instead of the flavours. Paprika. Cumin. Coriander. Lemon. Garlic. Chilli.

It was nice to ring the changes with these lamb chops - the spicy flavours worked well with the lamb and the chickpea mash was good too. I found it quite rich and 'solid' and could only eat a smallish amount.

Moroccan spiced lamb chops with chickpea mash

Serves 2

4 lamb chops

For marinade -
4 tablespoons olive oil
1 teaspoon cumin (or better still, cumin seeds crushed in a pestle and mortar)
1 teaspoon coriander seeds
1 teaspoon paprika
1/2 teaspoon chilli powder
1/2 teaspoon tumeric (optional)
1 garlic clove, finely chopped
grated zest and juice of half a lemon

For chickpea mash -
1 large can of chick peas, drained and rinsed
1 red onion
1 teaspoon paprika
glug of olive oil

1. Bash all the marinade ingredients together in a pestle and mortar, adding olive oil and lemon juice at the end. Pour over the lamb chops and rub all over. Leave for half and hour.

2. Turn grill to high and grill the chops for around 4-5 minutes each side (depending on how thick they are and how you like them cooked - mine were thick and I like them a little pink in the middle). Once cooked, set aside on a warm plate to rest for a few moments.

3. Meanwhile, prepare the mash. Place chickpeas in a pan covered with salted water and bring to boil. Simmer for a few minutes to heat through. Whilst this is happening, chop and soften the onion in a little olive oil. Drain chickpeas and place in food processor with onions, a glug of olive oil and the paprika. Whizz until smooth, adding more oil until you reach desired consistency.

4. Serve with the chops and vegetable of choice. I chose char-grilled courgettes that had been marinated in a herby, lemony, olive oil mixture.

Sunday, November 18, 2007

Banana muffins (with a little chocolate for good measure)


I like to think that every cook has a culinary nemesis. A food item that you may love to eat but that the idea of actually cooking sends you into a cold sweat. You've probably tried on several occasions (depending on your patience) and whilst you may not have failed, you have not been 100% happy with the results. For some this might be baking bread. For others, pastry. I have a bit of a thing about rice. Maybe I am wrong - it is quite possible that I am the only one who experiences such insecurity in the kitchen.

One of my 'issues' surrounds the baking of muffins. I adore freshly baked muffins. Blueberry, apple and cinnamon, bran and raisin, chocolate. Bring them on. All of them. At once. Such is my passion that I decided a few years ago that I simply must try to make my own. I found a reliable-looking recipe for raspberry muffins and away I went. So sure was I of success that I even invited people round for 'elevenses' to enjoy my freshly baked muffins. Too cocky. The muffins were hopeless. They tasted fine. But there was nothing muffiny about them. They were, in short, raspberry cupcakes. I was upset. Very upset.

One of my less attractive traits is that I am rather a bad looser. I like to get things right. First time. So upset was I with my muffin disaster that I resigned myself immediately to a life of purchasing (rather than baking) muffins.

This was until Friday. I had a brief lie-in as I work from home on Fridays. I was up at 8ish and stumbled into the kitchen to make a cup of tea before hitting the desk... It was then that I spied them. A bunch of very sad bananas. Going blacker and blacker before my very eyes. Immediate action was required. I simply had to think of some way to use up those overripe bananas. Banana cake? Usually, yes. But I had to start work and needed something quicker than that. I grabbed Nigella's Domestic Goddess book for inspiration. It just happened to fall open on the 'banana muffin' page. Uh-oh.

I decided to bite the bullet and go for it. I had all the ingredients to hand and the instructions were so simple that I really couldn't fail. Plus I was able to knock them up and be at my desk by 8.30am whilst the muffins baked in the oven.


And how were the muffins, I hear you ask. A partial success. Have, since my previous muffin disaster, read that the key to the perfect muffin is not to overmix the... mixture. Combine the ingredients with just a few gentle stirs. Apparently it does not matter if there area lumps of flour. It will, so I'm told, all come out in the wash (... or rather, in the oven. But you know what I mean).

Well. I'm not so sure about this. As you will see from the pictures, some rose much better than others. I can only assume that the bicarb and baking powder were not evenly distributed due to required half-hearted mixing. Clearly I should have thoroughly mixed the dry ingredients first and then mixed everything together lightly. Secondly, my 'muffin' tins are not really 'muffin tins' at all. More like... mince pie tins. I think I should have used a deeper tin. I'd be grateful for any tips though.

The good news? They did have the right texture. And they were delicious. I am therefore prepared to give muffins another whirl - can anyone tell me where I am going wrong?!

Here is the recipe. I added some milk chocolate chips to half of the muffins - just because I couldn't think of any reason not to!

Banana Muffins from Nigella Lawson's 'How to be a Domestic Goddess'


30g unsalted butter (ridiculous amount to weigh unless you have electric scales!)
2 heaped tablespoons clear, runny honey
1/2 teaspoon vanilla essence
2 large, very ripe bananas
150g plain flour
1 heaped teaspoon baking powder
1/2 teaspoon bicarbonate of soda
1/2 teaspoon cinnamon
pinch of salt
small handful chocolate chips (optional)

1. Preheat oven to 190C.
2. Place butter, honey and vanilla into a small saucepan and melt gently. Set aside.
3. Mash the bananas - add the butter and honey mixture to the bananas and mix together.
4. Mix together all the dry ingredients in a separate bowl.
5. Add the wet mixture to the dry mixture and combine lightly. Do not overmix - it will look lumpy and sludgy, but do not worry!
6. Put paper muffin cases into a 12-bun muffin tray. Fill the cases about 2/3 full. It will seem like you don't have enough mixture for this. You will. Honestly.
7. Bake for 25 minutes, until they are nicely browned on top. Remove from oven and cool in tray for 5 minutes before transferring to a wire rack until cool.

Going...


...going...

GONE!

Friday, November 16, 2007

Great British Pudding Challenge and a Chilli con Carne


No. It is not a picture of a great British pudding. You are absolutely right. It is a picture of a jacket potato smothered in chilli con carne and topped off with guacamole and sour cream. Yum. But before I talk about the joys of this delicious chilli, I would like to send you away. I want you to go and take a look at Rosie's blog, 'Rosie bakes a 'Peace' of Cake'. Upon hearing about the demise of the traditional British pudding, Rosie has decided that food bloggers must unite to preserve our wonderful puds. She has launched the Great British Pudding challenge. I fully intend to take part and urge you to do the same - do take a look. Go on. Just click here.

Those who have managed to stop drooling over Rosie's delicious cakes and have returned may like to hear about the chilli I made the other night. Another great winter warmer that freezes really well - I made a big batch and then froze it into smaller portions. I work in the wine industry and, as you can imagine, we are coming up to our busiest time of year - I is good to be prepared with food I can just heat up when I get home exhausted each night!

There is nothing original about this recipe - I found it on the BBC Good Food website. I thought I'd play around with it somewhat, but then I decided that there was really no need. It was perfectly good as it was. The only change I made was to add oregano rather than marjoram (I didn't have any). In fact, being super lazy, I am not even going re-write the recipe - just give a few notes. Click here for the recipe.

Basically, you sweat onion, garlic and red pepper in a mixture of spices (paprika, chilli and cumin). The smell is wonderful. It is a fairly spicy recipe so adjust accordingly. You then brown the meat. I would recommend doing this in another pan, in small batches, otherwise it stews rather than fries - you want a bit of caramelisation on the meat for added flavour. The mixture is then simmered away with tomatoes and stock.

I always add a square or two of dark chocolate to chilli - it adds a lovely smoothness to the sauce. It may sound odd, but you can't actually taste the chocolate. I do the same with venison casseroles - again, it doesn't taste chocolately, but gives a great texture to the sauce.

I am not wild about rice, so I like to serve chilli with jacket potatoes, topped with sour cream and guacamole. Alternatively, it is great stuffed into tortillas, sprinkled with cheese and popped under the grill for a few minutes.

Monday, November 12, 2007

Pheasant casserole with cider


A couple of years ago, I returned home to find two dead birds hanging from the knob on my front door. This was somewhat alarming and unusual as I live in the middle of London and my front door is in fact inside (I have the ground floor flat of a Victorian terrace). Once I got over the initial shock, I noticed that my neighbour had a similar brace hanging from his door. On closer inspection, I saw that these beady-eyed beauties were in fact Partridge.

Slightly bemused by the appearance of these birds, I headed into my flat trying not to knock them off the door knob. A few hours later I received a knock on my door. My neighbour.

Him: 'Hope you don't mind the birds? I haven't got anywhere else to hang them.'
Me: 'No, not at all. Gave me a bit of a shock when I walked in, but it is fine. Would you rather I put them in my shed?'
Him: 'No - they are fine there. Don't suppose you like game?'
Me: [BINGO!] 'I love game'
Him: 'Why not keep that brace for yourself then?'

In the weeks that followed, I was lucky to receive sporadic offerings of a similar kind following his weekend shooting excursions. Pheasant, partridge, wood pigeon - sadly never any grouse! Unfortunately, he doesn't seem to have been so lucky of late. He has a new girlfriend, perhaps she doesn't approve of his country pursuit. Anyway, I have been feeling somewhat deprived and found myself throwing a pack of pheasant thigh and breast meat into my trolley in a certain well-known, upmarket supermarket earlier this week.

Waitrose has a good selection of game, as it happens. I was rather impressed. I shall go back. Or rather I would if it were not for the baffling 'instructions' on the pheasant packaging. I had decided I would make a big casserole which I would then freeze into individual portions. For emergencies. As I took the meat out of the packet I happened to glance upon a notice on the wrapper that said 'once cooked, do not re-heat'. Why? In my book, casseroles always taste better the second outing, once the flavours have had time to mingle. Why, if the meat is fresh, should the casserole not be frozen then carefully re-heated on another occasion? If anyone can shed any light on this, I would be most grateful.

Anyway, here is the recipe for the casserole. I decided to use cider - the appley flavour was delicious with the pheasant. Definitely one to repeat. I made it up as I went along - next time, I think I would add leeks too. It may not be very photogenic (does anyone have any tips for making stews/casseroles look attractive?!), but it tasted absolutely delicious.

Pheasant Casserole with Cider


Ingredients (serves 4)

500g pheasant boned pheasant thighs (or combination of breast and thigh)

2 medium onions

1 large clove garlic

2 large carrots

2 sticks celery

250g mushrooms

1 pint cider

1 tbsp olive oil

Bay leaf

Bouquet garni and/or sprig or two of thyme

Salt and pepper

1. Pre-heat oven to 150C. Heat oil in a large casserole. Brown the meat evenly on all sides and set to one side, covered to keep warm.

2. Slice the onion and celery. Dice the carrot. Finely chop the garlic. Soften the veg for five minutes in the casserole, adding a little more oil if needed.

3. Slice the mushrooms and add to the pot, along with the browned meat. Season.

4. Add the cider so that the ingredients are covered - you may only need 3/4 pint. Add bay leaf, bouquet garni and/or thyme. Turn heat up a little and bring to simmering point - give a good stir.


5. Place in the oven and cook at 150C for 50-60 minutes. Check a couple of times during cooking in case the liquid needs topping up. If so, add more cider or a little chicken stock. Serve with fluffy mashed potatoes and greens, or celeriac mash.
Notes - The sauce is quite broth-like. If you prefer a thicker sauce, sprinkle a little seasoned flour over the meat prior to browning. You could also add some cream for more of a dinner party type dish - I stirred some cream into a little and it was good. But I actually think I preferred the non-creamy version (did I actually say that? I preferred the non-creamy version? I am clearly not yet fully better!).

Sunday, November 11, 2007

We all want some figgy pudding...


I'm beginning to feel a little better and though my appetite has not really returned to normal, I did fancy getting back in the kitchen this weekend. With my mother due to have an operation shortly before Christmas this year, I have volunteered to take charge of the Christmas lunch. Young whipper-snapper that I am (or so I keep kidding myself), I have never before taken on this somewhat daunting responsibility so who knows how it will turn out! Fortunately, my mother will be on hand to dole out instructions and I have agreed to do the lunch on the understanding that she tells me EXACTLY how to deal with the turkey.

I thought I would start the preparations with the part with which I am familiar: the Christmas pudding. I have been in charge of 'the pudding' on several occasions so feel fairly confident with this. I love Christmas pudding and couldn't bear the thought of serving a different pudding on Christmas day. No chocolate yule log or cranberry bombe for me!

I am always surprised by the number of keen cooks who have never made their own Christmas pudding. Whilst there are many yummy ones available on the market, it is so satisfying making your own. More to the point, it is so EASY! The one thing it does require though, is time. Not that it takes much time to make. Just that it takes a long time to steam so you need to set aside a day to be 'in'. Of course, the moment I put the puds on to steam, there is always some sudden reason why I need to go out. Today, I realised that I didn't have any mushrooms for the casserole I plan to make tonight. I was brave - I left the pots bubbling away whilst I dashed out for 15 minutes. Someone did once suggest steaming them overnight, but I couldn't sleep knowing the gas flame was burning. I leave it up to you!

Christmas pudding-making is steeped in tradition. I am breaking a few 'rules' with this recipe - traditionalists use just 13 ingredients to signify Jesus and the apostles. I am afraid that I am too greedy and have used 23! I have not buried any treasures inside (a ring to signify impending marriage, coins to bring wealth for the coming year). I am not making it on 'stir-up Sunday' - the Sunday after Trinity. I want mine to mature for a little longer. I did, however, stir the mixture from East to West in honour of the three Kings and make a wish as I stirred!


The recipe is a version from a course I took years ago at The Edinburgh School of Food and Wine. It is very much a guide rather than a prescription. Vary the ingredients according to your tastes - add preserved ginger, dried apricots, other nuts, dried figs, whatever takes your fancy. I'd love to hear your suggestions.

If you haven't made a Christmas pudding before, I urge you to give it a try. It gets you in the mood for the festive season (albeit a little early) and feels your home with a gorgeous spicy aroma. Mmmm. Do not be put off by the long list of ingredients - the method is very simple and you don't need a steamer.

N.B. You need to start this recipe the night before you wish to steam the puddings.

Ingredients (to make 2 x 2lb puddings, or equivalent)

6oz self-raising flour
pinch salt
1 level tsp mixed spice
1 level tsp nutmeg
1 level tsp cinnamon
4 oz breadcrumbs
4 oz suet
1 large chopped Cox (or similar) apple
8oz sultanas
6oz raisins
6oz currants
2oz mixed peel
3oz dark brown sugar
4oz glace cherries
4oz coarsely chopped almonds
2 tbsp treacle
1 orange - grated rind and juice
2 lemons - grated rind and juice
1/2 wine glass brandy
1/2 wine glass ale or stout
4oz ready to eat prunes
1 wine glass of Port
2 eggs

Equipment - pudding basin/s, greaseproof paper, silver foil

1. Place prunes in a bowl and cover with Port. Cover with clingfilm.

2. Mix together all other ingredients, excluding the eggs. Stir from East to West. If you have family present, ensure everyone has a stir (youngest to oldest). Each person gets to make one wish as they stir!

Cover with cling film and leave out overnight.


3. Next morning, chop the prunes (easiest with scissors) and pour into the mixture along with the Port from the bowl. Add the eggs and mix gently.


6. Butter your pudding basins - I used a 3 pint basin and 1 pint basin - and then divide the fill the basins with the mixture.

7. You now need to wrap the puddings in greaseproof paper and foil. To do this, cut a large rectangle of both the paper and the foil. Lay the greaseproof paper on top of the foil and butter the paper. Fold a pleat in the centre of the papers -

8. Place paper side down on top of the pudding with the pleat in the centre. Wrap tightly around the pudding basin to form a tight seal and tie with string.

Tie another piece of string from one side to the other to create a handle for lifting the pudding in and out of the pan. Tuck excess foil and paper up around the rim to create a watertight seal. For an excellent demonstration (and much clearer explanation of how to do this) - follow this link http://www.bbcgoodfood.com/content/knowhow/glossary/tie-a-pudding/

9. Now for the steaming. If you do not have a steamer, simply use a big pan, place an upturned saucer in the bottom and place the pudding on top. Fill pan with boiling water so that it comes half-way up the the pudding basin. Place the lid on top and steam on a low heat for a minimum of 6 hours and a maximum of 8 hours. I steamed my little one for 6 and the big one for 8.

10. Remove puddings from pans. Once cool, carefully remove the covering and re-cover with paper and foil in exactly the same way as before. Your puddings are now ready to rest peacefully in a cool cupboard until THE BIG DAY.

11. On Christmas Day, steam as before for 2-3 hours. Turn out onto an appropriately attractive plate, crown with holly and set alight!

12. Serve with brandy butter.

Notes -
To set the pud alight, heat some brandy in a small pan. Take a ladleful out of the pan and light with a match. Pour over the pudding.
This makes 2 x 2lb puddings which will serve 6-8 people each. Why not give one away as a gift?

Friday, November 09, 2007

Under the weather - 7 random facts meme

I guess it is that time of year, but I am currently tucked up on the sofa feeling quite dreadful, having gone down with some dreaded lurgy or other. I am feeling rather sorry for myself and cooking, as you can imagine, has not been high on my list this week. In fact, I think it is interesting the kinds of foods people crave when they are ill (if any). Last night I managed to eat a bowl of Marks and Spencer's mashed potato with touch of mustard and a few leeks stirred in. Very odd! What foods do you turn to for comfort when you are under the weather?

Anyway, since there has been little activity in the kitchen this week. I thought I'd take this opportunity to take part in the meme for which Rosie from Rosie Bakes a 'Peace' of Cake tagged me earlier in the week. For those who have not yet discovered Rosie's blog, do take a look - she cooks up mouthwatering cakes and bakes (among other things) that have me wanting to run to her door for a slice on a very regular basis. Thank you, Rosie, for tagging me!

The rules of this meme are very simple:1. Link to your tagger and post these rules.2. Share 7 facts about yourself: some random, some weird.3. Tag 7 people at the end of your post and list their names (linking to them).4. Let them know they've been tagged by leaving a comment at their Blogs. Here are seven random facts about me.

I'm stretching the rules slightly (I hope you will let me off seeing as I am poorly). I haven't tagged anyone in particular - I see that most of those I would like to tag have already taken part in this meme. I would instead, like to proffer an open invitation to anyone reading this to please take part. Rosie - I hope you don't mind. Maybe I will try to be more specific once I am feeling a little better!

I don't like to deprive you all of photos for too long though so I am using this as a good excuse to share a few more of my South Africa photos from my recent trip. Hope you enjoy them!

1. I come from a large family. Counting my parents, brothers, sisters, nieces and nephews, it comes to 19 people. Counting aunts, uncles and cousins on my mother's side, we are well into the hundreds! I am the youngest 'sibling' by 11 years and therefore have eight nephews and nieces despite being just 28.

2. I am, sadly, unable to eat shellfish. This has been the case for around15 years now - I would have no idea how to cook any form of shellfish if it found its way into my kitchen.

3. I have a 'thing' about stars. I collect antique glasses etched with stars, all my plates and dishes have stars on them and I have a necklace I wear most of the time in the shape of a huge silver star.

4. I am not especially keen on rice. Especially white rice which, to me, has a most off-putting smell.

5. I absolutely hate filling the car up with petrol. I have no idea why. I just find it a really tedious task!

6. I absolutely adore Hot Cross Buns. At any time of day or night.

7. My favourite UK city is... Edinburgh. By miles and miles and miles...

Monday, November 05, 2007

Favourite Fish Pie


At this time of year I crave comforting, homely dishes. I suspect that I am not alone. I want my food to wrap me up in a cosy blanket and warm the very cockles of my heart. I find that it is at this time of year that I cook disproportionate number of my mother's dishes. Those that I remember fondly from childhood.

Fish pie is one such dish. My version is quite different from my mother's but the basic principles are the same. I'm a little fussy when it comes to fish pie. It has to be exactly right.

My requirements are as follows...
  • It simply HAS to have a mashed potato topping. Not for me the combination of creamy fish and puff pastry. Mashed potato is pure comfort. Pastry is nice, but better saved for a meaty pie in my book.
  • When it comes to fish, it is fish only I'm afraid. Being allergic to shellfish means that my pie is a no-go zone for the prawn. Even if I could eat prawns, I don't feel that fish pie would be the right place for them. But each to his own...
  • The fish simply MUST include some smoked haddock (preferably un-dyed).
  • The sauce MUST contain large quantities of parsley.
  • Hard-boiled eggs are not welcome in my pie.

Don't let my 'requirements' get in the way of yours. I'm fussy, like I said. And that is one of the great things about comfort food - make it in the way that pleases you the most. There are no rules (though my mother might beg to differ when it comes to the hard-boiled eggs).

Here is my version. It seems to make use of almost every pan and implement in my kitchen but it is definitely worth it. I always make too much and freeze individual portions for nights when I am in need of the aforementioned comfort!

Ingredients (serves 5/6)

Approx. 600g mixed fish (I used smoked haddock, cod and salmon and tend to throw in one fillet per person rather than weigh the fish)

1 pint milk

3 tablespoons plain flour

3 oz butter (plus extra for dotting top of mash and mixing into potatoes)

2 large handfuls parsley (curly or flat-leaf according to preference)

2 tablespoons of chopped chives

3 large leeks

1 onion

small handful of cloves

celery stalk

bay leaf

peppercorns

6 large potatoes

1. Place fish fillets in large saucepan and pour over the milk (milk should just cover fish so adjust quantity accordingly). Cut onion in half and stud with a few cloves. Add to pan with celery, bay leaf and a few peppercorns. Add some parsley stalks too. Pre-heat oven to 200C.

2. Bring gently and slowly to the boil. When simmering, turn off the heat and leave the fish to poach in the hot milk.

3. Meanwhile, peel and chop the potatoes and boil until tender enough to mash. Slice the leeks and steam or boil until just tender. Drain and set aside.

4. When the fish is just cooked through, pour through the sieve catching the fish in the sieve and retaining the hot fishy milk for later use.

5 Make a white sauce by melting the 3oz butter in a clean pan and adding the flour to create a roux. Add a couple of tablespoonfuls of the hot milk and stir with a wooden spoon until a smooth paste is formed. Over a low heat, add the remaining milk a little at a time, stirring quite vigorously between each addition to create a smooth, creamy sauce. You do not want the sauce to runny - you may not need to add all the milk. When the desired consistency is reached, season with salt and pepper and add plenty of chopped parsley and chives.

6. Pick out the peppercorns, bay leaf and parsley stalks from the fish and flake into a buttered serving dish, picking out any obvious bones and peeling off any skin. Top with a layer of cooked leeks.

7. Pour over the parsley sauce.


8. Mash the potato with a little butter and any remaining fishy milk. Don't make too runny - it needs to be quite firm so that it sits properly on top of the fish. Spoon mash on top of the fish and sauce.

9. Run a fork over the top to create a pattern in the potato. Dot with butter. Place in the oven for 20-25 minutes until the potatoes are golden.

Notes - I usually make this the night before I want to eat it. Make up until the end of stage 8. Chill overnight and cook for around 45 minutes until piping hot inside.
I simply must serve this with peas. Frozen peas. And because I am really rather trashy in my tastes, I usually have a squirt of tomato ketchup too!