Monday, September 17, 2007

Damsons in Distress

Last week I was called to the rescue of a huge bag full of damsons, plucked from my Aunt's garden in Berkshire. With a bumper crop and enough damson gin to last a lifetime, it was suggested by my cousin that I might find a use for the surplus lovely little purple beauties.


Indeed, readers, I did find a use for these small fruits. By happy co-incidence, I had recently received an ice-cream maker for my birthday and felt that this would be an excellent opportunity to flex my new-found ice-cream-making skills.


The night before I was due to take delivery of said damsons I was partaking in a spot of food blog browsing and discovered that my damson ice cream would be a good entry for this month's 'In the Bag' food blogging event which is hosted this months by Scott at Real Epicurean. This great event focuses on seasonal produce and was founded by Scott, Cherry at Cherry's English Kitchen and Julia from A Slice of Cherry Pie. This month the theme is seasonal fruits. Autumn is my favourite season for fruit - apples, pears, blackberries all lend themselves so beautifully to the comforting puddings I crave as the nights draw in. But as we are enjoying the sunshine we should have had in August, I thought I'd clutch onto the last piece of summer and make ice-cream. For good measure I also whipped up some damson gin and a batch of blackberry ice cream. Both such gorgeous colours.


For a novice with the ice-cream maker, I was pretty chuffed with the results. I have to confess that I'm not overly keen on damsons (I have a strange, inexplicable dislike of all stone fruits), but it ice-cream form they are rather delicious with a flavour half way between cherries and plums. As for the gin, I'll have to wait until Christmas to report back. But gin is fairly high on my list so I can't see that I'll have any problems there!


Damson Ice-Cream

I decided to make this with a custard base. I've always thought plums and custard went well together so it seemed like the right choice. I made the custard base from the Magimix guide to my machine. It was rather sweet - less time I'd go easy on the sugar.

Ingredients (makes around 1 1/2 pints)

1lb damsons

4 egg yolks

4 oz caster sugar (plus extra for damsons to taste)

1/2 pint milk

1/2 pint double cream

1 lemon

1. Wash the damsons and remove any that are split or mouldy. Place into a large pan whilst still slightly wet (add a touch more water if they are very dry). Sprinkle over a little sugar to taste, cover and heat gently until soft and pulpy.

(I would start with - say - 2oz of sugar. You can always add more if not sweet enough, but it is hard to get rid of the sweetness once it is there).

2. Push the pulpy mixture through a sieve. Once cool, place in the fridge.

3. Make the custard. Pour milk into saucepan and slowly heat until just boiling.

4. Beat the egg yolks with the sugar and then gradually beat in the hot milk, whisking all the time.

5. Pour mixture back into pan and place over a low heat, stirring constantly until the mixture is slightly thickened and creates a film over the back of a wooden spoon. Do not let it boil as it will separate.

6. Remove pan from heat and leave to cool. Once cool, add cream, straight from fridge.

7. Add the damson purée and mix until you have a beautifully coloured mixture. Taste and add lemon juice to taste.

8. Churn the well-chilled mixture in an ice-cream maker according to the maker's instructions.

Notes - My mixture was far too sweet so I added the juice of 2 lemons to balance. Next time, I will add less sugar to the damsons.


Damson Gin

If I'm honest, I didn't really have enough damsons left to make gin. But I almost had enough. So I decided to give it a shot anyhow. I've not made it before but have made sloe gin in the past and felt it couldn't be much different in terms of method.


I simply pricked the damsons, placed them in a Kilner jar and topped up the jar with gin and around 150g sugar. I'll give it a quick shake each day for a few weeks and then leave it to steep for around 3 months. Should be ready just in time for Christmas!

I've gone easy-ish on the sugar as I can always add more. I'll definitely need to have a wee taste after a month or so - I can adjust accordingly!

For far better instructions and lots of brilliant tips, do take a look at this post from The Cottage Smallholder.

As you can see, when I woke up this morning the gin was already taking on a fabulous damson colour. Mmmm.


Blackberry Ice-Cream


This was the first ice-cream I attempted in the new machine. The best ice-cream I ever sampled was in Italy (no surprises there) and was blackberry flavour. It was black as the night and so wonderful I can almost taste it now just thinking about it. I was unable to re-create the magic 100%, but I came pretty close. Let's just say that this was the second best ice-cream I've ever eaten. I think this would be great served on top of a traditional apple crumble.


Ingredients

1lb blackberries

1/2 pint double cream

40z caster sugar

Juice of a lemon

1. Push the blackberries through a sieve. You could always whizz them in a food processor, but I'm always keen to get rid of the seeds - it is a bore, but the seeds can impart a bitter flavour.

2. Mix the sugar, cream and lemon juice into the purée. Chill and then churn in the ice-cream maker according to instructions.

Notes - this couldn't be simpler. And it tastes heavenly!

Saturday, September 15, 2007

Adventures with Ham...


It was with a certain level of nonchalance that I announced I was planning to cook a ham for my birthday party a few weeks ago. Perfect buffet fare, I decided. What could be better? As the date of the party drew near, it dawned on me that I had never actually cooked a ham. I'd cooked a few smaller joints, sure, but never a huge, Christmas-size slab of pig before.

I say Christmas-size because it is Christmas with which I most associate ham. We eat glazed ham every Christmas Eve, cooked by my mother and served with Cumberland sauce (which I detest and have done all my life but no-one seems to remember this fact). So I decided to call in the expert. I phoned my mother and asked how she cooks hers. All sounded relatively straight-forward so I took heart and rang one of my two local butchers; Moen. There followed a somewhat daunting list of questions - how big? smoked or non? Actually, I think there were just the two questions but I was unable to answer either. As for smoking, I eventually decided not due to the glaze and flavours in which I was planning to cook the beast. As for size - pretty big but it had to fit in my largest pot. Being as yet un-married (one lives in hope!) and young-ish, I have yet to acquire all the kitchen equipment I desire!

The very nice man at Moen was unfazed by my hopeless dithering and told me to bring my pan to the shop. I duly did as asked and then watched in amazement and he managed to squeeze a ham into a pot half the size. This took a wee bit of cutting to size but mainly he just tied it up very tightly and pushed it in. Genius.

Then came the moment where I had to pay. I nearly fell over when I heard the price, but after all his efforts I could hardly change my mind. I handed over the card, all the while steadying myself with one hand on the counter.

I raced home with my ham-filled pot and left the beastie to soak in water overnight. I poured myself a large gin and tonic to steady the nerves after the payment-shock-incident.

The next morning I poured off the water, refilled the pan with clean water and bought it to the boil before changing the water once again. I tasted a tiny sliver of meat from the outside to see if it was still salty - it was perfect. Step one, a success.

Next up, boiling the ham prior to baking. Into the water went: one onion chopped in half, one carrot, one celery stick, peppercorns, parsley stalks, a bouquet garni and 2 bay leaves.

Bring the water slowly to the boil and then simmer gently for 30 minutes per lb (25 mins. per lb for joints over 3 lb).

Drain the ham (reserving the delicious stock for soups) and when strip off the skin. This is easier than it sounds, I discovered. I literally pulls off. Leave a good covering of fat on top of the joint.

At this stage in the game, I was somewhat distressed when my light bulb decided to end its life. I scrabbled around looking for another and I was all out of bayonet blubs. It was dark, I was in the midst of important work! Help. With nowhere to place a lamp, the only solution was to light candles around the kitchen! Quite a strange sight, I can assure you. My next major problem was that as I lifted the joint out of the pan, I dropped the whole thing on the floor, causing it to fall apart. I have to confess that tears came to my eyes as I saw my priceless beauty hit the floor. I picked it up and tried to piece it back together and decided not to tell anyone (but of course, did tell everyone!).

Next I made a glaze by mixing together the following ingredients (quantities are for a 4lb joint. Mine was much larger so I adjusted accordingly - you need enough to cover the top of the joint)

4 tbsp soft brown sugar
Juice and rind of 1 orange
Large pinch of mace

I smothered this all over the top of the joint and then poured cider (1/2 pint for 4lb ham) into the roasting tin. I baked in the oven for 30 minutes at 180C.

The kitchen filled with a glorious spicy fug: it smelt like Christmas. Bliss.


Sliced up the next day and served with some of the glorious cidery, orangey juices, it was quite delicious. The orangey flavour seemed to have travelled right the way through the meat despite the short time in the oven.
Was it worth the money? In short, yes. I over-catered on a grand scale. This ham would have fed around 40 people, I reckon. I was eating it for days afterwards and even gave a huge chunk to a neighbour. Ham sandwiches, ham salad, ham with eggs - you name it, I ate it! The best 'leftover ham' dish I created though was a delicious ham and courgette pasta dish.


I softened a few onions, garlic and some sliced courgettes in a pan. I then added a little ham stock and white wine which I reduced. A heaped teaspoon of Dijon mustard and a good swirl of double cream at the end. A quick bubble and then in with the cooked pasta. Absolutely delicious!


Thursday, September 13, 2007

Crunchy Raspberry Ripple Ice-Cream Terrine

It has been a super busy week-or-so. Work wise, I feel like I've gone 'back to school' for the autumn term. I organise wine tastings and events for a living and after a quiet August, I have come back to earth with a bump. A big bump. I have just completed my fourth event of the week and cannot tell you how pleased I am to be home. I got straight into my pyjamas, poured myself a glass of wine and am about to cook a super-comforting supper. Then I intend to crawl into my own bed and sleep...

Before I do so, a few announcements and a delicious recipe. First and foremost, I cannot continue without mentioning the most important event of the day: the birth of my fifth nephew, baby Tom, who arrived safely into the world this afternoon. Hoorah for you, little Tom (...and for you, big sister).

Secondly, do check out the round-up of last month's Sugar High Friday. What a great selection of local sweet treats, a global tour of regional specialties brilliantly and thoughtfully compiled by Johanna, The Passionate Cook.

Thirdly, congratulations to Nick at The Tracing Paper for setting up the brilliant FeedReel on Food and Drink enabling us to keep track of all the latest posts from the many fabulous UK food and drink bloggers. Great initiative, Nick!

I'm also thrilled to be part of both the UK Food Bloggers Association and the Foodie Blog Roll. You'll find links to both on the right.

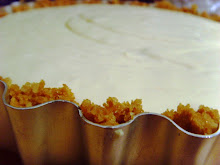
Anyway, on with the recipe. A gorgeous ice cream terrine swirled with raspberry purée and bits of crunchy meringue. Dreamy. No need for an ice-cream machine, this looks (and tastes) impressive but is pretty easy to make. I made double the quantity to make two terrines, meaning I have one in the freezer ready to whip out at an impromptu gathering. Friends will be amazed when I produce it from thin air at a moment's notice (...or so I hope).

The recipe came from an old issue of BBC Good Food. Click here for the original. Or follow my version below.

Ingredients

350g raspberries
3 eggs
100g golden caster sugar
284ml pot double cream
2 meringue shells (shop bought and not home-made. Home made tend not to be crisp enough - they need to be completely dry and crunchy)

1. Push the raspberries through a fine wire sieve into a bowl. This will take a fair bit of effort - you want to extract the maximum juice/pulp. Discard the pips.

2. Line a 1 litre loaf tin with cling film.

3. Whisk the eggs and sugar in a heatproof bowl over a pan of simmering water until the mixture has doubled in size. This is easiest with an electric hand whisk...

4. Remove from heat and continue to whisk until completely cool.

5. Whisk the cream until just thick. Fold egg mix into the cream and mix thoroughly. Crush the meringue and add to mixture.

6. Drizzle the raspberry purée in zigzags over the creamy mixture.


7. Pour the gloriously rippled mixture into the loaf tin and then place in the freezer for a minimum of 4 hours. 8. Turn out 15 minutes before serving and allow to soften a little. Decorate with further raspberries and serve in slices.


Notes - The recipe uses fewer raspberries in the terrine, but I prefer it with this quantity. Also, I used an extra meringue shell for a bit more crunch.

Friday, September 07, 2007

A tale of two pâtés...

From three salads to two pâtés... Chicken liver and smoked trout. Not together, of course. That would be revolting.

There are certain foods that are under-rated in life. Humble foods that you might easily pass by in favour of other, more elaborate concoctions are sometimes those which actually give most pleasure. I adore this chicken liver pâté. For so many reasons. First and foremost, it reminds me of home. It is a recipe of my mother's that we all adore though we only ever used to have it at Christmas. A once-a-year treat. The sort of thing that you'd think nothing of until you popped a bit in your mouth. And then the table would fall silent. And then suddenly everyone would be reaching for the pot to scoop out some more before they had finished the first lot, just in case there was none left by the time you were ready for seconds (I come from a large family; its every man for himself). It is still the food thing I look forward to most at Christmas. I suppose it is a symbolic food for me - I associate it with family, warmth, laughter, seasonal cheer.

I is only recently that I have started to make this myself. I felt sure it wouldn't be as good as my mother's. But, you know what? It was pretty good. I love to make a big batch and serve it to friends in place of a starter, with drinks. I just place the dish on a table, carve up some baguette and let them help themselves.

If you think this recipe has a lot of butter in it, ........ it does! Get over it. Ok. So its not the healthiest thing in the world, but you don't need to eat the whole pot at once (however moreish it may be). It keeps pretty well due to the brandy. And it is not something to have everyday. It may be simple. But it is definitely a treat. Try it, I'm pretty sure you'll like it...

My Mother's Chicken Liver Pâté

Ingredients

6 oz chicken livers
4 oz butter
1 medium onion
1 bouquet garni
1 clove garlic
1 tablespoon brandy
Seasoning

1. Trim the chicken livers of all white bits. These make the livers taste bitter.

2. Chop the onion and garlic finely and soften in 1oz of the butter until just turning colour.

3. Add the chicken livers, bouquet garni and season well. Fry for around 3-5 minutes, until the livers are just cooked through but a little pink.

4. Remove from heat and allow to cool.

5. Pour mixture into a food processor (or push through a sieve!) and pulse to smooth consistency whilst adding the remaining butter and brandy.

6. Pour into a china pot. Smooth over the top and top with clarified butter (or in the case of my photo, not so clarified!). Chill until set.

Notes - most recipes similar to this suggest flambée-ing the livers in the brandy. This burns off the alcohol of course and to some might be preferable. But I like it this way, with the slight 'kick' that comes from the raw brandy. In fact, I have been known to let the hand slip slightly when adding in the brandy....!


_______________________________


A total contrast, but super easy to make, is a quick smoked trout pâté. I actually prefer smoked trout to salmon, but this would work with salmon too. I'd probably use slightly less horseradish with the salmon.

Smoked Trout Pâté


Ingredients

200g smoked trout

200g cream cheese (I used low-fat to make up for all the butter in the chicken liver pâté)

Juice of half a lemon (less or more to taste)

1 tablespoon horseradish sauce

1 tablespoonful chopped chives

Seasoning

1. Simply place trout and cream cheese in the processor and whizz to a paste. Add horseradish and lemon juice to taste, plus plenty of black pepper (go easy on salt as the fish is salty). Add snipped chives and whizz to blend.


2. Scrape out into a serving dish and smooth over the top. You may like to garnish with some chives as per the photo. Or you may not like to!

Wednesday, September 05, 2007

A selection of salads


I am suffering from a blogging backlog. I have too much to write about and the longer I leave it, the longer the list becomes. Take tonight for example. I am sitting at the computer with a huge bowl of homemade blackberry ice cream. It is the first ice cream I've made with the machine given to me by friends for my birthday. It is soo delicious and I'm struggling not to tell you all about it here and now but there is still so much to write about the party at the weekend - so many recipes to share. And as for my holiday in Wales... well I've hardly started.

Anyway, I hope you'll forgive me for blogging about three salads at once in a bid to catch up with myself. Perhaps it would be easier if I just stopped eating for a week or so, then I wouldn't build up any more foodie thoughts.... No. I'd still be dreaming of food; it wouldn't work...

In truth, I made four salads on Sunday for the buffet, but one was a tomato and basil salad and I hardly think I need to write much about that. I've included the photo though as I so love the colours. The other three are worthy of note though (I think). Firstly, a cucumber salad. Very simple but really rather good in a pure sort of way.

Cucumber salad

Peel a cucumber and slice thinly. Sprinkle over plenty of salt and leave for an hour.
Drain in a sieve, rinse thoroughly with water and pat dry.
Dress the salad with finely chopped parsley, vinaigrette made with 1 tablespoon wine vinegar to 3 of oil (of choice) and a pinch of salt. Season with freshly ground pepper.

_____________
Kate's Salad (Broccoli salad with sugar-snap peas and spring onions)
hello
Unusual this one. I have my dear friend Kate to thank for this. It is always a winner, even with those who don't usually care for salads. A male friend who shall remain nameless admitted that he 'saw all the raw broccoli and gave it a wide birth' until his girlfriend persuaded him to give it a try. Needless to say it was one of buffet dishes he enjoyed most and was even to be heard asking for the recipe (although only when out of earshot of any of his testosterone-filled, salad-hating male counterparts!).
hello
It may sound like an unlikely combination, but I urge you to try it. Its not the healthiest of salads (all that cheese, mayo and sugar), but you can use low-fat mayo and use slightly less sugar if you wish. The sweetness of the dressing is fairly key though. I find that children like this too (if you leave out the spring onions) with the crunchy sugar-snap peas a real hit.

Ingredients

1 large head of broccoli (or 2 small)

1 packet of sugar-snap peas (2 large handfuls)

1 medium bunch spring onions (salad onions/scallions)

1 large handful grated Cheddar cheese

Equal quantities of mayonnaise, red wine vinegar and caster sugar

1. Chop the broccoli into tiny/mini-florets. As small as you can... I'd say this photo was almost life-size, post-chopping.

2. Chop the sugar snap peas into 3 or four pieces. Slice the spring onions. Mix vegetables together.

3. Mix the dressing ingredients together (probably 3 tablespoons of each for this quantity). You may want to add a little more vinegar, but the dressing should be fairly thick.

4. Pour over the dressing and mix thoroughly. Sprinkle the Cheddar cheese over the top. If you are making a large quantity, you may wish to sprinkle cheese half way through the salad too (i.e. make it in layers).

Rocket salad with roasted red onions, pine nuts and Parmesan

No photo of this one, but its another winning combination that is very moreish. I served it without the Parmesan for the party, but it is great with the Parmesan shavings for a dinner party starter.

Ingredients (serves 4 as a starter)

1 large bag of rocket or watercress, spinach and rocket salad leaves

2 large red onion

Handful of pine nuts

Balsamic vinegar

Olive Oil

Parmesan or Pecorino cheese

1. Pre-heat oven to 180C. Chop onions into chunks (in half and then each half into quarters). Place in roasting tin, drizzle with good helping olive oil, salt and pepper. Roast for 35-45 minutes - until soft and caramelised.

2. Meanwhile, dry-roast the pine nuts by placing them in a dry, oil-free frying pan over medium heat. Shake the pan occasionally and watch carefully (it is easy to burn them). This releases more flavour than serving them un-roasted.

3. Chop the pine nuts coarsely and pour into a small bowl. Pour over a good slosh of balsamic vinegar (around 3-4 tablespoons).

4. When the onions are ready, remove from oven and scrape into a bow. Whilst still warm, pour over the pine nut and balsamic dressing. Taste to see if you need to add a little oil (I generally find the onions are coated in enough oil and do not need any further added to the dressing).

5. On four serving plates, layer the salad leaves with the sticky onions followed by shavings of Parmesan then more leaves, onions, cheese etc. Finish with a few shavings of Parmesan.

Notes - for a dinner party starter, I like to serve this with the onions warm. For a big side salad, they can be cool.

Tomato, basil and thyme salad with three types of tomatoes

Monday, September 03, 2007

A Birthday Buffet (and a leek, bacon and mustard quiche)


The past couple of days have been entirely filled with my favourite activity. What is my favourite activity, I hear you ask. Cooking, of course! I decided to throw a lunchtime buffet party for friends to celebrate my birthday. Twenty-five or so people descended on my small London flat and I thanked him upstairs for the dry weather. Once the first eight guests were installed in the garden with a glass of fizz in hand, I decided that the garden was full and that perhaps inviting so many people was a mistake. Bit to late to decide that.

Fortunately no one seemed to mind the squash and it was extremely good fun. Modesty aside, I think I laid on a pretty impressive feast. I cooked my first ever ham (by candlelight, the night before - the kitchen light bulb blew at precisely the worst moment and I didn't have a spare), made quiches, chicken liver paté (I've forgotten how to do those accents again...), smoked trout paté, Kate's special broccoli salad, cucumber salad, other salads. And not to mention puddings. The divine Green and Black's Chocolate Mousse Cake (the first recipe I posted on this blog) and a delicious crunchy raspberry ripple semi-freddo. Recipes will all be posted over the next week, but first up is the quiche. It may not sound exciting. Anyone can cook a quiche. But I have had more comments on this quiche than on almost anything else I have ever cooked...


I am unable to comprehend the enthusiasm for this quiche. Don't get me wrong, I think it is absolutely delicious. A very good quiche with a lovely combination of flavours. But it is just a quiche. There are more exciting things in life, surely. Such is the demand for the quiche that several attendees refused to come unless I promised to produce the quiche. One person even confessed to having a dream about the quiche the night before (the dream also apparently involved a former Russian President). I made two enormous specimens but still had someone complaining that I hadn't made a third!

I feel duty bound to reproduce the recipe here (I personally think the secret of its success lies in the large quantity of double cream and the mustard spread over the base). It is no great secret as it comes from one of my favourite culinary resources - Leith's Cookery Bible. The recipe serves four, but is easily doubled or tripled.

A note on pastry now. Whilst I am capable (and often willing) to make my own pastry, I am not proud. Call me a heathen, but I am only too happy to use ready-made pastry when time restricts. With so many things to cook, I was happy to embrace this time-saving device. No doubt, people will tell me that I am creating a vastly inferior quiche this way, but let me let you into another secret. More than one person complimented me on the quality of said pastry. How I would have loved to bask a little in the glory but I'm too honest.

'How do make the pastry so good?'
'...(slight pause from me)...umm...I buy it in the supermarket'.

To be fair, nothing beats really good homemade shortcrust pastry, but there is certainly no shame in a few shortcuts!

Leek, Bacon and Mustard Quiche

Ingredients (serves four)

170g shortcrust pastry

15g butter
3 large or 5 small leeks - white part finely chopped
55g rindless bacon - I prefer smoked
2 egg yolks
140ml double cream
Grainy mustard - good quality, enough to cover base
Parmesan cheese, freshly grated

1. Pre-heat oven to 190C. Roll out the pastry on a floured surface. Line a loose-bottomed flan tin (20cm/8in). Pop in fridge to relax for half an hour. This prevents shrinkage.

2. Bake the pastry case blind to prevent soggy pastry (line case with foil, pour in baking beans or dried pasta/rice, bake for approx 15 minutes, remove beans and continue to dry out the pastry). Lower oven to 170C when you remove from oven. (Get on with making the filling whilst base is in the oven - step 5).


3. Spread the base of the pastry case with a generous quantity of mustard.

4. Melt butter in a frying pan and cook the leeks until fairly soft. Fry bacon until brown in separate pan in its own fat. Drain well.

5. Mix egg yolks and cream together and the add the leeks and bacon. Mix and season well. Pour into the pastry case.

6. Sprinkle with Parmesan and bake at 170C for 30 minutes or until filling is just set and the top nicely bronzed.


Wine Notes - This would be perfect with a dry white such as a Pinot Blanc from Alsace. Alternatively, a slightly oaked Chardonnay would marry well with both the rich creaminess of the filling and the slight smoke from the bacon - Burgundy is a safe bet. A restrained New Zealand Chardonnay might be good too.

Saturday, September 01, 2007

Spanking Fresh Mackerel

Mackerel is, in my view, an under-valued fish. Rarely does it make an appearance at a dinner party or on a restaurant menu. Only occasionally in the form of a smoked mackerel paté. Yet it is a delicious fish - extremely flavoursome and quite unique. I think there is a good reason for its lack of popularity though. It is one of those fish that is at its best when eaten just hours after being plucked from the sea. Don't get me wrong - all fish is best when it is fresh - but mackerel seems to deteriorate more rapidly than some. Or maybe I'm just spoilt as I have always eaten it this way - spanking fresh.

No holiday to Abersoch would be complete without a little mackerel fishing. This activity is undertaken with great relish in my family and always has a competitive edge. Who can catch the most? It is a well known fact/myth that mackerel are very stupid. It is certainly true that they are easy to catch, making fishing for them a fun task for children (and adults) who bore of fishing quickly when nothing is biting.
I missed out on the fun this time - I passed up the opportunity to hit the water when I thought the weather looked bad and it turned out to be the perfect day. Fortunately it all worked out well - my mother caught enough for us all while my sister and I sunned ourselves on the beach. Not quite as good as having caught them myself, but the next best thing. In fact, probably better as my mother is much braver when it comes to killing the fish post catching than I am. I'm a bit of a wimp. I understand that on this occasion it was my father who did the dastardly deed.

Back at home I found my mother already busy gutting the shimmering beauties, their vivid markings glistening on the worktop.

I had been wanting to try them whole, on the barbecue, with a lime and chilli dressing, but as they were already prepared in 'butterfly' formation, I decided to leave it to my mother to prepare in the traditional way. We have always eaten our mackerel for breakfast - I am not sure why - simply fried in a little Welsh butter. Firstly, the fish are coated in flour which has been well seasoned with plenty of salt and pepper. The butter is melted in the pan until foaming and the mackerel fried lightly on each side until just cooked and golden. Served with a wedge of lemon. Delicious...


Beautifully simple yet totally delicious. And, most importantly, spanking fresh!