Showing posts with label Starters. Show all posts

Tuesday, February 22, 2011

Green soup


One of the best things about hosting Christmas ourselves this year was that we were able to make turkey stock from the carcass. This is not something we are very good at remembering to do with our regular roasts, I'm not really sure why. We're probably just too lazy. But it is, of course, simplicity itself. Especially in the Aga - just bring it all to the boil on the top and then pop it into the simmering oven until you remember to get it out several hours later!

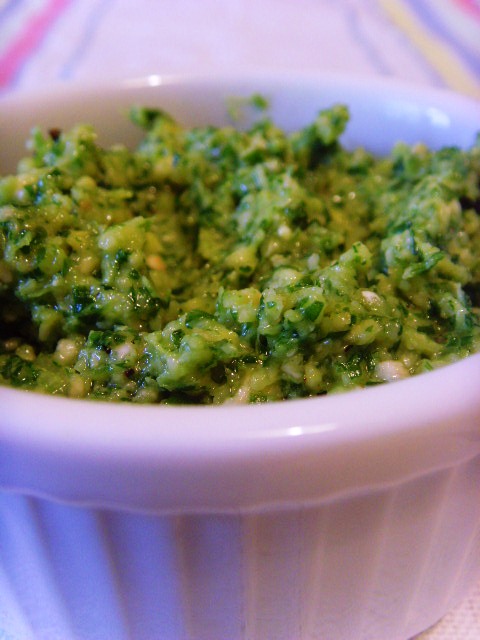
Our freezer is packed full of pots of stock and it is so flavoursome - it adds so much flavour to soups and risottos in particular. I have a few favourite 'go to' soup recipes that I make regularly but really, with stock so flavoursome, it doesn't matter what you put in your soup. The end result will probably be delicious. Last Friday I took a look in the fridge and didn't seem to have enough of anything to make a particular soup. Instead, I decided to make a mixed green vegetable soup using up little bits of all kinds of veg. I wasn't expecting a particularly great result, but it was absolutely delicious as well as being extremely healthy (...don't tell anyone about the cheese toastie I had alongside). It's lovely green-ness made me feel all Spring-like and uplifted!

Here is what I did...

Green Soup
Serves 4

Ingredients:
A selection of green vegetables. Here is what I used...

2 leeks, sliced
2 spring onions, sliced
1 stick celery, sliced
1 large potato, cubed
1 courgette, roughly chopped
1 cup frozen peas
small handful chopped cabbage
1 pint good quality turkey, chicken or vegetable stock
Dash of sherry vinegar (optional)

1. Heat a little olive oil in a heavy-based saucepan. Add the leeks, celery and potato and sweat for a few minutes until just starting to soften.

2. Add all the other vegetables and then the stock. Stir and bring to the boil. Simmer over a gently heat (or in the simmering oven of an Aga) until vegetables are tender. I left mine in the simmering oven for around 25 minutes.

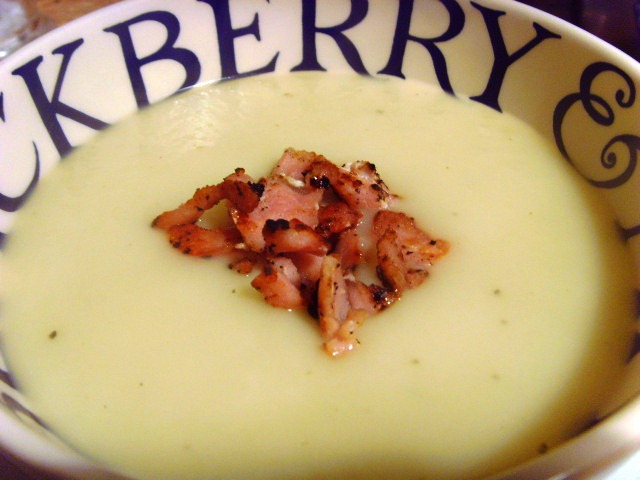
3. Whizz to a smooth consistency with a stick blender. Taste and season with salt and pepper to taste. Stir in a small dash of sherry vinegar to taste.

4. Pour into warmed bowls and garnish with chives, if you have any to hand!

Monday, February 07, 2011

Tuna and caper pâté


The husband and I are fond of a pre-dinner drink (or two). The trouble is that with that pre-dinner drink, we usually feel the urge to indulge in a pre-dinner nibble. This, I have no doubt, is one of the key reasons for our overly expansive waistlines. (This, and our fondness for cheese, proper puddings and cake). Whilst we know that eating earlier would help ease this habit, we're not actually willing to forgo this favourite part of our day. It is the time we relax post-work, talk through the day's events and generally unwind whilst one of us potters round the kitchen creating dinner.

We try to keep our snacking under control and stick to reasonably 'healthy' nibbles. Low-fat hummous with carrot sticks, olives or tomato salsa spread on melba toasts are staples in this house. We love them, but we get tired of them too. When friends are here, or at weekends, we are more adventurous and make more fancy canapes but mid-week, it is all about low effort. Whilst browsing through some of my favourite food blogs the other day, I stumbled accross a tuna and caper pâté on the Kitchen Diaries Challenge blog which rather caught my fancy. I find the salty tang of foods like capers, olives or anchovies just perfect for awakening the taste buds prior to the main event. I had most of the ingredients to hand in the cupboard and simply improvised for the rest. It took mere moments to make - a 'bung it all in and whizz it all up' recipe. The best sort for mid-week really.

Served moments later with a crisp glass of white and some melba toasts, it was a very delicious 'snackette' (as we like to refer to such things). It would make a nice starter too and, as it uses low-fat mayo, is pretty healthy too.

Do you like a pre-dinner 'snackette'? If so, what do you tend to choose?

Tuna and caper pâté


Ingredients:

1 tin of tuna, drained
half a small red onion or a shallot, finely chopped
2 heaped tablespoons low-fat mayonnaise
juice half a small lemon (to taste)
2 heaped teaspoons capers, well-rinsed
1/2 tsp paprika
handful flat-leaved parsley

1. Place all ingredients except lemon juice and capers into food processor and whizz to combine.

2. Add lemon juice a little at a time, tasting after each addition until the balance seems right.

3. Add the capers and pulse briefly so they are combined but not completely broken up. You want a little texture here.

4. Scrape into a serving dish and (ideally) leave for an hour or so in the fridge for the flavours to combine. If greedy and rushed like us, serve immediately with melba toasts or crudités. Or spread on crostini, as suggested by Maggie at Kitchen Diaries Challenge.

5. Serve with a crisp glass of white wine.

Monday, November 15, 2010

'Aga' drop scones


My new job has been eating into blogging and cooking time which means that getting used to the Aga is taking longer than I'd hoped. There have been a fair few disasters which, I have to admit, have had me tearing my hair out in frustration. My biggest gripe is that we struggle to keep a constant heat and, as we have to fill up with solid fuel once or twice a day, the kitchen is permanantly covered in a layer of black soot. Not very appetising!

However, there are aspects of this cooker that I already love and know I will miss terribly when we move. I love the instant heat - no pre-heating required here. Water boils instantly. Meat is sealed in moments. And the kitchen has a lovely warm glow. Having acquired an old Aga kettle we no longer need to use the electric version and the toaster is looking dusty in the corner too - crumpets and toast cook perfectly using the heat that is already there. But my favourite thing about the Aga involves the simmering plate (top right hand side) and a piece of Bake-o-Glide. Actually, we don't have Bake-o-Glide. It is fearfully expensive. We have some kind of supermarket imitation that does the job just as well. It is basically a non-stick, re-usable sheet of silicone (I think?!) which can withstand fairly high heat. We place it over the simmering plate and cook directly on it. Fat-less 'fried' eggs are a favourite - just crack an egg onto the non-stick sheet and lower (yes, really) the lid. A few minutes later, lift the lid to a perfectly-cooked, super-healthy egg. Butterless toasted sandwiches are a real hit - we favour a mature Cheddar and some onion chutney. Make the sandwich, place on the silicone sheet and put the lid down again. A few minutes later, flip the sandwich and repeat. Moments later you'll have a scrumptious, perfectly cooked toastie without messing up a sandwich toaster and without an ounce of butter smeared on the outside. Lovely!

The 'baking sheet-simmering plate method' is also a winner for all kinds of pancakes. Drop-scones (or scotch pancakes) cooked directly on the top are an Aga classic. I have a few Aga cookbooks which feature various 'Aga' classics. In slightly arrogant tone they refer to 'Aga' shortbread, 'Aga' drop scones, 'Aga' breakfasts and 'Aga' flapjacks. This makes it sound as though 'Aga' shortbread is vastly superior to any other kind - I'm not convinced by this but at least it makes me laugh! Anyway, the drop scones are a hit with me. I've made them several times in various guises. For pudding with maple syrup and pears or bananas. For an indulgent weekend breakfast with honey and berries. For a dinner party starter with added herbs and served with smoked trout and horseradish cream.

Here is the recipe I have used. I believe it is a Mary Berry recipe. Feel free to vary the batter. Good additions include cinnamon, raisins, blueberries or fresh herbs. An Aga is not necessary - these will be equally delicious cooked on a griddle or in a good non-stick frying pan! Please excuse a selection of terrible photos - light was awful and I was in a hurry to eat them.

'Aga' Drop Scones

Ingredients

4oz self-raising flour
1oz caster sugar (omit if making savoury pancakes and season with salt and pepper)
1 large egg
1/4 pint milk

1. Mix flour and sugar together and create a well in the centre.

2. Crack egg into the well and mix with a wooden spoon to combine.

3. Add the milk a little at a time, stirring between additions, until you have a smooth batter.

4. Lightly grease a frying pan, griddle or the top of the simmering plate on an Aga. If you have a solid fuel Aga like us, place a piece of non-stick silicone liner over the simmering plate. Drop tablespoonfuls of batter onto the pan or liner and leave to cook until bubbles begin to form on the surface. Carefully flip the drop scones with a palette knife and cook the other side. This should only take a minute or two.


5. Remove cooked scones from heat and keep soft in a clean tea-towel until ready to serve.


Tuesday, November 02, 2010

Timbale of trout and dill


I've just started a new job which is exciting but also rather tiring, particularly as we've had guests staying every weekend recently. I feel like I'm permanent sheet-washing duty! Anyway, I haven't had much time to blog but we are excited to have finally got our Aga working. We haven't quite got the hang of the re-fuelling as yet - my husband seems able to keep it going but as soon as he goes away with work it mysteriously goes out. I do my bit - riddling and emptying the ash pan, filling it up with anthracite and hoping for the best. But it seems not to like me much...!

When it has been working, we've been enjoying Aga classics such as the fatless 'fried' egg, fantastic butter-less toasted sandwiches (honestly) and wonderful drop scones cooked straight on the top of the simmering plate. I'll be reporting on these treats later in the week but firstly, I wanted to share this lovely little starter that I made the other night.

It emerged out of leftovers - as the best things often do. We don't often have a starter but I had some leftover trout which needed eating and wasn't enough for a main course. It took moments to throw together but looked impressive and tasted fantastic. An inpromptu starter for us but something I'll do again for a dinner party perhaps.

It was so simple that I hardly feel it requires a recipe. I used a 'cheaty' ingredient which was a jar of dill and mustard sauce I had in the fridge - the sort that you serve with gravadlax. I'm addicted to it and love it with all smoked fish too. You can make your own very easily too - there are plenty of recipes on the web, such as this one. To make your starter look attractive, use a big biscuit/cookie cutter or a timbale mould.

I use the word timbale in the loosest sense possible. I think it really refers to things that are baked in a circular mould. I find a regular round biscuit cutter can make all sorts of things look dinner party-ish. Rice, mashed potato, ratatouille, mousses all look strangely accomplished when served in a neat little shape like this!

This starter is the base for many. You could use leftover salmon, for example. Or try cooked chicken bound together with a little mayonnaise, curry powder and mango chutney. Smoked mackerel with creme fraiche and horseradish perhaps? The world is your oyster!

Here is the basic recipe...

Timbale of trout and dill
Serves 2

Ingredients:

1 small fillet cooked trout
2 tbsp dill and mustard sauce
1 inch piece of cucumber
half and avocado

1. Halve cucumber across the middle and scrape out the watery seeds. Chop into smallish cubes.

2. Peel avocado and dice.

3. Combine trout, sauce, cucumber and avocado in a bowl with salt and pepper. Add a squeeze of lemon juice if you think it needs a little more acidity (depends on the sauce). You may need a little more or less sauce in order to bind the ingredients together.

4. Push the mixture into a circular mould or biscuit cutter on a serving plate and refrigerate for half an hour if you have time.

5. When ready to serve, remove the mould carefully. You should be left with a nicely shaped mixture. Arrange some salad leaves on the plate, if desired. Garnish with dill or chives.

Tuesday, October 12, 2010

Oriental steamed seabass


I spent the weekend down on the Isle of Wight. It is where my parents live and where I lived from the age of ten. It really is a very special bit of England and this weekend was at its sunniest, sparkliest best. Our dog was extremely chuffed as he was finally allowed to tear along the beach - during the summer months dogs are not allowed on the beach near my parents' house. He had his first taste of swimming in the sea and absolutely loved it. I was momentarily nervous as he hasn't done much swimming as yet (he's just 8 months old) and the tide is so strong that I worried he might be swept out to sea. Fortunately he appears to be a strong swimmer and made it back to shore before indulging in an almighty shake-out...


But this has nothing to do with food. The sea surrounding the Island is home to a great deal of food however. Earlier in the week my mother was lucky enough to be given a large bass which she'd immediately frozen so that we could enjoy it at the weekend. Seabass is a favourite fish of mine and I often order it in a restaurant but I have to admit that I'm not sure I've ever cooked it before. My favourite way to enjoy it is with lovely fresh Oriental flavours and I've eaten it recently in a Chinese restaurant sprinkled with coriander and ginger with soy sauce and sesame. Inspired by this I took a look through my  mother's books and found a recipe very similar to the one I'd tasted. The book was written by Sophie Grigson and William Black and has the very original title of (you guessed it) Fish. I don't have the exact recipe here but I can remember what we did. It was extremely tasty - the only fiddly bit was serving the fish but with practice I'm sure we'd improve!

Oriental steamed seabass
Serves 2-4 depending on size of fish


Ingredients

1 large seabass
1 inch piece of fresh ginger
3 spring onions
1 small red chilli (less or more to taste)
1 fat clove of garlic
2 tbsp vegetable or sunflower oil
2 tbsp sesame oil
soy sauce
large handful fresh coriander

1. Wash and clean your fish and trim the dorsal fins. Cut 3-4 slashes through the skin on both sides. Season the cavity generously and place a few stalks of coriander in the cavity too.


2. Steam the fish. We used a fish kettle for this but you could curl it up in a regular steamer over a pan of boiling water as an alternative. Depending on the size of the fish, this could take anything from 10-20 minutes. Ours was pretty large and took almost 20 minutes. You want the fish to be just cooked.


3. Whilst the fish is steaming, prepare the garnish. Peel the ginger and cut into small matchsticks. De-seed the chilli and cut into very fine matchsticks. Finely chop the garlic and the spring onions. Mix all together in a little bowl. Chop the coriander.

4. Once the fish is ready, transfer quickly to a warmed serving plate and sprinkle on the ginger, chilli, garlic and spring onion mixture. Sprinkle over the chopped fresh coriander too.

5. Heat the oils in a small pan until smoking. Once really hot, pour over the top of the fish and garnishes. Dress liberally with soy sauce and hurry the fish to the table!


6. To serve, gently ease the fillets from the backbone and spoon over the juices and garnishes. We served ours with plain boiled rice and stir-fried vegetables.


Thursday, August 06, 2009

Summer squash and sweetcorn salad


Since I am now mainly cooking for two people, rather than one, I decided that it was time to re-instate my weekly veg box order. This week I was delighted to receive a rather attractive pattipan squash. I usually associate squash with the autumn and had a brief moment of depression when I wondered whether summer really was over already.

I then read the accompanying recipe sheet and realised that this was a variety of summer squash. I also read the accompanying recipe and decided that it sounded rather good. It was for a salad of roasted squash and corn (torn off the cob rather than from a tin!) with rocket, feta and a sweet chilli glaze. We decided to roast a chicken and serve it alongside the bird for a summery supper.

I made the classic error of not reading the recipe through before I started and I then realised that both the corn and squash needed time to cool before adding to the salad. I didn't have time for this and the squash was fresh out of the oven when I added it to the peppery rocket leaves*. It actually didn't matter a bit and was perfectly delicious as a 'warm' salad. As we were eating it immediately, the leaves didn't wilt at all. However, we did have to throw the excess away which was a shame. Next time, I'll make it with more time to spare and try a cold version to take for lunch at work.

Summer squash and sweetcorn salad
Serves 4 as a starter or side-dish (2 as a main)
Recipe from Abel and Cole

Ingredients

1 summer squash (we used a pattipan squash, the recipe suggests onion squash)
1 garlic clove peeled and chopped
5 sprigs fresh thyme
1 tbsp olive oil
2 cobs sweetcorn
1 tbsp butter
1 tbsp red chilli jam (I used
Jules and Sharpie red pepper jelly)
1 bag fresh rocket leaves
100g feta cheese (recipe suggests 200g, but this seemed too much to me)

1. Preheat the oven to 200C. Halve the squash and scoop the seeds out with a spoon. Cut into small wedges or chunks of around half and inch square. Keep the skin on as it is very thin and helps the squash keep its shape.


2. Place squash in a roasting tin with olive oil, garlic and thyme. Season with salt and pepper and mix together with your hands to ensure all is well coated. Roast for 30 minutes.

3. Meanwhile, remove husks from corn and place in a large saucepan of water. Bring to boil, put a lid on the pan and simmer for around 20 minutes until tender. Drain and cool (run under cold water if short of time). When you are able to handle it, cut the kernels off the cobs trying to keep them in large panels rather than individual kernels. Use a sharp knife for this - the panels should come off fairly easily.

4. Remove squash from oven and add butter to pan immediately. Dot the chilli jam over the top and pop back into the oven for then minutes to give squash colour and a sticky glaze. Remove from oven and cool (optional)*.


5. Take a large salad bowl or plate and add the rocket. Add the squash and toss together. Add corn and fold through. Finally, crumble the feta cheese over the top.

Saturday, June 13, 2009

A lovely asparagus and quails egg salad


I'm always on the look out for simple starter ideas. When I have guests it is always here that I fall down. Usually I don't bother and just make some nice nibbles and canapés, or I'll whip up some smoked mackerel or chicken liver paté and invite everyone to dig in. But occasionally, a proper starter is called for. Here is where I fall down. I usually want something that can be made in advance, or that is very simple to prepare so that I can focus on the other parts of the meal.

This little salad fitted the bill perfectly - simple but extremely tasty and just the thing to whet the appetite without being too copious. I found the basic recipe
here on the Waitrose recipe site which I have only recently discovered.

I cooked the quails eggs and asparagus a little in advance and just assembled at the last minute. It was pretty and summery and I'll be making it again.

Asparagus and quails egg salad
Serves 8


5 sticks asparagus per person (normal size, not asparagus tips)
16 quails eggs
1 tsp Dijon mustard
1 clove garlic, crushed
2 tbsp white wine vinegar
6 tbsp extra virgin olive oil
1 large bag mixed salad leaves (rocket or baby leaves are good)
1 large bag watercress

1. Snap the asparagus stems at the end to get rid of woody part and then plunge into a pan of boiling water. Cook for around 4 minutes, until just tender. Drain and then lay stalks out on plates to cool.

2. Place quails eggs in a pan of cold water. Bring to boil, remove from heat and leave to stand for 30 seconds before removing the eggs and peeling them under cold running water.

3. Whisk together the mustard, garlic, vinegar and oil with a good pinch of salt and some black pepper. Put salad leaves and watercress in a large bowl and pour over half the dressing. Toss the leaves to coat and then divide between eight plates.

4. Toss the asparagus in the remaining dressing and pop 5 bits on top of each pile of leaves. Cut quails eggs in half and arrange four halves on each plate. Serve and enjoy!

Thursday, May 21, 2009

Brie, bacon and spinach omelette


I've spent much of last week looking after my two small nephews. The eldest is three and the younger is 18 months so I'm sure you can imagine that I was rather rushed off my feet. We had a lovely time but I was glad to have help on hand for some of the time. My mother came for a couple of nights and on one of the days cooked me this rather delicious omelette for lunch.

In fact this is more fritatta than omelette in that it is made with potatoes. Not only potatoes though, it also contains lovely melty brie, bits of bacon and a handful of spinach. Served alongside some salad it made for an extremely tasty lunch. I thought it was perfect hot with the brie melting into the other ingredients, but I can imagine it would work well cold too for a picnic or a filling lunch to take to work.

Her recipe came from one of those supermarket recipe cards. I think it was from Sainsburys - apparently it is also good if you switch the spinach for cooked green beans.
Brie, bacon and spinach omelette
Serves 2-3


Ingredients

3 large free range eggs
2 rashers of bacon, chopped (or use lardons)
5 spring onions, chopped
100g baby spinach leaves
100g cooked new potatoes, sliced
Approx 130g Brie


1. Cook the bacon in a non-stick frying pan until just golden then add the spring onions and cook gently for a further 3 minutes. The bacon should give off enough fat of its own accord, but if not, add a little olive oil. Meanwhile, cook the spinach in a little water and then squeeze dry.

2. Add the potatoes and spinach and heat through.

3. Slice the brie and lay the slices on top of the vegetable and bacon mixture. Pre-heat the grill.

4. Crack the eggs into a bowl and beat together with a fork. Season well with salt and pepper. Cook in the pan for a few minutes until the egg has started to set on the bottom. Place pan under the pre-heated grill to cook and brown the top. When just firm, remove from oven and slice to serve. Accompany with sliced tomatoes and a green salad.

Monday, January 05, 2009

Pea and lettuce soup with bacon crumbs


I felt faintly ridiculous this morning as my train pulled into Stevenage station and jolted me awake. It was snowing. Heavily.

As others trampled through the fluffy white stuff in their 'sensible' boots and shoes, shielded by large umbrellas, I teetered along umbrella-less in foolish shoes. One of the perils of a two hour commute is that I'm invariably dressed for the wrong sort of day. Upon leaving London at 7am it was dark and ever-so-slightly icy. At 9am in Stevenage there was a blizzard. You'd think that by now I would have learnt the lesson and ensure I was permanently equipped with umbrella/wellies/sunglasses/layers so that I'd be prepared for every eventuality. Some people never learn.

What with the wind whipping round my ankles, I was pleased when it got to lunchtime and I had something hot to eat rather than the usual sandwich. These cold days call out for steaming bowls of soup or plates of comforting stew. I plan to be making many more soups this month to take with me to work. Which brings me neatly onto this very tasty offering which was introduced to me last week by my mother.

My passion for peas verges on the fanatical. To be honest it is faintly embarrassing. Sadly though, a good pea soup recipe has been for some time lacking in my life. You see almost all pea soup recipes contain mint. And I loathe mint. Almost as much as I love peas. What's the problem? I hear you ask. Just leave the mint out. I've tried that but I've always felt that the finished product was somehow... lacking. That it needed a little something extra.


Fortunately my mother came to the rescue (...or rather one of the magazines that comes with the Sunday papers did - not sure which one...). I'm not sure if it is the lettuce or the bacon crumbs that lifts this soup from the ordinary but whatever it is, it works for me.

As with most soups, it is a cinch to make. We made this with cream but, to be honest, I thought it was completely delicious before the addition of the cream. I'm not convinced that it is necessary. And at this time of year when most of us could do without the extra calories, that can only be good news! You'll also see that the recipe uses water rather than stock. It was perfectly delicious with plain water but it you wanted to inject more flavour then you could use stock.

Pea and lettuce soup
(courtesy of one of the Sunday colour supplements!)
Serves 6


8 spring onions
1 garlic clove
2 little gem lettuces
50g butter
600g frozen peas (or spanking fresh ones, shelled)
1 litre water (or stock)
breadcrumbs made from 3-4 slices of bread
100g pancetta or smoky bacon
200ml double cream (optional)

1. Melt butter in a large saucepan. Add finely chopped spring onions and garlic and sweat gently for around 3 minutes.

2. Slice the lettuces into small pieces and add to the pan along with the peas. Pour over 1 litre of water. Stir to combine and bring to a simmer. Cover with a lid and simmer gently for 15 minutes.

3. Whilst the soup is simmering fry the pancetta until crisp along with the breadcrumbs - use a little extra fat if necessary. Chop very finely so you have crispy crumbs of bacon and breadcrumbs.

4. When the soup is ready, whizz with a stick blender or in a liquidizer. Taste and season with salt and pepper. Add the cream (if using) and stir to combine. Taste again and adjust seasoning as necessary.

5. Ladle into bowls and sprinkle a generous pinch of bacon crumbs in the centre.


Friday, December 19, 2008

Warming carrot and ginger soup


I've been a little quiet of late. Christmas is kind of like that, isn't it? Added to the general busyness that is Christmas shopping, wrapping, partying and card writing, my phone line has been down. No internet. Not amusing.

Anyway, all back up and running now. I'm about to whizz off to a work Christmassy thing but first I thought I'd share this scrumptious soup that I made earlier in the week. This is a recipe that I spotted in a magazine in the doctor's waiting room and tried to memorise it - it was part of a feature on Christmas canapés and the writer suggested serving the soup in little espresso cups, as I've done here.


I have to confess that I wasn't in fact having a party and no sooner had I photographed the soups (in very poor light) when I poured them back into a plastic bottle to take to work the next day for my lunch.

I can't remember the name of the magazine these came from and the quantities are slightly different to the original - my memory isn't that good! The warming ginger and slight kick of chilli is perfect for the time of year and is very good for you too - perfect for staving off those coughs and colds.

Carrot and ginger soup
Enough for tiny espresso cups, or 2-3 servings


Ingredients

300g carrots, roughly chopped*
3 small shallots, peeled and kept whole
2 cloves garlic, skin on
500g weak vegetable stock
2cm piece fresh ginger, peeled and grated

To garnish -
pinch dried chilli flakes (optional)
chopped coriander (optional)

1. Pre-heat oven to 200C. Put carrots, shallots and garlic on baking sheet and drizzle with olive oil. Season (though remember your stock may well be fairly salty. Roast for half and hour, or until carrots and shallots are soft.

2. Remove veg from oven. Squeeze garlic from its skin. Place veg in a blender and blitz. You may need to add a little of the stock to help it along.

3. Scrape the puréed veg into a saucepan, add the stock and ginger and heat, stirring to combine. Taste and season accordingly. You may like to add more ginger. Then again, you may not. At this stage, you may wish to blitz further to create a fully smooth and silky soup. I'm not so fussed here and didn't bother. It was fairly smooth anyway.

4. Pour into cups or bowl and top with a pinch of dried chilli flakes and a sprinkling of coriander.


* I used some large Chanteray carrots that I stumbled upon. They were particularly flavoursome and sweet.


Thursday, September 18, 2008

Chicken with ginger marmalade. Yes, really.


If you have decided to read past the title then I am thankful. I know this is not the most tempting-sounding recipe in the world. After all, marmalade is something best eaten on hot buttered toast for breakfast, is it not?

But here, you're eyes do not deceive you, I have decided to dish it up with a juicy chicken breast. Have I gone mad?

Indeed, it would be totally understandable if I had gone mad. Having been
ill all week, I finally decided to venture out this afternoon in order to rent a DVD with which to console myself as I missed a rather fun birthday party. Upon reaching the car, I discovered that it had been broken into. For the THIRD time in two years and the second time in six months. Each time I've had to have the door replaced and the entire car resprayed. As you can understand, in the immortal words of Queen Victoria; 'we are not amused'.

Having called the police and filed a report I then traipsed to the video shop only to discover that it had closed down earlier in the week. Again I tell you: 'we are not amused'.

Anyway, I'm still not fully recovered and am existing on a deeply uninspiring diet of toast, eggs and soup. So I thought I'd share a few things that I cooked up last week. Where better to start than with some marmalade-glazed chicken, I ask you?


With corn-on-the-cob, that's where. I'll woo you with this lovely butter-laden corn and you won't even notice the seamless transition to marmaladey chicken.

Corn is in season and it is delicious. If you haven't been eating it by the bucketful then I conclude that a) you don't like sweetcorn or b) you don't like sweetcorn.
If, however, like me, you think it is wonderful stuff, buy it with the husk attached and remove this and the silky threads before boiling until tender. You can grill it too. But how you actually cook it is of no interest to me (...or of little interest...). What I'm all about is the butter in which you smother it. After all, corn-on-the-cob is the ideal vehicle for the stuff, is it not?

My latest thing is to flavour the butter. A favourite is
lime, chili and coriander. You can make a nice roll of it and keep it in the freezer - just slice of little rounds as and when you need it. It is great with fish too. However, the cob you see in the picture is enhanced with a very simple flavoured butter. I simply melted the butter with a generous pinch of smoked paprika. Just delicious with the corn.


Oh - one more thing before I go on to the chicken dish - isn't this rainbow chard lovely? I served this with the chicken - just cooked it in a saucepan with a little garlic and some olive oil. I started with the stalks as they took a little longer to soften and then just wilted the leaves as I would spinach. Very tasty.

And now... The moment you've all been waiting for... The marmalade chicken....

It is not so crazy, you know. Duck is good with orangey things. Why not chicken? (Because chicken is totally different to duck is not an acceptable or helpful answer here incidentally).
The recipe came from a little supplement that came with BBC Good Food magazine which was called something along the lines of '101 things to do with chicken'. Actually it wasn't called that at all, but I am now unable to lay my hands on it.

You can use any kind of orange marmalade for this - mine just happened to be laden with ginger too. It thought it all the better for it. The chicken was lovely and sticky but wonderfully moist too. It was so good, that I'm almost loathe to spread the remaining marmalde on my morning toast. I might just save it for the chicken.
My ratios are slightly different to the recipe, so I give my version here...

Sticky ginger marmalade chicken
Serves 2


2 skinless chicken breasts
1/2 pint of chicken stock
2 heaped tablespoons of marmalade with ginger
pinch of chilli flakes

1. Heat a little olive oil in a pan and fry the chicken breasts for approx 10 minutes until golden, turning once and seasoning with salt and pepper as you go.

2. Pour in the stock and marmalade, giving everything a good stir to combine. Sprinkle over the chilli and then simmer gently for around 5 minutes. You want the sauce to become sticky and syrupy. If it reduces too much too quickly, add a little more stock. You want a little syrupy liquid to pour over. Taste and season as necessary.

3. Remove chicken from the pan to a plate and spoon over the syrup sauce. Serve, perhaps with fluffy mash and greens.


Don't forget: There is still plenty of time to think up a great entry for my exciting blogging event 'The British Food Fortnight Challenge'. The details can be found in my previous post - I hope you have thinking caps on as I can't wait to see your entries!