Showing posts with label Sauces/dressings/accompaniments. Show all posts

Saturday, September 17, 2011

Chinese plum sauce


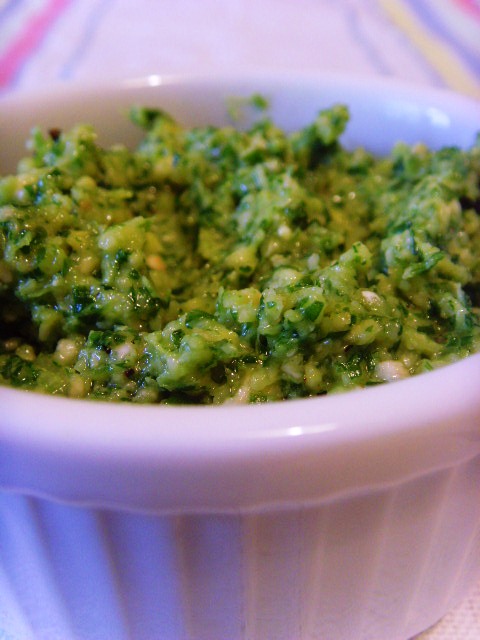
More plums courtesy of my colleague. This time I made a gloriously glossy Chinese plum sauce. Flavoured with ginger, garlic and star anise, this sauce will have add oriental flavour to many dishes over the coming months. It is brilliant as a dipping sauce or to serve with crispy duck pancakes, but there are more imaginative ideas too. No doubt I'll be using it as a base for many a stir-fry, but I'll also try using it as a baste for a pork joint and a glaze for roasted ham.

So far I've used it twice to make a delicious sauce to serve with duck breasts. Just heat in the pan you've seared the duck breasts in (minus the fat), add a little water to thin and bubble for a bit before pouring over the duck. It is so handy to have homemade sauces in the cupboard for nights when time is short - the duck dish makes a great dinner party main course with minimal effort. Roasted baby potatoes and carrots pureed with a little ginger and cumin went really well alongside.


I researched various different recipes, but eventually chose one from my favourite preserving book which is written by Thane Prince. It is called 'Jams and Chutneys - Preserving the Harvest'. As well as jams and chutneys, it also has great recipes for drinks, sauces, pickles and jellies. The recipe makes around 1 litre of sauce and keeps for up to a year. Decanted into pretty bottles and tied with a lovely ribbon, this sauce would make a lovely Christmas present for a foodie friend or a nice alternative to a box of chocolates when visiting friends for dinner.

Chinese Plum Sauce
From 'Jams and Chutneys - Preserving the Harvest by Thane Prince'


Ingredients:

2kg ripe plums (any colour but I used red)
750g white onions
Cloves from 1.5 heads of garlic
20cm piece of ginger
250ml light soy sauce
1 litre rice wine vinegar (not to be confused with rice wine)
1kg light muscovado sugar
6 star anise

1. Firstly, prepare all the ingredients. Roughly chop the onions and garlic. Peel and chop or grate the ginger. Grind the star anise in a pestle and mortar.

2. Halve the plums and remove the stones.

3. Put all ingredients except for star anise and sugar into a preserving pan. Bring to the boil  and simmer for 20 minutes until the ingredients are very soft.

4. Push the mixture through a fine metal sieve - hard work!! If you have a mouli, you'll be grateful as it will make much shorter work of this somewhat tedious and surprisingly strenuous task. Push through as much as you possibly can.

5. Return the sieved mixture back to the cleaned pan, add the sugar and ground star anise and bring to the boil, stirring all the time as the sugar dissolves. Simmer for 30-60 minutes until you have a thick, glossy sauce. Pour into sterilised bottles and label when cool

Friday, August 26, 2011

Plumbrillo


After a chaotic couple of months, we are installed in our new house and settling into our new village. Now that I'm feeling a bit better (thank you for all the good wishes) and have unearthed the kitchen equipment, I'm back to the stove and cooking away.


I was a little sad to leave the fabulous garden at our rental property complete with its many fruit trees. The plums were just ripening as the time came to leave and I hated to leave them on the tree for the next tenants. No need to worry though. As fortune would have it, I share an office with someone currently faced with a serious glut of plums. Last week I came home laden with four bags full of the little beauties and with a head full of ideas for transforming them into delicious treats. Four kilos of plums is quite a few to deal with. Especially considering that I'm not especially fond of stone fruit (odd, I know - it is a textural thing). I do love the flavour of plum though so I was keen to preserve the flavour whilst losing the fleshy texture I'm less fond of.


First up was this superb accompaniment to cheese. Plumbrillo is a fruity take on the superb membrillo which is often served alongside Manchego cheese. It is essentially a fruit 'cheese'. A thick, almost jelly-like confection which slices neatly and goes well with lots of cheeses.

It is easy to make and looks very impressive with its gleaming plum-red colour. The only hard part is pushing the cooked plums through a metal sieve. Next time I think I'll invest in a mouli which would make this job much less time-consuming! Whilst this looks best set into small moulds and turned out onto the cheese board, I actually poured most of mine into sterilised jam jars. This way it will keep for up to 6 months and will make nice presents at Christmas time. If you can find small, ramekin-shaped jars, these would be perfect.

I found the recipe on the BBC Good Food website, a great favourite recipe source.

Plumbrillo
Enough to fill approx. 7 small jam jars


Ingredients:

2kg ripe black or red plums
1kg jam/preserving sugar

1. Wash the plums. Quarter and stone all fruit and place in a large preserving pan along with 500ml water.

2. Bring to boil and simmer for around 45 mins until the plums have completely cooked down and are pulpy and dark.

3. Now for the hard bit! Pour the plums into a large bowl. Rinse out the preserving pan and then push the plum mixture through a nylon sieve (or use a mouli) into the cleaned pan. Try to extract as much of the pulpy flesh as you possibly can.

4. Stir in the sugar and heat, stirring all the time until the sugar dissolves. Turn up the heat and bring to the boil. Bubble for approx 25 minutes until you have a thick puree. The mixture is ready when a wooden spoon leaves a trail along the bottom of the pan for a second before the puree floods the gap.

5. Pot into sterilised pots or jars and seal. Leave to set and cool before labelling. Keep in a cool dark place for up to 6 months. 

Thursday, March 03, 2011

Greek-ish salad


I call this vibrant salad a Greek-ish salad as I have zero Greek credentials and everywhere I look there is debate and criticism on what a Greek salad really is. It seems that a number of Greeks get quite hot under the collar about this, perhaps their most famous national dish. Some insist that the salad should be onion-free whilst others say that finely sliced red onion is a vital component (and that this is the way their mother/grandmother/great-grandmother made it). Controversy also surround the use of cucumber which, to me, has featured in all 'Greek' salads I've ever tasted. There is also disagreement about herbs - fresh or dried? Dressing - plain olive oil, olive oil and lemon juice or something more elaborate?

My take on all of this is that there is no such thing as a truly 'authentic' recipe. There are recipes. There are variants. All are valid. There is no such thing as a 'wrong' recipe. There are many ways of creating a good 'Greek' salad. This version is mine and it contains the things that I love and the combination of flavours that work for me.


I served this alongside some harissa turkey burgers (recipe to follow) and it was a real hit. Wonderfully fresh, vibrant and crunchy and beautifully colourful too. If you can get those knobbly, hard-skinned cucumbers for this salad, so much the better. You'll definitely need to peel them and cut out the seeds but they are crunchier and (in my opinion) much more flavoursome. Obviously this salad is all about the quality of the ingredients - it would be miles better when tomatoes are actually in season. I was lucky enough to find some on-the-vine tomatoes with plenty of flavour in my local supermarket but I know this would have tasted much more wonderful with fresh-from-the-garden tomatoes, still warm from the sun! Go for the best feta you can afford too - there is quite a difference in flavour.

My Greek-ish Salad
Serves 2 as a side dish

Ingredients:

Half a red onion
1small  lemon
4 good-sized tomatoes
Half a long cucumber or a whole knobbly, crunchy one
100g good quality feta cheese
small handful Kalamata olives
4tbsp good quality extra-virgin olive oil (Greek, if possible!)
1 tsp dried oregano
salt and pepper

1. Half an hour before you want to eat the salad, slice the onion very finely and place in a bowl with the juice from the lemon. This will soften the onion and take away some of the harsh flavour of raw onion.

2. In a small bowl, measure out the olive oil and sprinkle in the oregano with a good sprinkling of salt and pepper. Set to one side.

3. Chop the tomatoes into bite-sized pieces and remove the seeds and mushy middle bit (unless you love seeds and mush, in which case feel free to leave them in!). Peel the cucumber and remove the seeds/fleshy core. Chop the crunchy flesh into small pieces. Cut feta into small cubes and olives into rough quarters.

4. Assemble the salad just before serving. Throw tomatoes, cucumbers, feta and olives into a bowl and mix gently to combine, season with salt and pepper. Sprinkle softened onions over the top and pour over most of the lemony juices over the salad. Use your judgement here - I found I used just under the juice of a whole lemon! Finally pour over the oregano oil which will mingle nicely with the lemony juices.

5. Devour and mop up the gorgeous juices with crusty bread!

This salad would be great with so many things - a side dish at a barbecue, alongside some simply-grilled fish or chicken, a summery lunch time dish, with grilled and marinated lamb chops....

And here is my lovely Sinbad enjoying the Spring-like sunshine in the garden. Absolutely irrelevant to this recipe, but equally lovely...


Sinbad, the husband and I are off on holiday next week. We're heading to Aldeburgh on the Suffolk coast. we plan to eat lots of fish and plenty of picnics (probably in the rain, knowing our luck!). Look forward to sharing it all on our return!

Friday, October 24, 2008

Vanilla ice-cream with 3 sauces


If you are ever feeling low and in need of a good laugh then can I heartily recommend a trip to the
Party Superstore at Clapham Junction on a Friday evening or Saturday morning?

This extraordinary shop is the setting of much hilarity. Above all, the shop is a fancy dress emporium selling and hiring literally thousands of different disguises. Upstairs you'll find every accessory you could possibly ever wish for including masks of the Queen, cowboy hats, fairy wings, feather boas and witches' broomsticks. But downstairs is where the real fun begins. The basement is home to a staggering array of costumes available for hire. You want to be superman for the night? No problem. A pirate? Well shiver me timbers if there aren't eight or nine suitable costumes to choose from. Cleopatra? Certainly.

I was there to pick up a 1920's flapper costume for a Great Gatsby themed birthday party I'm attending this weekend and I left with a huge grin on my face. The basement was packed with people selecting costumes for parties taking place over the weekend - three Irish men were dressed up as cowboys, one woman was trying to look virtuous as a nun and one (extremely attractive) man was dressed up as batman. He asked me what I thought of his outfit and I rather blushed as I gave it the seal of approval. What is it about superheros that makes us woman come over all funny??


After all that excitement I felt the need to cool off with a bowl of the supremely good ice cream I made last weekend. For some reason I've never made vanilla ice cream before. Other flavours, yes, but never plain old vanilla. I've always thought it to be rather dull. But now I've made my own, there is no looking back. The texture of homemade ice-cream is just so wonderful and really, I do think an ice-cream maker is worth every penny.

This recipe doesn't make a huge amount but it is exceedingly good. It is worth splashing out on really good quality vanilla pods. I spent a bit more than usual and bought
Ndali vanilla from Uganda. Apparently if is more concentrated than ordinary premium beans with notes of spice and caramel. Who knows, but I have to say that the flavour was exceptionally good.

But I'm afraid that good as it was 'au natural', I couldn't help but add a few good things to it when it came to serving. I give here three different options. First up is Mars bar sauce; a favourite from my childhood that I'm sure I'll never grow out of. Second is another favourite; Pedro Ximenez Sherry. This thick, treacley, unctuous Sherry is almost more of a food than a drink. Although I occasionally like to drink it on its own in place of pudding, my favourite way is to pour a little over vanilla ice cream. Just heavenly. If you have the time, soak a few raisins in the Sherry overnight and add the lot to the ice-cream. You won't be disappointed.


Finally, a sort of recipe for caramel apples. Divine with the ice cream too. Sadly no picture of this one - I greedily devoured the lot before getting the camera out!

Really good vanilla ice-cream


Ingredients

1/2 pint whole, full fat milk (seriously, there is no place for semi-skimmed in this recipe)
1/2 pint double cream
4 egg yolks
4oz golden caster sugar
1 vanilla pod

1. Pour milk into saucepan and slowly bring to the boil. As soon as it starts to bubble, take off the heat. Meanwhile split the vanilla pod and scrape out the seeds. Once the milk is off the heat, add the seeds to the pan along with the scraped pods. Leave to infuse for around half an hour.


2. Using an electric whisk or mixer, whisk the egg yolks and sugar together until fairly thick.

3. Remove vanilla pods from milk then pour the vanilla-infused milk into the egg mixture, stirring all the time. If using an electric mixer, just turn it to the slowest setting and pour slowly.

4. Once combined, pour the lot back into the saucepan and heat gently, stirring all the time until the custard has thickened. Caution is the word here - you don't want it to curdle which is what will happen if the mixture boils. If you are worried, you could do this in bowl set above a pan of simmering water. But you don't need to. Just be patient and keep stirring - once it coats the back of the spoon nicely, it is ready.


5. Leave mixture to cool (you could place bowl into a larger bowl of iced water to speed this up) and then chill in the fridge until cold.

6. When cold, mix in the double cream and then pour into your ice-cream maker according to the instructions. Usually, this will result in a very soft ice cream so I'd pop it in the freezer for a few hours to firm up before serving.

N.B. You don't have to have an ice-cream maker to make homemade ice-cream.
Click here for instructions on how to make it without a machine (plus some info on the benefits of using a machine if you possibly can..


Mars Bar Sauce

Please note: this may not be health-enhancing but it certainly is mood-enhancing!


Ingredients

1 Mars bar per person
Milk (I'll let you use semi-skimmed here, if you wish!)

1. Chop the Mars bars up into small pieces. Take a small, non-stick milk pan and add the Mars bars along with a reasonable splash of milk - the photo gives an idea of ratios!

2. Turn the heat on low and melt, stirring with a wooden spoon as you go until you have a lovely smooth sauce. Pour over ice-cream.

3. Be sure to leave a little in the pan - come back to it 20 minutes later when it has started to solidify a little. Be sure to gorge yourself on the remnants straight from the wooden spoon. Please do this. It will make me feel better!


Caramel apples

1 eating apple per person, sliced
equal amounts of butter and brown sugar (I used 50g of each for 3 people)
a little cinnamon

1. Melt butter in a frying pan and add the apple slices. Fry a little until starting to soften. Shake over the sugar and cinnamon and continue to cook and bubble, stirring all the time until the sauce has combined and taken on a caramelly colour. Serve alongside the ice-cream!


Sunday, April 27, 2008

One Perfect Ingredient: rocket and cashew pesto


Along with many food bloggers, I was lucky enough to get my hands on a copy of the new book by Marcus Wareing: 'One Perfect Ingredient'. In this book, Marcs uses everyday ingredients to create 120 dishes aimed at the home cook. It is organised by ingredient, so, for example filed under 'peas' you find pea and broad bean salad with Manchego cheese, gratin dauphinoise with peas and leeks and pea and bacon velouté. He pushes the idea of 'everyday ingredients' somewhat in my mind - how often do you just happen to have a pot of brown shrimps sitting forlorn in the fridge? Ditto mangoes. But on the whole I like the idea.

I'm always wary of cookery books written by chefs. All too often they are full of overly cheffy recipes that are hard to reproduce at home in a domestic kitchen without a brigade of sous-chefs chopping and clearing up after you. On the whole though, I was impressed with this book. There are the occasional signs that this is a man who probably doesn't do his own washing up (a tasty sounding recipe for Savoy cabbage with nut butter sounds simple but in fact uses a whopping four different pans). But most of the recipes seem fairly simple, well-explained and wholly achievable. And most of them are enormously tempting; an initial read-through found me eagerly grabbing the post-it notes to start bookmarking recipes to try soon. Amongst those that caught my eye were sea bass with a pine nut crust and red wine vinaigrette, carrot and coriander galette and orange syrup cakes. Photos in the book are simply and beautifully shot and are refreshingly short of cheffy flourishes. I would have liked to see more though personally - I'm a very visual person and am probably over 50% more likely to try a recipe if it is accompanied by a photo.

I decided to start with one of the books simplest recipes: linguine with rocket and cashew pesto. I'm pleased to say that it was a resounding success and I'm sure it will become a regular addition to my weeknight suppers. Everything is whizzed together in a food processor and the flavour makes a good change from basil pesto.


For four people, you'll need around 100g rocket, 100g cashew nuts which should be toasted in a dry pan, 40g freshly grated Parmesan and 100 ml extra virgin olive oil. Add the oil slowly - you may not need to use it all.

The pesto was great with the suggested linguine but I found some other used for the leftovers - I also found the flavour better the next day, once the flavours had had time to mingle. Spread on crostini and topped with a slice of cherry tomato (or sundried tomato), the pesto made for pretty and delicious little canapés...


Mixed with natural yoghurt, the pesto was also delicious along with cold sliced lamb stuffed into pitta breads, following last week's Sunday lunch.


I'll definitely be trying other recipes from the book. As far as chef-written (as opposed to cook-written) books go, Marcus Wareing has succeeded on coming up with a selection of interesting and exciting recipes which on the whole use simple ingredients and basic techniques. As such, the book had a fairly broad appeal - there is enough to interest the experienced cook and yet the recipes are clear enough for the less confident.

Sunday, February 03, 2008

Blood Orange Curd

I was very excited on Friday to receive my first organic fruit and vegetable box from Abel and Cole. For £9 a week, I get a good seasonal selection of produce delivered by a very friendly driver on a day that is convenient. Abel and Cole tell you what to expect in your box each week and you can specify if there are particular items that you do not like (fennel, in my case, which last week was changed for alfalfa sprouts). My first box looked like this...


Nothing too unusual, although the Arran Victory potatoes have purple skins, but a good selection. Citrus fruits were to the fore, unsurprisingly, and the box contained both mandarins and blood oranges. Such gorgeous fruits these - so surprising. The orange exterior gives little away - except for a touch of rosy pink on one of them. But cut into them and you are in for a glorious surprise - just look at these beauties...


You'd almost be forgiven for mistaking these for ruby grapefruit. The flavour is an interesting one and, I think, goes to show how eating is a process involving all the senses. You are seeing a deep red colour in the glass and yet... it tastes of orange. It is somehow... unexpected. Rather than eat these as they were, I decided I'd like to use their juice to make something delicious. I toyed with the idea of a jelly to start with, but eventually settled on making this delicious blood orange curd. I just adore lemon curd - all eggy and buttery and tangy - spread liberally on white toast (never brown - all wrong), crumpets, pancakes or sandwiching together a lemony cake. I figured that orange curd would be pretty good too.

Making jams, jellies, chutneys and curds gives me a great sense of domestic bliss and achievement. I urge anyone who has never done so to start with making an orange or lemon curd. It is just so simple and yet so satisfying. And what is more, they make lovely gifts - just think how thrilled someone will be when you go round for dinner and take a homemade gift as well as the requisite bottle of wine.

Sterilising jars may sound like a whole lot of faff, but really it isn't in the slightest. All you do is fill the sink with very hot, soapy water and throw empty jam jars and lids in to soak. The labels will eventually float off with a little help. Give them a bit of a scrub and then rinse under hot water. Place them on a shelf in a low oven to dry out until you are ready to use them. Hardly any trouble in that, is there?

But what about all those funnels and preserving pans and wax disks? Don't you need a lot of equipment? Not really. If you are making jam on a big scale, then yes, some of this equipment will help. But not for a simple curd. I would suggest investing in pack of wax disks - these usually come from any cook shop in a packet along with celophane disks and tiny plastic bands. These just keep everything nice and hygenic and clean.

I based my recipe very loosely on Delia's recipe for lemon curd.Obviously oranges are a lot sweeter than lemons, so I used less sugar and added quite a bit of lemon juice to balance things out a little. The result is much sweeter than lemon curd (next time, I'd use even less sugar, I think) but is absolutely delicious and such a pretty colour. I could eat it straight from the jar... Actually, if the truth be known, I have been doing exactly that as I am out of both crumpets and white bread (...did I mention that curds simply HAVE to be eaten with white, not brown bread, in my book. You can slather them on brown bread if you really must, but do so at your own peril!). If you are short of ideas for using up your curd, may I suggest using it to sandwich together an orange-flavoured Victoria sponge or meringues or even stirring it through some plain yoghurt?

Blood Orange Curd
Fills four regular jam jars


3 blood oranges

1 large, juicy lemon

4 large eggs

10 oz golden caster sugar

8 oz unsalted butter at room temperature

1 dessertspoon cornflour

1. Finely zest two of the oranges and then squeeze the juice from all three oranges and the lemon.

2. Crack the eggs into a large heavy-bottomed saucepan. Whisk the eggs a little.

3. Cut the butter into small pieces and add to the saucepan with all the other ingredients and place over a medium heat. Whisk with a balloon whisk for around 9 minutes, until thickened. Do not worry if it looks very unattractive during this stage. Mine looked as though the butter would never fully melt (I made the mistake of adding it rather cold) and meld with the rest, but it did. Just look how horrible it looked for a while...


4. Once the mixture has thickened, turn the heat down and simmer for a couple of minutes, continuing to whisk. Remove from heat.

5. Remove jam jars from the oven and place on a tea towel. Pour the curd into the jars whilst they are still hot. Any spills will be caught by the tea towel. Top each jar with a wax disk and seal jars whilst still hot.

6. Once the jars are cool, label and store in the fridge for up to 3 weeks.

Notes - don't panic if the curd looks a little too liquidy in the jar. Once it has been in the fridge, it will firm up a little more.

Sunday, June 10, 2007

Salmon noodle parcels with chilli, coriander and lime butter

This recipe is one I found in BBC Good Food Magazine (http://www.bbcgoodfood.com/) and is ideal for a quick but delicious weeknight supper, or even worthy of serving at a casual dinner party. It caught my eye as it was part of a feature on flavoured butters and I just so happened to have some chilli, coriander and lime butter in the freezer which needed using up. Flavoured butters are so handy to have stored in the freezer or the fridge as they instantly perk up all sorts of plain dishes from grilled meats to steamed vegetables. In one book I have, it suggests they will keep for up to 9 months in the freezer (BBC Good Food suggest one month), but certainly they will last a good while and are an excellent standby.

So first, the butter...


Ingredients
250g/8oz unsalted butter, softened
1 large handful of chopped coriander
1 fresh red chilli, seeded and finely chopped
1 tbsp lime juice AND/OR the rind of 1 lime
Good pinch sea salt
Good grinding black pepper

1. Place all ingredients in a food processor or blender and whizz until well blended.

2. Scrape out the butter onto a square of foil or cling film and roll up like a sausage, securing the ends -


3. Refrigerate or freeze. Slice small rounds off the butter as and when needed.

Notes - this butter is delicious with corn on the cob, grilled chicken and most fish.

Other ways to flavour butter (thanks to 'Barbecue' by Eric Treuille and Birgit Erath as well as BBC Good Food for ideas)-

Garlic and parsley (5 crushed cloves, 1tbsp lemon juice, handful parsley)

Blue Cheese (use 4 oz and plenty of pepper but not salt). Great on steak.

Black olives (use 100g and some thyme leaves)

Basil, Parmesan and tomato (4tbsp grated Parmesan, basil and 1tbsp sun dried tomatoes).

Horseradish and chive (2 tbsp horseradish cream, lots of pepper, 2 tbsp chopped chives). Try with trout.

Onto the salmon dish -

Ingredients (for 2)

2 salmon fillets

100g/2oz rice noodles

2 handfuls of frozen peas (or fresh, when in season)

85g/3oz chilli, coriander and lime butter

3 spring onions

1. Pre-heat oven to 200C. Put noodles in a bowl and cover with boiling water. Leave for 2 minutes until bendable but not too soft. Drain well. Add chopped spring onions, peas, salt and pepper and a third of the butter.

2. Mix until butter starts to melt (see notes).

3. Pile noodle mixture onto 2 large squares of baking paper and place salmon on top. Slice remaining butter and place on top of the salmon.

4. Make a parcel with the paper - bring both sides to the centre and fold, tuck ends under so there are no gaps.

5. Bake in the oven on a baking sheet for 15-20 minutes. Serve immediately.

Notes - My local shop did not have regular rice noodles, only the ones that are already cooked and go 'straight to wok'. I was worried these would not be as good, but they were in fact excellent. Of course they were cold so I had to melt the butter before mixing in and then cooked the salmon for slightly longer as the dish did not have the initial blast of heat from the noodles.

If you have guests, I would recommend serving these in their parcels at the table as the aromatic fug that emanates upon opening the parcels is wonderful!

Wine Suggestions -

A nice fresh, aromatic sauvignon blanc from New Zealand or South Africa would work well here, as would a limey New World Riesling. We enjoyed it with a slightly herby, slightly off-dry rose from Bandol which was delicious