Friday, August 26, 2011

Plumbrillo


After a chaotic couple of months, we are installed in our new house and settling into our new village. Now that I'm feeling a bit better (thank you for all the good wishes) and have unearthed the kitchen equipment, I'm back to the stove and cooking away.


I was a little sad to leave the fabulous garden at our rental property complete with its many fruit trees. The plums were just ripening as the time came to leave and I hated to leave them on the tree for the next tenants. No need to worry though. As fortune would have it, I share an office with someone currently faced with a serious glut of plums. Last week I came home laden with four bags full of the little beauties and with a head full of ideas for transforming them into delicious treats. Four kilos of plums is quite a few to deal with. Especially considering that I'm not especially fond of stone fruit (odd, I know - it is a textural thing). I do love the flavour of plum though so I was keen to preserve the flavour whilst losing the fleshy texture I'm less fond of.


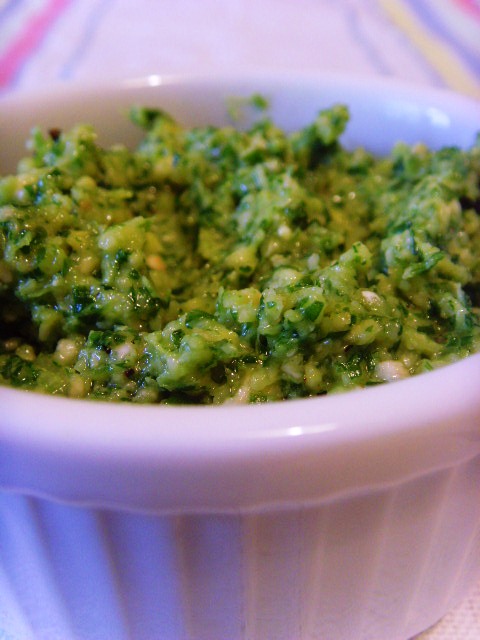
First up was this superb accompaniment to cheese. Plumbrillo is a fruity take on the superb membrillo which is often served alongside Manchego cheese. It is essentially a fruit 'cheese'. A thick, almost jelly-like confection which slices neatly and goes well with lots of cheeses.

It is easy to make and looks very impressive with its gleaming plum-red colour. The only hard part is pushing the cooked plums through a metal sieve. Next time I think I'll invest in a mouli which would make this job much less time-consuming! Whilst this looks best set into small moulds and turned out onto the cheese board, I actually poured most of mine into sterilised jam jars. This way it will keep for up to 6 months and will make nice presents at Christmas time. If you can find small, ramekin-shaped jars, these would be perfect.

I found the recipe on the BBC Good Food website, a great favourite recipe source.

Plumbrillo
Enough to fill approx. 7 small jam jars


Ingredients:

2kg ripe black or red plums
1kg jam/preserving sugar

1. Wash the plums. Quarter and stone all fruit and place in a large preserving pan along with 500ml water.

2. Bring to boil and simmer for around 45 mins until the plums have completely cooked down and are pulpy and dark.

3. Now for the hard bit! Pour the plums into a large bowl. Rinse out the preserving pan and then push the plum mixture through a nylon sieve (or use a mouli) into the cleaned pan. Try to extract as much of the pulpy flesh as you possibly can.

4. Stir in the sugar and heat, stirring all the time until the sugar dissolves. Turn up the heat and bring to the boil. Bubble for approx 25 minutes until you have a thick puree. The mixture is ready when a wooden spoon leaves a trail along the bottom of the pan for a second before the puree floods the gap.

5. Pot into sterilised pots or jars and seal. Leave to set and cool before labelling. Keep in a cool dark place for up to 6 months. 

Wednesday, July 06, 2011

A pause


I've had a pause and I'm going to continue pausing for a little while.

I've had some health problems over the past few months and I'm still trying to get to the bottom of them. Nothing serious hopefully but it all centres around my stomach meaning that food-related reading and writing have been a little... off the menu. I'm fed up of feeling permenantly queasy and uncomfortable and, worst of all, the whole thing has put me off one of my very favourite pleasures in life... food! It is hard to enthuse about the cooking when you don't feel much like eating.


On the better days, I have been busy in the kitchen and there is actually much to report. I hope to get back to it very soon. But first, we have the small matter of a house move. We have finally found a permanant home (after a ten month stop-gap) so I'm currently surrounded by packing boxes for the second time in twelve months. It will take a while to get back online but I expect to be back to blogging in a few weeks time!

In the meantime, I hope you like these pictures I took the day my pup, Sinbad, was momentarily reunited with his sister, Bramble, who has spent the past year living in Germany.


Two peas in a pod!

Monday, May 30, 2011

Baked Sea Bream with Potatoes and Thyme


What a busy month. I can't belive that we are almost in June - what happened to May? I've been busy with a new job, recovering husband (from a slipped disc), weekend guests, our wedding anniversary and buying a new house. I've been busy cooking and have lots to share but time to do so has been scarce. Here's hoping for a more relaxed June!

We've been enjoying lots of fish recently. Inspired by a favourite recipe book (Mitch Tonks - 'Fish'), we tried out an interesting dish with two beautiful gilt-head bream which my husband picked out at our local fishmonger. Sea bream is becoming a real favourite of ours - flavoursome without being too 'meaty' in texture. We find that a whole fish is just right for my husband but a little too much for me - it all depends on appetite. Bream can take some pretty punchy flavours and this recipe is full throttle with red peppers, roasted garlic, thyme, olives, tomatoes and chilli. It had a distinctly Mediterranean feel to it and was superb with a full-flavoured southern French rose.


This is an all-in-one dish with potatoes cooked under the fish, a garlicy tomato sauce with roased red peppers all topped with crispy chilli-flecked breadcrumbs. We like a bit of greenery and served some green veg on the side too, but it wasn't really necessary. Mitch Tonks' recipe used a rather startling amount of oil in which to cook the potatoes. I couldn't bring myself to use as much as he suggested (200ml) and next time I would use even less. I've put the quantity I used here, but I did find the potatoes a little oily. We were also out of olives which was a shame, but it was delicious without too.

Baked Sea Bream with Potatoes and Thyme
Adapted from 'Fish' by Mitch Tonks


Serves 4 (although we ate the lot between 2, using smaller fish, half the quantity of garlic and fewer potatoes)

Ingredients:

4 waxy potatoes such as Charlotte
1 red pepper
1 head garlic, unpeeled
3tbsp olive oil, plus extra for drizzling
1 tbsp fresh thyme leaves
2 sea bream, about 450g each (or smaller if only 2 of you). Ask the fishmonger to scale and gut!
6 whole canned tomatoes
1 pinch dried chilli flakes
50g black olives (optional)
50g fresh, coarse breadcrumbs drizzled with olive oil

1. Preheat oven to 240C.

2. Peel (or scrub) potatoes and blanch in boiling water for a few minutes. Drain and dry and set to one side.


3. Place the pepper (whole) into a roasting tin with the whole head of garlic. Drizzle with olive oil and sprinkle with salt. Roast in the oven for approx 15 minutes. Remove the garlic from the tray (checking first that the cloves are soft and squidgy). Return pepper to oven and roast for 5 minutes more or until soft and blackened. Place pepper in a plastic bag, seal the top and leave to cool.

4. Divide the garlic into individual cloves, but do not peel. When the pepper is cool enough to handle, remove skin and seeds, reserving any juices.

5. Pour the olive oil into an ovenproof dish (large enough to hold both fish). You need enough oil to coat the bottom of the dish. Arrange the potato slices over the bottom and sprinkle with sea salt and the thyme leaves.

6. Rub the fish with a little olive oil and salt and arrange on top of the fish. Bake in oven for around 12 minutes.

7. Remove fish from oven and arrange the garlic cloves and olives around the fish. Slice pepper into strips and arrange in the dish too. Squeeze tomatoes over the fish and potatoes to release the juice and add these to the dish too. Pour any juices from the pepper over the fish and sprinkle the chilli flakes over the top. Sprinkle breadcrumbs over the top of everything and bake for a futher 8 minutes, until the breadcrumbs are golden brown.


8. Place the dish in the centre of the table and dig in!

Friday, April 29, 2011

Royal Wedding Red Velvet Cupcakes


What a wonderful British celebration! 


Here at Food, Glorious Food! HQ, we've thoroughly embraced Royal Wedding mania. It rather snuck up upon me. I wasn't feeling overly festive until a couple of days ago when suddenly I came over all patriotic and excitable. I was helped by our village who organised a fantastic Street Party to celebrate the 'big day'. Bunting and Union Jack flags started to appear and I found myself busy planning an appropriate street party menu.

How fortuitous it was that the theme for this month's Forever Nigella should be 'Street Party'. A few weeks ago whilst out shopping I found a set of 'British' cupcake cases and royal-themed toppers and decided that a tray of cupcakes would be a good thing to share with the neighbours. The cases themselves were blue and so, playing on the British theme, I thought that bright red velvet cupcakes with white cream-cheese icing would fit the bill. I'd recently made a red velvet cake for a hen party and had been quite pleased with the results so felt keen to attempt a smaller version. Conveniently, Nigella has the perfect recipe in her newest book 'Kitchen'.


You have to be fairly brave with the food colouring to make these cakes. It takes almost a whole pot of red food colouring paste to turn these cakes into this startling shade of rouge. As I scooped the batter into my waiting cupcake cases, I thought it looked rather as though I'd squirted tomato ketchup into them by mistake. My husband thought it looked as though I'd had a nasty run-in with a kitchen knife.

I found that the mixture made a few more than the stated 24 cupcakes but I don't make huge ones. Similarly, I seem to have a huge amount of icing left over, despite topping with a reasonably generous blobs. If you like your cakes to be more icing than cake, then the full amount may be just perfect.


The cakes worked perfectly and sprinkled with little hearts and topped with royal symbols, they went down a treat at the party. I also took along this leek, bacon and mustard quiche and an interesting broccoli salad.

Other treats included this fantastic Union Jack cake...


The street party was exactly what it should be. A terrific celebration, utterly British in character and a great oppotunity to get to know neighbours better. There was music, bunting galore, silly hats and a great sense of fun.


Forever Nigella is one of my favourite food blogging events, devised by Sarah at Maison Cupcake and hosted, this month, by Mardi at Eat, Travel, Live, Write.

Wednesday, April 27, 2011

Simnel Cake


We spent Easter on the Isle of Wight at my parents' home. Lovely sunny days and catching up with family. My husband is still suffering with a slipped disc but we were able to manage a short dog walk together along the beach which was a small thing but so nice after five weeks of walking without him.

My Mum asked me if I'd bake the Simnel Cake. I was marginally disappointed as I absolutely LOVE my mother's Simnel cake and knew instantly that mine wouldn't match up. However, as I've never made one and it is possibly my favourite kind of fruit cake, I was up for the challenge.

Oddly, despite owning an entire library of cookery books, recipes for a traditional Simnel cake were few and far between. I found a few 'modern' versions including Simnel cupcakes and Delia's version which houses lumps of marzipan rather than the traditional disc in the centre. But I wanted a totally traditional version. This is what I've grown up with and this is what I wanted. I finally found a suitable recipe in Nigella's 'Feast'. I followed the recipe precisely and you can find it here.

Cake batter, then a disc of marzipan and then more cake batter

Originally the Simnel cake was baked to celebrate Mothering Sunday but, over the years, has become synonymous with the Easter celebrations. I like mine to be a good deal lighter than a Christmas cake and for it to have plenty of sweet spices. In an ideal world, I would make my own marzipan. It is so much better than the bought version. My mother usually makes her own and it makes all the difference to this cake. It sort of 'melts' into the cake whilst I found the middle layer of marzipan remained a little firm in this version. I also found the timings to be out - my cooker is usually pretty accurate but this cake needed a good 15 minutes longer. In fact, it needed longer than that. I took it out a little early and it sunk in the middle. If this happens, do as I did and simply turn the cake upside down before topping with marzipan. That way you have a nice flat surface to work with!

Take a little time witht the top of the cake. Roll out the disc of marzipan and glue onto the cake with some apricot jam. It looks nicest if you 'crimp' the edge by pinching all along the edge with your thumb and forefinger. Next, score a grid pattern on the top of the marzipan - the uneven texture on the top helps the marzipan brown when the blowtorch is applied. Arrange all the balls (apostles) on top of the cake before 'glueing' in position. It takes a little effort to get them all evenly spaces. Pick them up one at a time and glue into position. Sounds obvious but if you start glueing immediately, you may get to the end of your circle and still have two balls to fit in! Finally, brush the top of the marzipan (and the balls) with beaten egg and carefully brown with a blow-torch or under a hot grill. Go carefully as it is easy to burn the top!

However, despite these few niggles, the cake was delicious and well received. I'd make it again but next time would definitely go to the extra length of making my own marzipan.


The fluffy chickens are, in my mind, absolutely obligatory. I can't imagine Easter without them. You may feel different. In which case a little pile of chocolate eggs or perhaps some sugar flowers would look more.... tasteful!


Easter Cake Bake

I am entering my traditional Easter bake into Julia's 'Easter Cake Bake 2011' over at 'A Slice of Cherry Pie'. I hope that she likes it!

Thursday, April 14, 2011

Hotel Chocolat Competition Winner


It has been a funny few weeks. My husband has slipped a disc in his back and has been off work in agony. Somehow, him being at home has meant that I am behind with all sorts of things. I am spending far too much time sitting, chatting to him whilst he lies flat and far too little time tending to household tasks, cooking and blogging.

Hence my delay in posting the winner of my Hotel Chocolat competition. Apologies all round.

Anyway, today I remembered and dilligentlly wrote all the entries on small pieces of paper, folded them and popped them into a hat. I then enlisted the help of my two trusty companions (husband and dog) in randomly selecting a winner.


So. Who did they pick...?


Happyfox. Congratulations - a delicious Hotel Chocolat Easter Egg will be heading your way very soon.

Click here to enter our Easter Competition

 
For those who missed out, fear not! Hotel Chocolat are running their own very exciting competition. They are looking for a name for their latest chocolatey creation and you can be the person to invent it. The winning entry will receive a fabulous chocolate hamper worth £75. Hop over to their website to enter.

Sunday, April 03, 2011

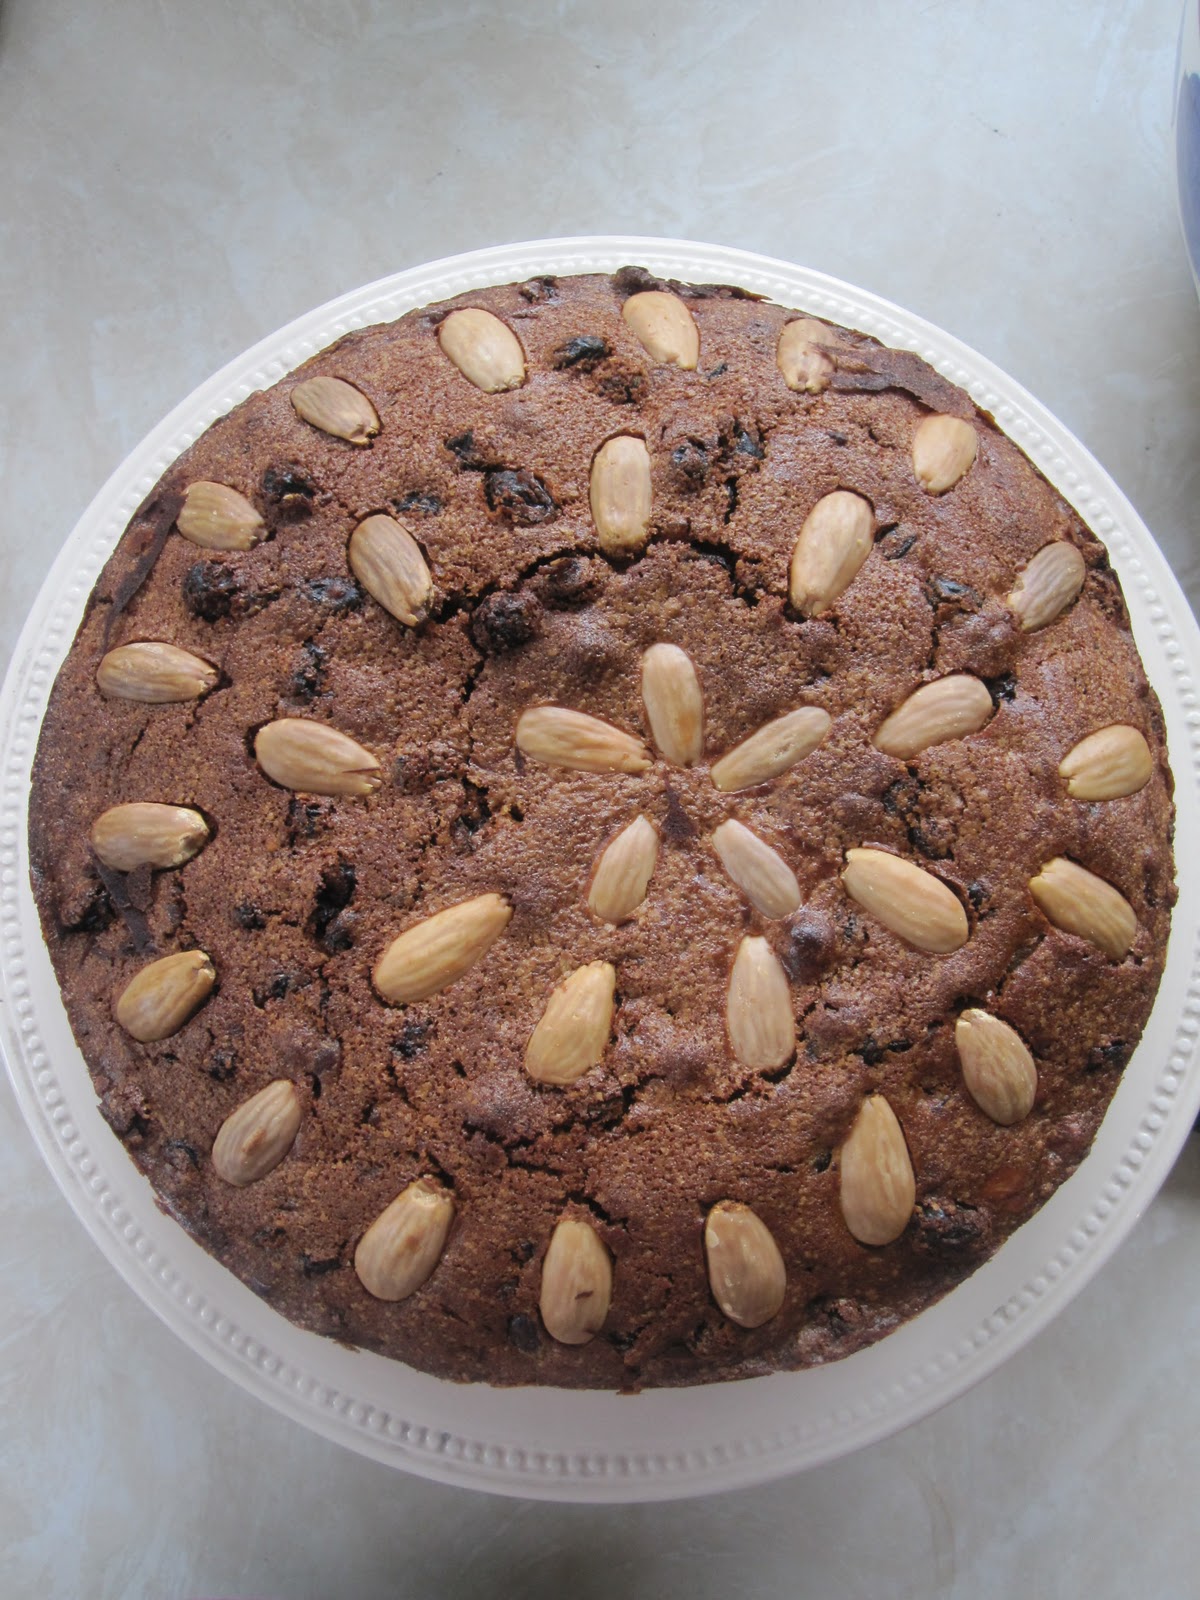
Dundee Cake: Baked and Delicious


I'm a total sucker for a foodie magazine. My house is over-run with back copies of most of the major food magazines available and I refer to them constantly for inspiration. Despite having numerous handy recipe files, I am hopeless at sorting through the magazines and cutting out the recipes that interest me.

Baked and Delicious

I was excited to hear of a new magazine which has recently hit the shelves of our newsagents. Baked and Delicious is a part-series collection-type magazine dedicated to the art of delicious baking. Each issue is packed with inspiring recipes for traditional cakes, savoury bakes and tarts, breads, celebration cakes, scrumptious desserts, biscuits and patisserie. Each recipe is clearly illustrated and certain more complex techniques are covered in details with step-by-step guides. But most excitingly, each issue comes with an item of silicone bakeware. Collect each issue and soon you'll have a set of cupcake cases, a loaf pan, tart tin, heart-shaped mould and handy accessories such as a silicone spatula and pastry brush.

I was fortunate enough to receive a copy of the first issue for review. I liked the layout of the magazine and the variety of recipes. I also appreciated the tips for variations on certain recipes  and the detail about the origin of some of the bakes. This issue comes with a set of silicone cupcake cases but rather than try the cupcake recipe, I thought I'd try something I hadn't made before. My husband loves fruit cakes and so the Dundee cake was the ideal choice. The recipe was easy to follow and the cake turned out beautifully. I particularly appreciated the tip of making a slight dip in the cake mixture to prevent the cake rising to a point in the middle. Why haven't I thought of that before?! I was initially a little disappointed by the number of recipes in the magazine but, on reflection, I think there are enough. Importantly, the recipes are all very different (Mediterranean tarts, fougasse, macarons, chocolate fondant puddings, lebkuchen, choux pastry) and I am sure I will try a few of the others in the weeks to come.


This would be a great magazine for novice bakers who are keen to collect a great set of bakeware whilst learning a variety of techniques. But it is also suitable for keen cooks, looking to expand their repertoire and try some new bakes.

You can find all the details about this magazine collection on the Baked and Delicious website.