Saturday, August 22, 2009

Recipease


Living in London, I'm frequently surprised with the constantly changing face of the streets around me. Every couple of weeks a shop or restaurant will close, only for another to open in its place. Sometimes this is sad, as in the case of the excellent independent toy shop which metamorphosed into a Costa coffee. But sometimes it is exciting, as in the case of the lovely new bakery and cafe which recently opened on the Northcote Road.

Earlier this year, I was intrigued when wooden boards went up around a high street building society. These boards were plastered with Jamie Oliver's name and I wondered what on earth to expect. Surely he wasn't opening the latest branch of Fifteen in the shadow of Clapham Junction tube station?

Indeed, no he wasn't. A few months later and the boards were removed. Behind them was a branch of his new venture 'Recipease'. This shiny new store has been attractively Jamie-fied. At the front, shoppers can buy all kinds of Jamie merchandise, including some rather lovely wooden chopping boards. There is also food for sale, much of it packaged in over-sized Kilner jars. Imagine mustards, chutneys and jams. And bread too. Lots of bread. Foccacia. And the most expensive Chelsea buns you are every likely to eat. The busy shopper can also buy pseudo ready-meals freshly prepared instore to take home and throw in a pan for supper. You can even buy the wine to go with it.


But at the heart of the shop are several huge workstations where you can assemble your own meals. There is a pizza station where you can create your own signature toppings. Or you can select from a changing menu of different dishes to prepare. All the chopping and preparation is done for you - you just book a session, turn up and create one (or two) of Jamie's mouthwatering recipes.

As well as this, you can also book in for cooking lessons focusing on a particular skill - knife skills, risotto, cooking the perfect steak, pasta to name just a few. The best news, these classes are a great deal cheaper than many other cookery demonstrations in the capital.


I haven't sampled the 'ready-meals' and nor have I booked in to assemble my own Jamie recipe. But recently I took part in a very fun hen party that included a pasta-making session at Recipease. Upon arrival, we were greeted with glasses of wine (...tea, coffee and soft drinks were provided too but these were rather ignored in favour of the wine!). We then set to work with our excellent and highly enthusiastic chef. She showed us how to make pasta dough and then we all headed to our own workstations to make our own. Once all twelve of us had enough spaghetti, tagliatelle, ravioli and caramelli to feed an army, we then made a super sage butter sauce to accompany the ricotta and spinach stuffed pasta shapes. Divine!

I would thoroughly recommend a private party at Recipease of this type - it was great fun and a real ice-breaker. I think we could have used another member of staff as twelve novices making pasta was somewhat chaotic and our chef could only help one of us at a time! However, it was great fun and despite making a horribly dry-feeling dough that fell apart in the pasta machine, I ended up with some quite delicious pasta. I clearly need practise...

Recipease, 48-50 St John's Road, Battersea

Friday, August 14, 2009

A low-fat chicken curry that is rather good

A strange thing happened to me on Wednesday night. I was preparing a butternut squash for roasting and, after I had peeled it, I noticed that my hands were becoming most uncomfortable. Sort of tight and dry. No amount of hand cream or washing would relieve the feeling. I then watched with some alarm as the skin of my hands started to peel off. It was revolting and rather unnerving. Thank heaven for google! I raced to the computer and typed in 'strange skin reaction to butternut squash'. It seems that this is a quite common problem - many people experience the tightness but the peeling skin is quite a strong reaction. Oddly, I've handled butternut plenty of times before with no ill effect... I wonder if anyone else has experienced this? One article likened the effect to that of a chemical peel - perhaps I should be grateful for the now soft and rejuvenated skin on my and?

Anyway, moving swiftly on. The flower-sender and I are trying to eat a little more healthily in order to shift a few pounds before the wedding in May. We are keeping this a secret as I don't want to feel under any pressure to transform myself into someone I'm not. Frankly, we both love food far too much to ever be as thin as we might wish. I'm not planning to give up my love of cake just so I can fit into a smaller wedding dress. But it would be nice to be a little healthier and so we are trying to change a few things.

One of our initiatives is to try and make healthier versions of favourite high-fat dishes without compromising on taste. We are particularly pleased with this recipe which we found in a Weight Watchers cookbook called
'Delicious'. We loved the creamy, rich-tasting tomato-based sauce and the aromatic flavour of the ginger and lime leaves. We tinkered a little with the recipe, adding some extra vegetables. We made this with left-over roast chicken which worked very well, but the recipe below gives directions for cooking the chicken. If you want to use leftovers, add the chicken to the pan once the initial veggies have softened - just before you add the liquid. The addition of thinly sliced mange tout is far more than just a garnish - the refreshing crunch really adds something to this curry.

Fragrant Chicken Curry
Based on recipe from
Weight Watchers Delicious cookbook
Serves 4

low fat cooking spray (or tbsp oil)
600g skinless, boneless chicken breast, cut into bite-sized chunks
1 red pepper, sliced
1 large onion, sliced
150g sliced mushrooms
1 bag spinach
1 inch fresh ginger, grated
2 garlic cloves, crushed
2 freeze dried lime leaves
1 tsp mild or hot chilli powder
1 tbsp mild curry powder
50g low-fat soft cheese
1 x 400g can chopped tomatoes
150ml chicken stock
handful chopped fresh coriander
large handful mange tout, shredded finely lengthways

1. Heat a non-stick saucepan or wok and spray with cooking spray/add oil. Add chicken chunks and cook for around 5 mins until sealed all over. Remove and set to one side.

2. Spray/add a little more oil if necessary and add the pepper, onion, mushrooms, ginger, garlic and lime leaves. Cook for a minute or so until starting to soften. Stir in the chilli powder and curry powder and return the chicken to the pan, stirring constantly for a minute.

3. Add the soft cheese, tomatoes and stock. Bring to boil and simmer gently for 10 minutes until thickened and the chicken is cooked. Serve with rice, topped with the coriander and shredded mange tout.

For anyone who is interested and knows how Weight Watchers works, this curry (without rice) is amazingly just 2.5 points per portion. And the portion was pretty generous - we felt very full afterwards.

Thursday, August 06, 2009

Summer squash and sweetcorn salad


Since I am now mainly cooking for two people, rather than one, I decided that it was time to re-instate my weekly veg box order. This week I was delighted to receive a rather attractive pattipan squash. I usually associate squash with the autumn and had a brief moment of depression when I wondered whether summer really was over already.

I then read the accompanying recipe sheet and realised that this was a variety of summer squash. I also read the accompanying recipe and decided that it sounded rather good. It was for a salad of roasted squash and corn (torn off the cob rather than from a tin!) with rocket, feta and a sweet chilli glaze. We decided to roast a chicken and serve it alongside the bird for a summery supper.

I made the classic error of not reading the recipe through before I started and I then realised that both the corn and squash needed time to cool before adding to the salad. I didn't have time for this and the squash was fresh out of the oven when I added it to the peppery rocket leaves*. It actually didn't matter a bit and was perfectly delicious as a 'warm' salad. As we were eating it immediately, the leaves didn't wilt at all. However, we did have to throw the excess away which was a shame. Next time, I'll make it with more time to spare and try a cold version to take for lunch at work.

Summer squash and sweetcorn salad
Serves 4 as a starter or side-dish (2 as a main)
Recipe from Abel and Cole

Ingredients

1 summer squash (we used a pattipan squash, the recipe suggests onion squash)
1 garlic clove peeled and chopped
5 sprigs fresh thyme
1 tbsp olive oil
2 cobs sweetcorn
1 tbsp butter
1 tbsp red chilli jam (I used
Jules and Sharpie red pepper jelly)
1 bag fresh rocket leaves
100g feta cheese (recipe suggests 200g, but this seemed too much to me)

1. Preheat the oven to 200C. Halve the squash and scoop the seeds out with a spoon. Cut into small wedges or chunks of around half and inch square. Keep the skin on as it is very thin and helps the squash keep its shape.


2. Place squash in a roasting tin with olive oil, garlic and thyme. Season with salt and pepper and mix together with your hands to ensure all is well coated. Roast for 30 minutes.

3. Meanwhile, remove husks from corn and place in a large saucepan of water. Bring to boil, put a lid on the pan and simmer for around 20 minutes until tender. Drain and cool (run under cold water if short of time). When you are able to handle it, cut the kernels off the cobs trying to keep them in large panels rather than individual kernels. Use a sharp knife for this - the panels should come off fairly easily.

4. Remove squash from oven and add butter to pan immediately. Dot the chilli jam over the top and pop back into the oven for then minutes to give squash colour and a sticky glaze. Remove from oven and cool (optional)*.


5. Take a large salad bowl or plate and add the rocket. Add the squash and toss together. Add corn and fold through. Finally, crumble the feta cheese over the top.

Friday, July 31, 2009

Bakewell Cake

It has been a very social fortnight with not one, but two big parties held at my flat. Though we haven't quite had the 'barbecue summer' we were promised, Mother Nature was kind enough to turn the taps off on the both occasions. The day of our engagement party was a little nerve-wracking. We were expecting around thirty for a barbecue in the garden. It poured on and off all morning and we spent the time setting things out and then racing out to bring them all in again. Fortunately, the afternoon was largely dry and we had a great day.

My cousin's hen party was a week later and we were even blessed with a few rays of sun - quite a bonus!

On both occasions, I'd been busy in the kitchen. The flower-sender did the barbecuing, but I did all the salads and a serious amount of baking. Strawberry cupcakes and chocolate brownies were popular, but my personal favourite was a deeply almondy Bakewell Cake. Like Bakewell tart, only in cake form. I made it for a friend whose birthday happened to fall on the day of our party and she seemed pretty chuffed with it. Of course, I gave the leftover cake to her to take home but I have to confess I was rather sorry to see it go. I think I'll have to bake it again soon.


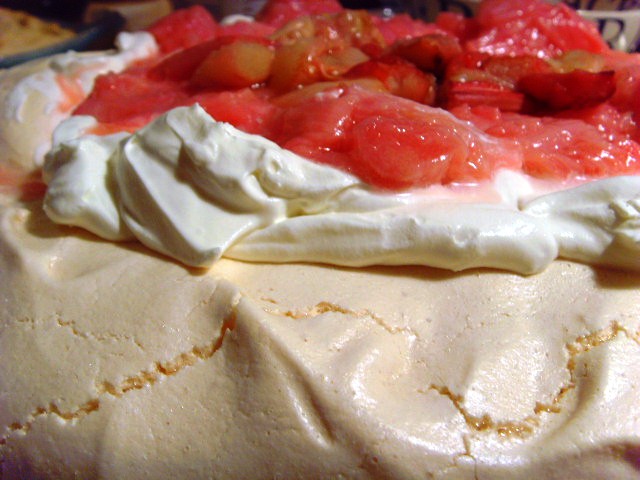
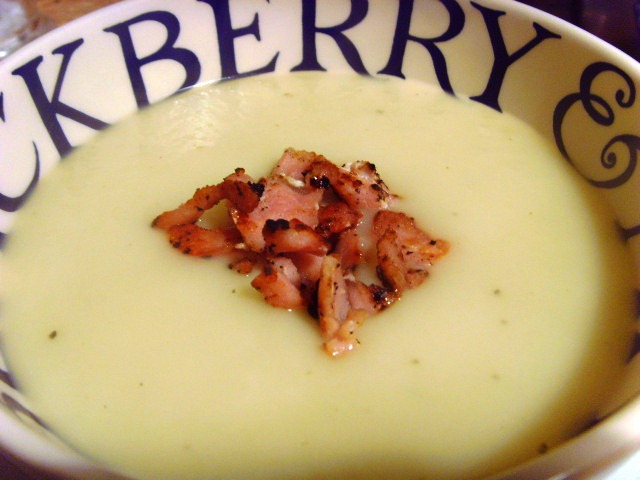
As with so many of my favourite recipes, this came from BBC Good Food. I made a couple of adjustments though. I much prefer raspberry jam to cherry so filled it with this. I also chose to ice the cake so it looked more like my idea of a proper 'Bakewell tart'. Despite what the picture at the end of this post might lead you to believe, it was wonderfully moist and sticky in an amost marzipanny sort of way.
Bakewell Cake

Based on this recipe from BBC Good Food


Ingredients

200g butter, softened (plus extra for greasing)
200g golden caster sugar
100g ground almonds
100g self-raising flour
1 tsp baking powder
1/2 tsp almond essence
4 large eggs, preferably free-range

1/2 jar good quality raspberry jam
175g icing sugar
approx 5 tsp lemon juice
5 glace cherries

1. Pre-heat oven to 180C. Grease and line the bases of 2 20cm round cake tins.

2. Using an electric mixer if you have one, cream together the butter and sugar until pale. Add the ground almonds and eggs, one by one. Fold in the flour and baking powder. Add almond essence and mix well until you have a smooth batter.

3. Spoon into the two tins (equally) and try to smooth the tops as best as possible.
Bake in the oven for around 30 minutes until the cakes are springy on top. DO NOT be tempted to open the oven to check on them until at least 25 minutes has passed!

4. When cooked, cool cakes in their tins for a few minutes before turning out onto wire racks to cool completely.

5. Once cool, sandwich together with the jam. Sieve the icing sugar into a large bowl and mix with the lemon juice until smooth and thick. Spread icing over top of cake - it doesn't matter if it drips down the sides a bit. Decorate with halved glace cherries.

Thursday, July 23, 2009

Pork tenderloin with a mustard and herb crust

What a long time without posting! I can only mumble feeble excuses and try to win you back with promises of pork tenderloin, bakewell cake and a great paella.

The past few weeks seem to have been a whirlwind. I had never realised that getting engaged would be such a social activity! So many friends have invited us to dinner, plus we've been busy organising our engagement party. Added to this, we've been dealing with the insurance companies trying to get back the money for the items that were stolen on holiday. So far we've been completely unsuccessful. Much as I could now embark on a long rant about the insurance blighters, I think it is best for all of us that I keep my feelings to myself.

Despite the problems, we have bought a new camera. Not the SLR we're saving up for, but an interim point and shoot that seems to be doing the job reasonably well. It is taking me a while to adjust to the new device so apologies all round if my photos aren't up to scratch over the next few posts! I'll get there in the end.

I rarely cook pork.

Actually, this isn't entirely true. I have something of an unbridled passion for sausages. It verges on the shameful. Fortunately, a cure may be to hand. Following our engagement barbecue at the weekend, we have a grand total of 50 sausages lying in wait in the freezer. I fear I may be sick of sausages come the autumn... Never knowingly under-catered. That's my motto...

But pork in its pure, untouched form? I rarely cook it. Yet I always thoroughly enjoy it. I'm training myself to experiment more with this deeply satisfying meat, especially as it is reasonably good value.

This is a Delia recipe. I followed it to the letter and I have to say it was really rather good. Pork fillets rolled in a mustardy, herb crust and served with an onion and mustard sauce. It looked impressive for a dinner party but was actually a cinch to make after work. Easy as pie. I served it with new potatoes and greens - we all agreed it was very tasty.

Roast Tenderloin of Pork with Mustard and Creme Fraiche Sauce
From Delia Smith's 'Pork' recipe book
Serves 4

Ingredients

2 good sized pork fillets
1 large egg
1 tbsp wholegrain mustard
1 tbsp Dijon mustard
2 cloves garlic, peeled
large handful curly parsley
4 heaped tbsp white breadcrumbs

For sauce:
1 dessertspoon each of wholegrain and Dijon mustards
1 tbsp creme fraiche
knob of butter
1 onion, finely chopped
11 fl oz dry white wine

1. Pre-heat oven to 190C. Trim the fillets of as much fat and sinew as you can.

2. Beat egg together with the mustards and pour into an oblong dish, long enough to hold the pork fillets.

3. Chop the garlic and parsley together finely. Add breadcrumbs, salt and pepper and then spread out onto another long dish.


4. Roll the pork fillets in the eggy mixture first until they are entirely coated. Then roll them in the herby crumbs before setting each one onto a greased baking tray.


5. Roast the fillets in the oven for 30 minutes (or until cooked through). Remove from oven and rest for 10 minutes.

6. Meanwhile make the sauce. Melt the butter in a small saucepan and cook the chopped onion for around 10 minutes until soft and golden brown. Add the white wine and bubble for about 10 minutes to reduce slightly.

7. Add the creme fraiche and mustards and simmer very gently for a further 5-10 minutes.


8. To serve, carve the pork into thick slices and pour over the sauce.

>

Sunday, July 05, 2009

Strawberry and marzipan tartlets


Am back from holidaying in Tuscany and Lake Annecy in France. We had a wonderful time though it sounds like the weather was much better here than in chilly, windy and frankly rather damp Tuscany! I'd love to be showing you photos of the fantastic scenery and, more importantly, the superb food we enjoyed but alas, we fell prey to some rather greedy burglars who broke into our apartment one night and stole (amongst other things) both our cameras from our bedroom whilst we slept!

Despite this somewhat traumatic incident, we had a cracking couple of weeks. Much of it was spent either in the cucina or at the table, feasting on the best of Italian produce and indulging in some superb French restaurants. I'm stuffed!

Sadly, the incident means that it may be a short while before I'm back up and posting regularly. We've the insurance to sort out and then the purchase of a new camera. We hope to get a point-and-shoot to tide us over before hopefully investing in a proper grown-up SLR. I'd be interested in any recommendations!


In the meantime, here is a simple yet tasty summer tart that I made before we left. The night, in fact, that the flower-sender proposed.

It hardly warrants a full recipe as it is so simple. Basically, all you do, is buy some ready-made puff pastry. Roll it out and cut into little squares or rectangles. One per person. Using a knife, lightly score a line around half an inch in from the edge all the way around. Prick the pastry lightly with a fork.

Roll out some marzipan and lay a slice over the centre of each tart. Arrange sliced strawberries on top, then brush the lot with melted butter. Sprinkle with caster sugar and then bake at 200C for around 25 minutes.

Lovely served with ice cream, or just regular cream.

Friday, June 19, 2009

Nigella's gleaming maple cheesecake

Are you paying attention?

I have something important to announce. I always have your best interests at heart and, in the name of the greater good I simply had to try out this cheesecake recipe. Now, here is the important part. Are you listening? I have just one thing to say and it is of vital importance...

MAKE THIS CHEESECAKE. NOW.

It will do you good, I promise... Ok, so perhaps it won't actually physically do you much good, but I'm fairly sure that it will release endorphins or some other equally mood-enhancing energies.


I have made a Nigella cheesecake before and, at the time, waxed lyrical about its perfect silky texture. I'm certain that cooking a cheesecake in a waterbath is the only way to achieve such sensuous perfection and I vow never to go back. This one is made very much the same way - you simply need to make sure that the tin is completely watertight by wrapping it in several layers of foil. It really is worth it.

I've always loved the flavour of maple syrup since first discovering it when a Canadian friend of the family came to stay when I was a child and bought gallons of the stuff as a present. In this cheesecake, the maple effect is two-fold. First there is a gentle maple flavour within the cheesecake itself and then, the entire thing is liberally doused with the stuff. This gives the finished pud a glorious shiny sheen and is decadent sweet contrast to the bite of the filling.


Ideally, you should make this the night before you want to eat it (and up to two days ahead if you want to get ahead!). Importantly, the cream cheese really must be room temperature if you are to achieve that silky Nirvana for which you've been searching.

I served this at a dinner party I held and even managed to win over a couple of cheesecake-haters. Give it a try, I'm sure you'll be thrilled with the results...

Gleaming Maple Cheesecake
from 'Nigella's Christmas'
Serves 8


Ingredients

For the base:
8 digestive biscuits
75g pecan halves
75g soft butter

For the filling:
3 x 200g packets of cream cheese, at room temperature (this is VITAL)
50g sugar
2 tsp cornflour
125g maple syrup, plus more for drizzling
4 eggs
1/2 tsp cider vinegar or lemon juice

1. Preheat oven to 170C.

2. Blitz biscuits in food processor, add the pecans and do the same until you have crumbs. Add the butter and whizz until it all comes together. Press into the bottom of a 20cm springform tin and pop in the fridge to chill.

3. Clean food processor. Then add cream cheese, sugar, maple syrup, cornflour. Whizz together and with the motor running, add the eggs one at a time. Add vinegar/lemon juice and mix until you have a smooth batter.

4. Take tin out of fridge and line the outside of the tin with a double layer of extra strength foil - bring it right round under the base and up the sides. If you are worried, you could wrap a layer of ovenproof cling film before doing the foil.

5. Pour in the filling mixture and pop in a roasting tin. Boil the kettle and fill the tin until the water comes half-way up the side of the tin. Bake in the oven for around 1 1/4 hours, until the cheesecake is set on top but still wobbles a little in the middle.

6. Take roasting tin out of the oven and carefully lift out the cheesecake. Peel away the foil layers and cool on a wire rack. Once cool, chill in the fridge for at least 4 hours or preferably over night.

7. Let it come to room temperature before releasing from tin when ready to serve. Pop on a serving platter and pour maple syrup all over the top!


I am away on holiday for the next 10 days - we're off to Tuscany! Normal service will resume on my return...