Sunday, September 07, 2008

Pimientos de padron


Another weekend, another wash-out. We've had a string of family celebrations this 'summer'. All of them planned around enjoying the great outdoors, all of them dampened rather by rain. Fortunately, our spirits have not been dampened and we therefore soldier on. A naming ceremony for my nephew 'in the garden' next weekend and a sister's birthday party al fresco the next. Will we ever learn?

My favourite 'washout' though occurred this weekend. My nephew decided he wanted to celebrate his birthday at
Wilderness Wood in Sussex. They specialise in children's parties here - you walk into the woods, build a huge den using branches and leaves from the forest floor and then build a campfire. Out come the sausages and marshmallows and everyone gets involved in cooking them over the smouldering fire. At least this is what is supposed to happen in theory...

The heavens opened at the crucial moment and sausages cooked over a rain-drenched fire. My favourite photo of this damp and muddy affair is this one...


I can't help thinking that the sausages look rather rude. I'm sorry. My mind is obviously impure and unclean. I have nothing to add in my defence.

Moving swiftly on, I'm reporting in briefly tonight to tell you that how delighted I was to get my hands on my favourite 'padron' peppers whilst in the butcher last week. These small green peppers are often found on Spanish tapas menus and whenever I see them, I always order them. The fun of these little peppers lies in the
Russian roulette style gamble you take when plucking one from the serving platter...

You see, most pimientos are lovely and sweet and tasty. Every now and then, however, you'll pluck a hot one from the plate and your eyes will water! The good ones are absolutely delicious and totally moreish, the hot ones aren't too violently hot, but certainly enough to make you a little wary.

Traditionally, the peppers are fried in olive oil and then sprinkled with crunchy salt. Plenty of it. For some reason best known to myself, I decided to roast mine in the oven on a high heat instead. They worked pretty well, but I guess the might have been a little crisper on the outside had I reached for the frying pan.

Either way, to eat them, you hold them by the stalk and bite the pepper off in one go.

Pimientos de padron


Padron peppers- allow approx. 5 per person as tapas/nibble
Olive oil
Crunchy sea salt, such as Maldon

1. Place peppers on a baking sheet and drizzle with generous amount of olive oil. Sprinkle with some of the salt and shake the baking tray to coat evenly.


2. Roast in a hot oven (210C) for 10-15 minutes until the pepper skins start to blister and brown. Blot on kitchen paper and sprinkle with a little more salt - don't hold back.


3. Hand round whilst still hot along with a dish to collect the stalks.


Thursday, September 04, 2008

Cheesy ham and leek pie


I am rather partial to the odd pie.

A satisfyingly crisp exterior that gives way to something creamy, unctuous and just a little bit naughty underneath is my idea of heaven. Or rather, it is one of my many culinary ideas of heaven.

Pies can seem like a lot of work. I've seen many blanch at the mere mention of pastry. But here is where I come clean. I didn't actually make the pastry for this pie. Shhhh. Don't tell anyone...

I am in the school of thought that labels ready-made pastry as one of the great time-saving devices of the modern age. I know that homemade tastes better and when I have a little more time to spare, I'm pretty nifty at the old shortcrust. But puff pastry? I simply can't be bothered. I'm sorry. I hope you don't think any less of me, but there we are.
I am someone who can't be bothered to make my own puff pastry.
I'm not ashamed. I laugh in the face of puff pastry purists... Or something.

I find a couple of packs of the ready-made stuff are handy items to have in the freezer. Puff pastry can be just the thing to transform an uninspiring supper into one with a bit of dash. Got red onions? Got goats cheese? Bingo. You have a rather tasty tart. Got left over roast chicken? Got milk? Bingo. You have a creamy chicken pie.

At the weekend I held a party in my garden for twenty or so friends. I do this every year around my birthday and do a big buffet for all to dig into. I would share the recipes here, but I kept it pretty much the same as last year with my
favourite quiche, scrumptious ham, a series of salads and a couple of my favourite puddings.

As someone who is only ever able to cater for twice the number of people I've invited, I had a fair few leftovers to use up. In particular, quite a large hunk of ham. Sandwiches were good, but this tasty pie was the best. I made a cheesy sauce in which to smother the ham and added leeks and courgettes too. You could use any combination of vegetables - mushrooms would have been good, carrots and certainly peas. Whatever takes your fancy really.

My favourite moment with pie-eating is when you plunge the spoon through the crust for the first time to reveal the juicy interior. Heaven indeed...

The recipe here is for two, but can be easily doubled/tripled etc...

Cheesy chicken and leek pie

Serves 2


Ingredients

3 generous handfuls of chopped cooked ham (cut thick slices and then cut into chunky cubes)
1 large leek (or two small...)
1 medium courgette
1 heaped tablespoon plain flour
1 1/2 oz butter
1/2 pint milk
4oz mature cheddar cheese
1 heaped teaspoon of dijon mustard
Approx 250g puff pastry (I used half a regular pack)
1 beaten egg
salt and pepper

1. Preheat oven to 180C. Make the sauce first. Melt the butter in a saucepan. Add the flour and stir thoroughly to combine to make a paste. Cook for a minute or so. Next add a little milk and stir to combine. Cook for a few seconds. Add a little more milk - stir until smooth, cook a little. Repeat, adding the milk a little at a time until you have a smooth sauce. Keep the heat reasonably low and keep stirring all the time to prevent sauce sticking on bottom.

2. Grate the cheese into the sauce, add the mustard. Taste. Add more cheese or mustard if required.

3. Steam the leeks and courgettes until al dente. Add to the sauce, along with the chunks of ham. Warm through and season carefully, remembering that ham is usually quite salty, as is the cheese.


4. Pour the pie filling into a small pie dish or baking dish. Flour a surface and roll out the pastry until the thickness of a pound coin. Brush a little beaten egg around the edge of the pie dish and place the pastry carefully over the top. Trim the overhang. Use any trimmings to decorate the top (I used a little heart cutter). Brush the top with egg so that it browns nicely. You can also use milk, if you prefer.

5. Place in the oven and bake for half an hour, or until the pastry is crispy and golden.

Monday, September 01, 2008

A London cheesecake and some wonderful awards...


Ugghh. It appears to be September.

I've nothing against September per se. It is just that after a quiet August work-wise and a summer of rather lovely holidays, I now have the 'back to school blues'. Three days back and work and already I'm wondering when I can next find some time to take off...


No doubt it is a temporary blip and I'll soon be back to my usual self but at the moment I'm facing a horribly hectic September and I'm far from relishing the challenge. Luckily though, I love autumn produce so there is lots to look forward to!

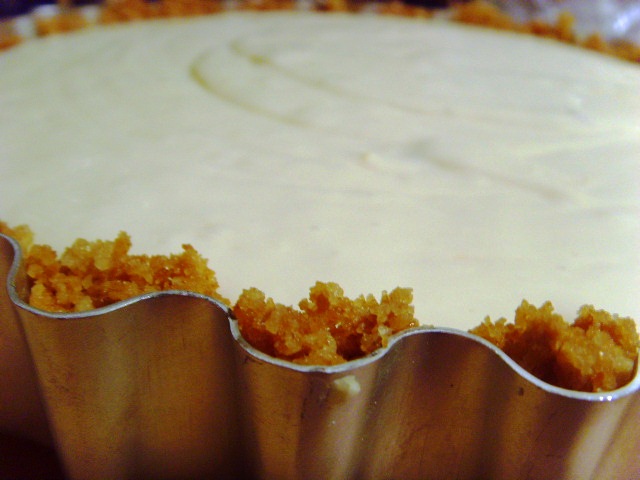
In the meantime, let me tell you about this delicious cheesecake that I baked whilst up in Wales.


My first ever experience of cheesecake-making didn't turn out so well. In fact, it was rather a disaster. I was at school and required to produce one of those somewhat old-fashioned gelatine-set cheesecakes that you see rather rarely these days. Somewhere along the line I must have had a little slippage with the gelatine as the whole thing set like rubber. I could literally peel it off the biscuit base and flap it about the room without it breaking. Not a good sign. On the plus side, it looked the part and as the teachers didn't taste it, I was awarded top marks for what was a totally inedible creation.

Scarred by the experience, I have never since made a cheesecake. Until the other day. With the weather rather wild, wet and windy, I was glad that I had thought to take Nigella's
'How to be a Domestic Goddess' with me to Wales.

Nigella dubs this cheesecake 'London Cheesecake'. Being terribly patriotic she felt that if she had to include a 'New York Cheesecake', then she simply must have a London one too.

The cheesecake had the most perfect, silky texture and a lovely soured-cream topping. The secret, so suggests Nigella, is cooking it in a water bath. I thoroughly recommend it and shall be making it again and again, I am sure. I served it with some summer berries but it would be lovely with any kind of fruit. Next time, I might cook the fruit down a little and make it syrupy.

I'm not going to repeat the recipe here as I have nothing to add to Nigella's excellent and clear instructions. You can find them on her website
here.

The only tricky part is wrapping the cake tin in a double layer of foil to ensure that no water seeps in.


Before heading to bed, I simply must apologise to Margaret at Kitchen Delights and Julia at A Slice of Cherry Pie. Both of them were kind enough to award me with some lovely blogging prizes a while back and amongst the holiday season I've only just got around to mentioning them. Thank you so much ladies for these lovely awards, they mean a huge amount and really made my day! In fact, just thinking about them again has lifted me out of my September gloom and made me feel able to face the week ahead at work!


With so many blogs out there, it is hard to pick just a few to award these prizes to. I've been discovering a few more favourites recently and plan to pass these awards on over the next week or so.


Saturday, August 30, 2008

Spicy sweet potato soup


This seems like a rather inappropriate post seeing as it is roasting hot outside. When I cooked it, two nights ago, it seemed entirely appropriate. It was positively autumnal and I needed something soothing and warming. So, apologies for the inappropriateness of this warming soup but no doubt it'll be foul again tomorrow and we'll all be craving something of this sort.

I don't usually make hot soups in August, it has to be said. However, at the moment, soup is one of the few things I can actually manage. I'm suffering with my wisdom teeth. Is anyone actually able to tell me what the point of wisdom teeth actually is? As far as I can see they are completely unnecessary and there simply to cause pain. A great deal of it. A bit like the appendix really.

Anyway, unable to move my jaw much means that I've been eating a lot of soup. And ice-cream. And rice pudding. And mashed potato. Not all at once, you understand. This soup is one I'll make again and freeze in individual portions to take to work once the nights draw in. If I take them in frozen, there is no chance of spilling or leaking en route and they are defrosted in time for lunch.

Spicy sweet potato soup
Makes 3-4 portions


Ingredients

2 large orange-fleshed sweet potatoes
1 medium to large white onion
1/4 tsp cumin seeds
1/4 tsp coriander seeds
1/4 tsp ground ginger
1/4 tsp dried chilli flakes (or half a deseeded red chilli, finely chopped)
1 pint chicken or vegetable stock
yoghurt or cream for serving

1. Peel and chop the onion and then sweat in a little olive oil over a medium heat.

2. Crush and grind spices using a pestle and mortar (or rolling pin and plastic bag). Add spices to onions and stir to coat, continue to heat until onions are translucent and coated in spice.

3. Peel sweet potatoes and chop into small pieces. Add to pan and heat for a few minutes with onions. Add stock and simmer until potatoes are tender (around 20 minutes).

4. Take pan off heat and blitz soup with a stab mixer or in a liquidizer. Season with salt and pepper as required and serve with a little cream or yoghurt drizzled over. And perhaps some chopped fresh coriander.

Notes - For a richer version, you could add some coconut milk.


P.S. Don't you love this picture of my brother's dog 'shrimping' at low tide in north wales?

Wednesday, August 27, 2008

Happy Birthday to me - lovely lemon cake


I've just returned from a wonderful fortnight on holiday. I haven't taken a full two weeks off work for six years, so it was a real treat. I usually like to spread my hols out throught the year, but I had a little spare this year and decided to make the most of it. After a wonderfully lazy few days is Provence with girl friends, I headed up to my beloved North Wales for a week and a half with family.


Since I was a baby, I have holidayed up on the Llyn Penninsula and really think it is one of the most beautiful parts of our country. The scenery is just stunning. Of course, the 'problem' with holidaying in the UK is the age-old one of the weather. It becomes an obsession. From our rented house, we watched the clouds and rain in earnest over breakfast, trying to decide what the day had in store. We'd look out of each side of the house, hoping for a touch of blue sky out of one of the windows. Sadly, on this occasion, 'him upstairs' was not on our side. We had a couple of sunny-ish days, but most were grey, grey and more grey...


It was a shame, but didn't matter too much. I still managed some lovely walks and loved catching up with nephews, nieces and parents.

I was also very spoilt. Yesterday was my birthday, you see. It wasn't one I was looking forward to. I'm now twenty-nine. Twenty-nine is not a problem in itself, you realise. It is just the fact that it comes before the dreaded three-oh. I know, I know. I'm still a young whipper-snapper. I've heard it all before. I'm afraid nothing will convince me though. Turning thirty is not something I'm looking forward to.

However, as I mentioned, I was very spoilt. The blow was duly softened by some lovely presents. Most exciting of all is my new
Kenwood Mixer! I have wanted one for ages and had to put it to use straight away.


It seemed only apt that I should bake a birthday cake. A challenge when staying in a rental holiday house without your usual cake tins, baking equipment, cook books etc... I thought about my favourite kind of cake. Luckily I had bought one book with me; my favourite
'How to be a Domestic Goddess' from wonderful Nigella. At first I thought I'd go chocolately, then fruity but eventually I decided upon lemony.


I adore lemony cakes and wanted a full-on explosion of lemony flavour. I followed Nigella's basic Victoria Sponge recipe, sandwiched it with lemon butter icing and lemon curd and then topped the lot with bright white lemon glacé icing. You'll see that Nigella uses a little cornflour in her recipe - this can be replaced with regular self-raising flour, but she reckons that the cornflour makes for a lighter sponge.

My efforts were hampered by various factors. I didn't have sandwich tins, so baked the cake in one large springform 20cm tin and then cut it in half. I was also cooking in an oven which had a mind of its own. Everything we made in it seemed to burn, so I cooked it on a rather low heat and relied on some guess work.

The result was, I think, absolutely delicious. Wonderfully citrussy with just the right balance between the sweetness and the tangyness. This is certainly an indulgent cake, with two kinds of icing AND lemon curd, but if you can't indulge on your birthday, when can you?!

Very lemon cake
Serves 8


Ingredients

For the sponge:
225g butter
225g caster sugar
4 large eggs
200g self-raising flour , sieved
25g cornflour
juice and zest of one unwaxed lemon

For the butter cream:
75g butter
75-100g icing sugar
juice and zest from half a lemon

Homemade or good quality bought lemon curd

Icing sugar and juice from half a lemon

You will also need two 20cm loose bottomed sandwich tins, buttered


1. Pre-heat oven to 180C. For the cake, cream the butter and sugar (in your brand-new Kenwood mixer...). Add the eggs one at a time, adding a tablespoon of flour after each addition and continuing to mix. Fold in rest of flour and cornflour, plus the lemon juice and zest. The mixture should be a dropping consistency. If too thick, add a touch of milk.

2. Pour the cake mixture into the prepared cake tins and bake for 25 minutes, or until the cakes are springy to the touch and a skewer comes out clean when inserted into the centre. Leave to cool in tins for ten minutes, then turn out onto a wire rack.

3. Whilst the cakes are cooling, make the buttercream. Using a mixer, blend together the butter and sugar and add in the lemon. If too runny, add more icing sugar until a spreading conisistency is reached.

4. Sandwich the cakes together with a thin layer of butter icing and then a layer of lemon curd. Top the cake off with a layer of glossy glacé icing. Sieve the icing sugar and mix to reasonably thick consistency with the lemon juice. Add candles and away you go!

Monday, August 11, 2008

They may be small...


...but these are the best tasting tomatoes ever! Freshly picked from my garden - what could be better?

I'm away for the next couple of weeks, in France and then in Wales. I hope to check in occasionally, but will be back in full force on the 28th!

Sunday, August 10, 2008

Summer Pudding


I'm fairly surprised to find that I've not yet posted a recipe for one of my favourite British pudding. Summer pudding is something I make quite frequently during the months when berries are at their glorious best. I make it for several reasons. Firstly, I think it is delicious. Secondly, most other people tend to think it is delicious, hence it is a winner at a dinner party. Thirdly (and this is the exhibitionist in me), people are always rather impressed when you turn a gleaming pudding such as this out of the pudding basin. They seem to think it is a complicated pud to make. I'm happy to let them think that. It's nice to bathe in a little glory once in a while.


The secret is out though. Summer pudding is actually a remarkably simple thing to make. In fact, it was one of the first desserts I ever attempted. Admittedly, it is not quite as simple as my father used to think. One evening when we were congratulating my mother on having turned out the perfect summer pudding, he asked what all the fuss was about. It was surely very simple to make, he said. Surprised that my father felt he could make a summer pudding (his culinary skills extend to making toast, though he does have many other talents), we asked him for his recipe. Well, he said, you take a large loaf of unsliced bread and scoop out all the bread from the middle. You then fill the space up with fruit and leave in the fridge for a day-or-so. Hmmm. Not quite sure that would be the summer pudding of my dreams. I'll stick to my mother's ever-so-slightly more complex version, I think!

I've tried lots of different summer puddings over the years in restaurants and have reached several conclusions. Your tastes may well be different to mine, but for me, summer pudding should be kept simple. Trying to fancy it up just doesn't work (...for me).


First things first. Make one big pudding rather than several little ones. This actually pains me to say it, as I think individual puddings look far prettier. But the ratio is all wrong with an individual pudding. Too much bread and not enough fruit.

Secondly, and this is where things may get controversial, I use plain old medium sliced white, slightly stale, bread. Seriously. I've tried it made with brioche, with thick freshly-baked bread, with all sorts. Nothing works for me as well as a loaf of medium-sliced white bread which is past its best. Fresh bread just doesn't soak the juices up as well. Brioche is too rich and buttery. Delia and I come to blows here. She insists upon high quality bread. Delia and I don't often come to blows, but on this matter I refuse to shift. I'm sorry, Delia.

Finally, don't be afraid of the sugar. Remember, raspberries and redcurrants are tart. You want a little tartness in your summer pudding, but not too much. Puddings should be fun, not leave a sour taste in the mouth! Taste, taste, taste as you go - all berries differ in sweetness so I just add the sugar until it tastes right to me.

I find it a little tricky to know what quantity and mixture of fruit to suggest. Purists would insist on just raspberries and redcurrants. They would be horrified at the inclusion of strawberries or - heaven forbid - blackberries. I'm not a purist though. Use whatever fruit floats your boat. I think some kind of black fruit is essential to give the pud its glorious colour. I like to use a mixture of red and black currants, raspberries, strawberries and blackberries. My grandmother used to add apples. This may seem like a total no-no, but it is not at all bad and perhaps a wise tip in times of credit crunch: apples pad the pudding out and are cheaper than expensive berries. The proportions are entirely up to you. Nigel Slater has some interesting things to say on the matter.

One final comment before the recipe itself. My mother's method involves lining the pudding basin with the bread, spooning in the fruit and weighting it down overnight so that the juices seep through. They usually do, of course, but sometimes there are a few 'bald' patches. These can be covered up with reserved juice. This time round, I wanted to be sure of success, so I cheated. I dipped the bread briefly into the juices before lining the bowl. That way, they were instantly the 'right' colour. I felt like I was cheating. I felt a bit like a fraud. But it worked beautifully, of course. And if it works, then why does it matter?!

I used a 2 pint pudding basin for my pud - it was huge and would have probably fed ten. It needed a whole lot of fruit to fill it. Fresh is best, of course, but you can get good quality frozen berries in most supermarkets and these tend to be much cheaper. I threw in a couple of frozen punnets along with the fresh on this occasion and I really don't feel it made any great difference.

Summer Pudding
Serves 10

Ingredients

Approx 1.8 kg mixed summer berries (use any mix of raspberries, redcurrants, blackcurrants, blackberries, strawberries, tayberries, cherries etc...)
Caster sugar
Framboise or cassis (optional)
White medium sliced loaf of bread - approx 10 slices, crusts removed


1. Sort through all the fruit, wash and discard any slightly manky fruit!


2. Place in a large, deep saucepan and pour over a cup of water and 4-5 tablespoons of liqueur if you are using. Sprinkle over some sugar - I'd suggest about 150g to start with. Heat gently until the berries start to burst and release their juices. Cook gently for about five minutes - you want the berries to retain most of their shape, but be nicely softened and sitting in plenty of juice. Taste and add more sugar if necessary. You also want plenty of juice - sometimes I'll add a little more water if needs be, but you don't want to dilute the juices to much, so keep tasting.


3. Turn the heat off and leave to cool slightly while you prepare the pudding basin. Cut the crusts of the bread and then line the pudding basin, as if it were a jigsaw puzzle. Dip each bit of bread into the juices before lining the basin for ease, if you like. Cut a circle for the bottom of the bowl and then slot together triangular bits of bread until the sides are entirely lined with bread. Make sure there are no gaps.


4. Ladle the juicy fruit into the pudding basin. I use a slotted spoon for this - you want some of the juice in the pudding but also some to keep aside to serve alongside the pud. Fill it right up to the top and pour some of the juice over the berries. Then cover the top of the pudding with another layer of bread.

5. Place a plate on top of the pudding basin and stand the whole thing on a larger plate (to catch any overflowing juices). Place a heavy weight on top of the plate - a can of baked beans works well. Chill in the fridge overnight. Pour the juices into a jug and chill.

6. To serve, run a palette knife around the edge of the pudding. Place the serving platter on top of the bowl and quickly turn upside down. The pudding should (with a little help) plop neatly out onto the platter. Ta-dah!


7. Serve with double cream and the juices in a jug. If the pudding is quite tart, you may like to serve a bowl of sugar for sprinkling in case your guests prefer something a little sweeter.