Thursday, March 03, 2011
Greek-ish salad
Wednesday, March 02, 2011
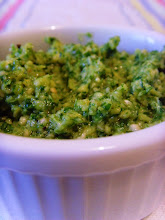
Pea and watercress purée for fish
Thursday, August 06, 2009
Summer squash and sweetcorn salad


I then read the accompanying recipe sheet and realised that this was a variety of summer squash. I also read the accompanying recipe and decided that it sounded rather good. It was for a salad of roasted squash and corn (torn off the cob rather than from a tin!) with rocket, feta and a sweet chilli glaze. We decided to roast a chicken and serve it alongside the bird for a summery supper.
I made the classic error of not reading the recipe through before I started and I then realised that both the corn and squash needed time to cool before adding to the salad. I didn't have time for this and the squash was fresh out of the oven when I added it to the peppery rocket leaves*. It actually didn't matter a bit and was perfectly delicious as a 'warm' salad. As we were eating it immediately, the leaves didn't wilt at all. However, we did have to throw the excess away which was a shame. Next time, I'll make it with more time to spare and try a cold version to take for lunch at work.
Summer squash and sweetcorn salad
Serves 4 as a starter or side-dish (2 as a main)
Recipe from Abel and Cole

Ingredients
1 summer squash (we used a pattipan squash, the recipe suggests onion squash)
1 garlic clove peeled and chopped
5 sprigs fresh thyme
1 tbsp olive oil
2 cobs sweetcorn
1 tbsp butter
1 tbsp red chilli jam (I used Jules and Sharpie red pepper jelly)
1 bag fresh rocket leaves
100g feta cheese (recipe suggests 200g, but this seemed too much to me)
1. Preheat the oven to 200C. Halve the squash and scoop the seeds out with a spoon. Cut into small wedges or chunks of around half and inch square. Keep the skin on as it is very thin and helps the squash keep its shape.

2. Place squash in a roasting tin with olive oil, garlic and thyme. Season with salt and pepper and mix together with your hands to ensure all is well coated. Roast for 30 minutes.
3. Meanwhile, remove husks from corn and place in a large saucepan of water. Bring to boil, put a lid on the pan and simmer for around 20 minutes until tender. Drain and cool (run under cold water if short of time). When you are able to handle it, cut the kernels off the cobs trying to keep them in large panels rather than individual kernels. Use a sharp knife for this - the panels should come off fairly easily.

4. Remove squash from oven and add butter to pan immediately. Dot the chilli jam over the top and pop back into the oven for then minutes to give squash colour and a sticky glaze. Remove from oven and cool (optional)*.

5. Take a large salad bowl or plate and add the rocket. Add the squash and toss together. Add corn and fold through. Finally, crumble the feta cheese over the top.
Sunday, December 07, 2008
Delicious nibbles and a dreamy parsnip gratin

Often, I think how useful it would be if I could just hurry up and find 'the man of my dreams'. Nothing to do with the joy and wonder to be had in finding the person with whom to share ones life. Oh no. I'm far more practical than that (...though that part would be nice too). No, mainly, I think it would be handy to have 'another half' so that they could pour the drinks. And maybe take the coats. And possibly even hang those coats up somewhere. Or hide them in my bedroom so that people didn't have to venture in there themselves and discover that is where I've hidden the entire contents of the dining room to make it suitable for guests.
Seriously.
Last weekend I had seven friends over for lunch and it was lovely. But it would have been lovelier still had there been someone else who could have poured the drinks. And perhaps laid the table. What happened instead was this...
I then realised that I'd run out of milk. I gave her back her coat, took her drink from her and sent her back into the cold to the corner shop.
Fortunately, I know her well.
In the meantime, in the middle of whisking eggs, the doorbell rang again. Two more guests. Two more drinks to make (one involving a trip to the basement to get ice), two more coats to deal with and eggs half-whisked. More door-bell ringing, plus the timer going off as the beef was done and that the Yorkshire puddings needed to go in.
Anyway, to cut a long story short, within half an hour, my calm controlled, clean and tidy kitchen had become a scene of total destruction. Tonic bottles, corks, half-sliced lemons, dirty pans and a half made pudding all jostled for space with my seven lovely friends who were kindly trying to assist by getting their own drinks/whisking more eggs/putting coats in the black hole of my bedroom.
What joy it would have been to have a handy man around to entertain them all for ten minutes in the sitting room, fix their drinks and hand round the rather delicious nibbles that I had made in advance. My friends would then perhaps have thought me to be the height of effortless entertaining. (Actually, I think they know me better than that).
Fortunately, the chaos was salvaged when we sat down to eat and I realised that beyond the mountains of mess in the kitchen, I'd managed to produce a reasonably good lunch. What a relief! Next time though, I'll be serving a dessert that I can make in advance. And perhaps I'll employ the services of a butler. And also, in my next house, I'll have one of those kitchens where people can sit and chat and nibble while I potter behind the safety of an island which hides all the mess and chaos.
Anyway, onto the food. These great nibbles came from the queen of relaxed entertaining, Nigella. They are in her Christmas book and elsewhere too, I think. The combination of parma ham, mild goats cheese and dried fig is a winner. These are super simple to make and can even be made up a couple of hours in advance and popped in the fridge until needed. I'd suggest taking them out around 30 mins before you want to eat them to take the chill off which tends to numb the flavours.
Parma ham, fig and goats cheese rolls
Makes approx 24
Ingredients
12 slices of parma ham (2 supermarket packets)
125g mild, creamy goats cheese
6 dried figs
1. Carefully cut each slice of parma ham into strips - mine went fairly neatly into two strips, but you may find you can get three. Lay the strips out on to a chopping board.
2. Snip the figs into quarters (I used scissors).
3. Smear a small teaspoon-or-so of goats cheese onto the cut side of a fig quarter. Place cheese side-down at the end of one of the strips of parma ham and roll tightly together.
4. You're done. That's it.

With the rib of beef, I served Yorkshire puddings, roast potatoes, glazed carrots, peas and this
The recipe for this came from the great BBC Good Food and so I won't repeat it here. It is made in much the same as pommes dauphinoise though with the addition of grain mustard. I made no amendments to the recipe. All that I will say is that I used Parmesan cheese instead of the Twineham Grange suggested. I also found it quite hard slicing the parsnips thin enough so I used the slicer of the food processor. I suggest you do the same.
So, here is
Thursday, September 18, 2008
Chicken with ginger marmalade. Yes, really.

If you have decided to read past the title then I am thankful. I know this is not the most tempting-sounding recipe in the world. After all, marmalade is something best eaten on hot buttered toast for breakfast, is it not?
But here, you're eyes do not deceive you, I have decided to dish it up with a juicy chicken breast. Have I gone mad?
Indeed, it would be totally understandable if I had gone mad. Having been ill all week, I finally decided to venture out this afternoon in order to rent a DVD with which to console myself as I missed a rather fun birthday party. Upon reaching the car, I discovered that it had been broken into. For the THIRD time in two years and the second time in six months. Each time I've had to have the door replaced and the entire car resprayed. As you can understand, in the immortal words of Queen Victoria; 'we are not amused'.
Having called the police and filed a report I then traipsed to the video shop only to discover that it had closed down earlier in the week. Again I tell you: 'we are not amused'.
Anyway, I'm still not fully recovered and am existing on a deeply uninspiring diet of toast, eggs and soup. So I thought I'd share a few things that I cooked up last week. Where better to start than with some marmalade-glazed chicken, I ask you?

With corn-on-the-cob, that's where. I'll woo you with this lovely butter-laden corn and you won't even notice the seamless transition to marmaladey chicken.
Corn is in season and it is delicious. If you haven't been eating it by the bucketful then I conclude that a) you don't like sweetcorn or b) you don't like sweetcorn.
My latest thing is to flavour the butter. A favourite is lime, chili and coriander. You can make a nice roll of it and keep it in the freezer - just slice of little rounds as and when you need it. It is great with fish too. However, the cob you see in the picture is enhanced with a very simple flavoured butter. I simply melted the butter with a generous pinch of smoked paprika. Just delicious with the corn.

Oh - one more thing before I go on to the chicken dish - isn't this rainbow chard lovely? I served this with the chicken - just cooked it in a saucepan with a little garlic and some olive oil. I started with the stalks as they took a little longer to soften and then just wilted the leaves as I would spinach. Very tasty.
And now... The moment you've all been waiting for... The marmalade chicken....It is not so crazy, you know. Duck is good with orangey things. Why not chicken? (Because chicken is totally different to duck is not an acceptable or helpful answer here incidentally).
You can use any kind of orange marmalade for this - mine just happened to be laden with ginger too. It thought it all the better for it. The chicken was lovely and sticky but wonderfully moist too. It was so good, that I'm almost loathe to spread the remaining marmalde on my morning toast. I might just save it for the chicken.
Sticky ginger marmalade chicken
Serves 2

2 skinless chicken breasts
1/2 pint of chicken stock
2 heaped tablespoons of marmalade with ginger
pinch of chilli flakes
1. Heat a little olive oil in a pan and fry the chicken breasts for approx 10 minutes until golden, turning once and seasoning with salt and pepper as you go.
2. Pour in the stock and marmalade, giving everything a good stir to combine. Sprinkle over the chilli and then simmer gently for around 5 minutes. You want the sauce to become sticky and syrupy. If it reduces too much too quickly, add a little more stock. You want a little syrupy liquid to pour over. Taste and season as necessary.
3. Remove chicken from the pan to a plate and spoon over the syrup sauce. Serve, perhaps with fluffy mash and greens.
Don't forget: There is still plenty of time to think up a great entry for my exciting blogging event 'The British Food Fortnight Challenge'. The details can be found in my previous post - I hope you have thinking caps on as I can't wait to see your entries!
Sunday, June 29, 2008
Learning to love broad beans/Five spice quail

I've always had a tricky relationship with broad beans.
I remember that as a child, broad beans were proffered as a real treat. I was supposed to feel lucky to have the greying shrivelled up things nestling upon my plate.
Trouble is, I didn't feel too lucky. In fact, I felt distinctly unlucky. What had I done to deserve such horrible vegetables? Why couldn't I just have peas instead?
Ever since, I have shunned the broad bean. It has had no place in my kitchen. Until now, that is. Just recently I had something of a eureka moment. I was a guest at a lunch party and upon picking up the menu, my heart sunk somewhat. I forget what kind of fish was being served, but I can remember all too clearly that the seasonal sauce was broad bean-based. I thought that I could perhaps politely push the offending beans to one side or hide them under a bit of discarded fish skin. When the dish arrived, however, I was surprised to see how bright and pretty the broad beans looked. None of the wrinkled greyness I had come to loathe. The verdict? Delicious, of course.
What had happened, you see, is that the chefs had peeled the beans after cooking them. A thankless task, they may have grumbled as they peeled enough broad beans for 200-odd people. But I, for one, am hugely thankful. I have at long last discovered the joy that is a fresh broad bean. Before I get all evangelical on the subject of the peeled broad bean, allow me to demonstrate the obvious. Which of the below looks more tempting to you?
The grey wrinkly thing with its tough skin, or the lovely bright green thing? I rest my case.
I was having a bad day yesterday. The sun was shining, it was the weekend, I'm off on holiday next week - what on earth could be wrong? I was stuck inside working. And today, I'm stuck inside working too. It is my own fault, of course. I've been foolish enough to book a week's holiday and we all know what that means, don't we? Desperately trying to fit two weeks' work into one to make up for the week that we'll miss. This time I am determined to get it all done before I go so that I can properly relax and enjoy myself.
To make up for the bad weekend, I decided to treat myself to a really special meal in the garden. Unusually for a Saturday, it was just me, but I wasn't going to let that stop me from making an effort. At six thirty, I took myself outside with a glass of wine and set to work podding the beans and topping and tailing gooseberries for dessert (more on that later). I felt suddenly completely summery - there is something about podding beans or shelling peas outdoors that seems timeless. The epitome of English summertime. I then made a marinade for a little quail that I'd picked up at the butcher and sat back with the papers and a little plate to nibble on: parma ham and manchego cheese drizzled with a little honey. Heaven...
As for the quail, I followed a Nigel Slater recipe from The Kitchen Diaries. It worked out rather well. He suggested 2 quail per person and he is probably right (I find he is about most things), but I was happy with just the one seeing as I had the cheese and ham to start and gooseberry crumble for pudding. He also comments on the fact that one should not be polite when eating quail - a knife and fork will not get you far. Pick it up in your fingers and nibble away at those bones.
To go with the quail, I roasted some butternut squash in the same tin and then made a lovely side dish of broad beans with pancetta. Food, Glorious Food indeed!
Take a look in The Kitchen Diaries for the original recipe for the quail. He serves his with spinach which might be nice next time. You'll find it there on page 169. And if you still don't have the book, then you really must go out and buy it. I've said it before and I shall be certain to say it again. I really think it is my favourite cookery book. Or possibly even my favourite book full stop.
Anyway, here is my version with the quantites changed somewhat. Underneath, you will also find my recipe for the broad bean side dish. Both are easily doubled or tripled!
Nigel Slater's roasted five spice quail with butternut squash
Serves one
Ingredients -
1 or 2 oven-ready quail
1 1/2 heaped teaspoons of five spice seasoning
half a teaspoon of hot chilli powder
1 small clove garlic
juice of half a lemon
1 tablespoon of oil (I used vegetable, Nigel suggests groundnut)
flaked salt
Half a butternut squash - peeled, seeded and chopped into 1 inch chunks
1. Finely chop the garlic and place in a bowl with the seasoning, chilli powder, lemon juice and oil. Season with a little salt. Pop the quail into the bowl and rub all over with the marinade. Pop to one side for an hour or so.
2. Pre-heat oven to 200C. Drizzle a little oil into a roasting tin and pop the squash in 5-10 mins ahead of the quail. Push squash to one side and then place quail in the tin too, with a little of the marinade drizzled over the top. Rub a little more salt into the skin to help it crisp up and roast for 25 minutes until the skin is nicely browned.
Broad beans with pancetta
Serves one
Ingredients:
Handful of freshly podded broad beans
Heaped tablespoon of chopped pancetta
1 dessert spoon double cream
1 dessert spoon freshly chopped curly parsley
pepper
1. Boil broad beans for 5-10 minutes depending on size. Drain and rinse in sieve with cold water. Peel and discard those wrinkly grey skins!
2. Heat a small frying pan and add the pancetta (no need for any oil). When this is cooked and crispy, add the broad beans, cream and parsley. Season with pepper (no salt - pancetta is very salty). Heat through and serve.
Wednesday, June 25, 2008
Braised little gems

Summer, it seems, is finally here. We are half way through the first week of Wimbledon and there's not been a spot of rain. Is this a first? It is not super hot, but the sun is shining and there is a gentle breeze in the air. English summer at its best...

I've always been intrigued by recipes for cooked lettuce. To me, the joy of lettuce is that it is crisp and fresh. Cooking it seems all wrong. I imagine something flabby and stringy and not even vaguely pleasant. You'd think that I'd leave it at that. But no. The idea has been playing on my mind lately. The recipes usually involve peas. And anything involving peas is good, is it not?
My curiosity got the better of me and so it was that I found myself braising some Little Gem lettuces on Sunday night.
What have I been missing all my life? It was superb. I'm totally unable to explain why soggy lettuce should taste good, but trust me; it does. Actually, it wasn't soggy at all. It retained a pleasing crunch. And it was perfect with a bit of simply grilled fish. This comes thoroughly recommended.
Braised Little Gems with Peas and Spring Onions
Serves 2 (easily halved, or doubled)

Ingredients:
2 small Little Gem lettuces, outer leaves removed
1 mug of peas (frozen is fine)
5 spring onions
200ml chicken stock
butter
2 tablespoons creme fraiche
pepper
1. Chop the lettuce into strips and the spring onions into thin slices.
2. Melt a knob of butter in a non-stick frying pan and then add the spring onions. Fry until starting to soften. Add the lettuce and the peas and stir to coat in the buttery oniony juices.
3. Pour over the hot stock and bubble away for ten minutes or so. You want most of the liquid to evaporate (you can always pop a lid on the pan if it disappears too quickly).
4. Just before serving, add the creme fraiche and stir to combine. Heat through and season with pepper. Taste before adding any salt - the stock is usually pretty salty.
Wednesday, May 28, 2008
Pink healthy-ish coleslaw

It has been over a week without a single post. For this apologise. A combination of technical malfunction on the computer front and a few days away are to blame. I'm enjoying a week's 'holiday'. Or at least I should be. I had scheduled in a week off but seem to be spending more time than I would choose catching up on work... Hmmm. Doesn't seem quite right, somehow.
But all is not bad. Far from it. I've had the most lovely few days catching up with my parents on the Isle of Wight (where they live). The break had involved a lot of this...

...and I have returned to London with more plants than I have space for in my garden. On Friday, I was lucky enough to visit the Chelsea Flower Show. I've never been before but always gaze at the gorgeous gardens from the comfort of my sofa via the joys of television. This year, the 'in' colours seemed to be white and green with the odd hint of purple. Just thought you'd like to know. My favourite garden by far was the Daylesford Organic garden. This featured the kitchen garden of my dreams - bed after bed of fruits and vegetables surrounded by wicker. There was even a fireplace with a seating area overlooking the pristine produce - heaven!

After Chelsea, we went to eat at a great restaurant that happens to be just along the road from me. For some reason I've not been before, even though the restaurant is run by 'celebrity' chef Nancy Lam. The Indonesian-inspired dishes we tasted were extremely flavoursome and it was great to meet Nancy herself after she had finished in the kitchen. I shall most certainly be back. Sadly I took no photos of the food but I do have a few more of the fabulous flowers at Chelsea...
Lily-of-the-Valley are favourites of mine - I tried to grow some recently but it ended in disaster. 'Disaster' is perhaps a little strong. Let's just say they didn't grow. These were snapped in the Molten Brown garden which was (unsurprisingly) heaven-scented with fragrant blooms, all in white.

In case you are worried (or, worse, hungry), I am planning to share a recipe here too. I love coleslaw. But until last week I had never made my own version. I think that perhaps I thought that if I made my own, I would actually realise just how unhealthy it was and it might ruin the pleasure I get from a big dollop of the stuff. But then I spied a recipe for a slightly more healthy (or should that be 'less fattening') version and thought I really should give it a go, especially as my weekly veg box had been good enough to send me not one, but two different cabbages. This version used yoghurt mixed with just a little mayo to creat a tangy and delicious dressing.

I really didn't miss the copious mayonnaise. I found the yoghurt actually gave a more interesting flavour and red cabbage was a pretty and flavourful substitute for the usual white variety. I'm not sure I'll ever go back. Though there is something quite moreish about the overly vinegary shop-bought variety too. I've changed and tweaked the recipe somewhat to my liking - a little less dressing, a few more carrots and a final sprinkling of chives which is entirely optional but seemed a good idea seeing as they were growing in the garden.

I always think that coleslaw should be served with ever-so-slightly trashy food: a fish finger or sausage sandwich, barbecued ribs, burger and chips. I'll leave that to you though. I'll keep quiet about how I ate mine. It is just a touch too embarrassing to admit publicly.
Pink healthy-ish coleslaw
Serves four(ish)

Ingredients
Half a white onion
Half a red cabbage
4 medium carrots
6 tablespoons low fat plain yoghurt
1 tablespoon low fat mayo
1 teaspoon Dijon mustard
Handful of chives (optional)
1. Shred all the vegetables either using the shredder on a food processor or a grater. If the onion is very strong, you may want to use a little less.
2. Stir in yoghurt, mayo and mustard. Season with salt and pepper.
3. Cover with cling film and place in fridge for at least an hour if possible to allow flavours to mingle. Garnish with chopped chives if wished.
Friday, May 02, 2008
Enjoying the garden

What you see above may well not look especially exciting. It is, after all, just a plate of salad leaves drizled with some (particularly good) extra virgin olive oil, a squeeze of lemon juice and a little sea salt. But it was one of the most delicious things I've eaten in the past week. The key reason for this, is that it was just four minutes that elapsed between picking the leaves from my garden and eating them. Fresh as a daisy just tastes so much better.
I have to be totally honest here and confess that I have not grown these lovely leaves from seed. I've been wanting to grow a little more in the way of fruit and veg in my garden for a while, but the small city shoebox that I inhabit does not offer a huge amount in terms of garden. I am restricted to pots and (as the garden is so small) it all has to look nice. I can't hide the veg in a quiet corner. All is very much on display.

It was the lovely Wendy from A Wee Bit of Cooking who inspired me to finally get going on planting some edible plants. She has a envy-inducing vegetable patch and was kind enough to send me some tips and information regarding what grows well in pots. I read it all carefully. As I have little space inside for nurturing seedlings, I decided it would be best to plant established plants and go from there. I'm starting with tomatoes, strawberries, various salad leaves and lots of herbs.
Sage and Thyme
I wouldn't give up my London garden for anything in the world. Having outdoor space when living in such a gritty capital a luxury that keeps me sane. Whilst I love the hustle and bustle that metropolis has to offer, there is nothing better than arriving home on a warm evening and taking a glass of wine into the garden. I love breathing in the fragrant, floral air, watching the plants grow a little each day and even the daily battle with slugs and snails. It is a true retreat.
Agapanthus
I thought I'd share a few photos from my garden. If I can fight off the aforementioned slugs and snails, I hope to be enjoying tomatoes and strawberries later in the season...
Rocket, mizuna, chard, lollo rosso, lamb's lettuce, lamb's cress, coriander, chives and parsley

I couldn't resist this pretty lavender tree - the smell is just gorgeous. I've seen quite a few recipes using lavender and have tried lavender ice-cream. I'm not yet convinced, I have to say!
These sweet peas are a total mystery to me. They usually flower in the height of summer. Mine have never stopped flowering! They had flowers all through the winter months and are still going.
Strawberry plant
Geranium and trailing lobelia
Viola pansyAnd finally (for it would be remiss of me to leave you with no food), here is my favourite seasonal delight: asparagus. I spent the weekend with my parents at home on the Isle of Wight and today we picked up a huge bunch of asparagus from a farm shop. This particular asparagus is grown on the shoreline, amongst the seaweed apparently. It was superb. Served simply with melted butter, some Parmesan shavings and plenty of black pepper; it was a real treat. Even more so because we served it along with some hard-boiled quail's eggs. Delicious. Summer is truly on the way...