Friday, February 25, 2011

Mincemeat and marzipan cake


I was going to call this cake 'leftovers' cake seeing as it is made with Christmas leftovers but it struck me that, as a title, it didn't sound too appetising. But appetising it is in a 'slice with a cup of tea' sort of way. Loaf cakes are my favourite kind of cakes to bake, largely because there is minimal margin for error and no need for artistic decoartion. It is in the nature of a loaf cake to look pleasingly plain. This doesn't mean that it need taste plain however. This little loaf is packed with fruity, almondy flavour - all the more welcome now that we're somewhat distanced from the onslaught of such things in December.


Like many of my favourite recipes, this one is from BBC Good Food. It doesn't seem to be on the website - I found it in a little book that I have called '101 Cakes and Bakes'. It is a handy little book with sections on 'fresh fruit cakes', 'tray bakes' and 'muffins and cookies' amongst others. This, from the 'loaf cake' section, is an easy cake to make and you don't need any special equipment - two bowls, a whisk, wooden spoon and loaf tin. The smell as it bakes is particularly tempting and once it was out of the oven, I have to confess that I didn't manage to wait until it was cool to try a slice. I should have waited though as the marzipan was a little chewy whilst still hot - it had a better texture when cool. My only criticism would be that the chunks of marzipan sunk to the bottom of the cake. Next time I will cut them slightly smaller perhaps. Otherwise, this is a definite 'bake again' cake. It would be good spread with a little butter too, like a tea-bread. I made one minor alteration - the recipe suggest sprinkling with flaked almonds prior to baking and then dusting with icing sugar whilst still warm. I didn't have any flaked almonds (and, truth be known, don't really like them) so I simply sprinkled the top with demarara sugar which gave a nice crunchy crust to the loaf. My version is here...

Mincemeat and marzipan cake
From '101 Cakes and Bakes' by BBC Good Food

Ingredients:

200g self-raising flour
100g cold, diced butter
85g soft brown sugar
85g marzipan
2 large eggs
300g mincemeat
2 tbsp demarara sugar

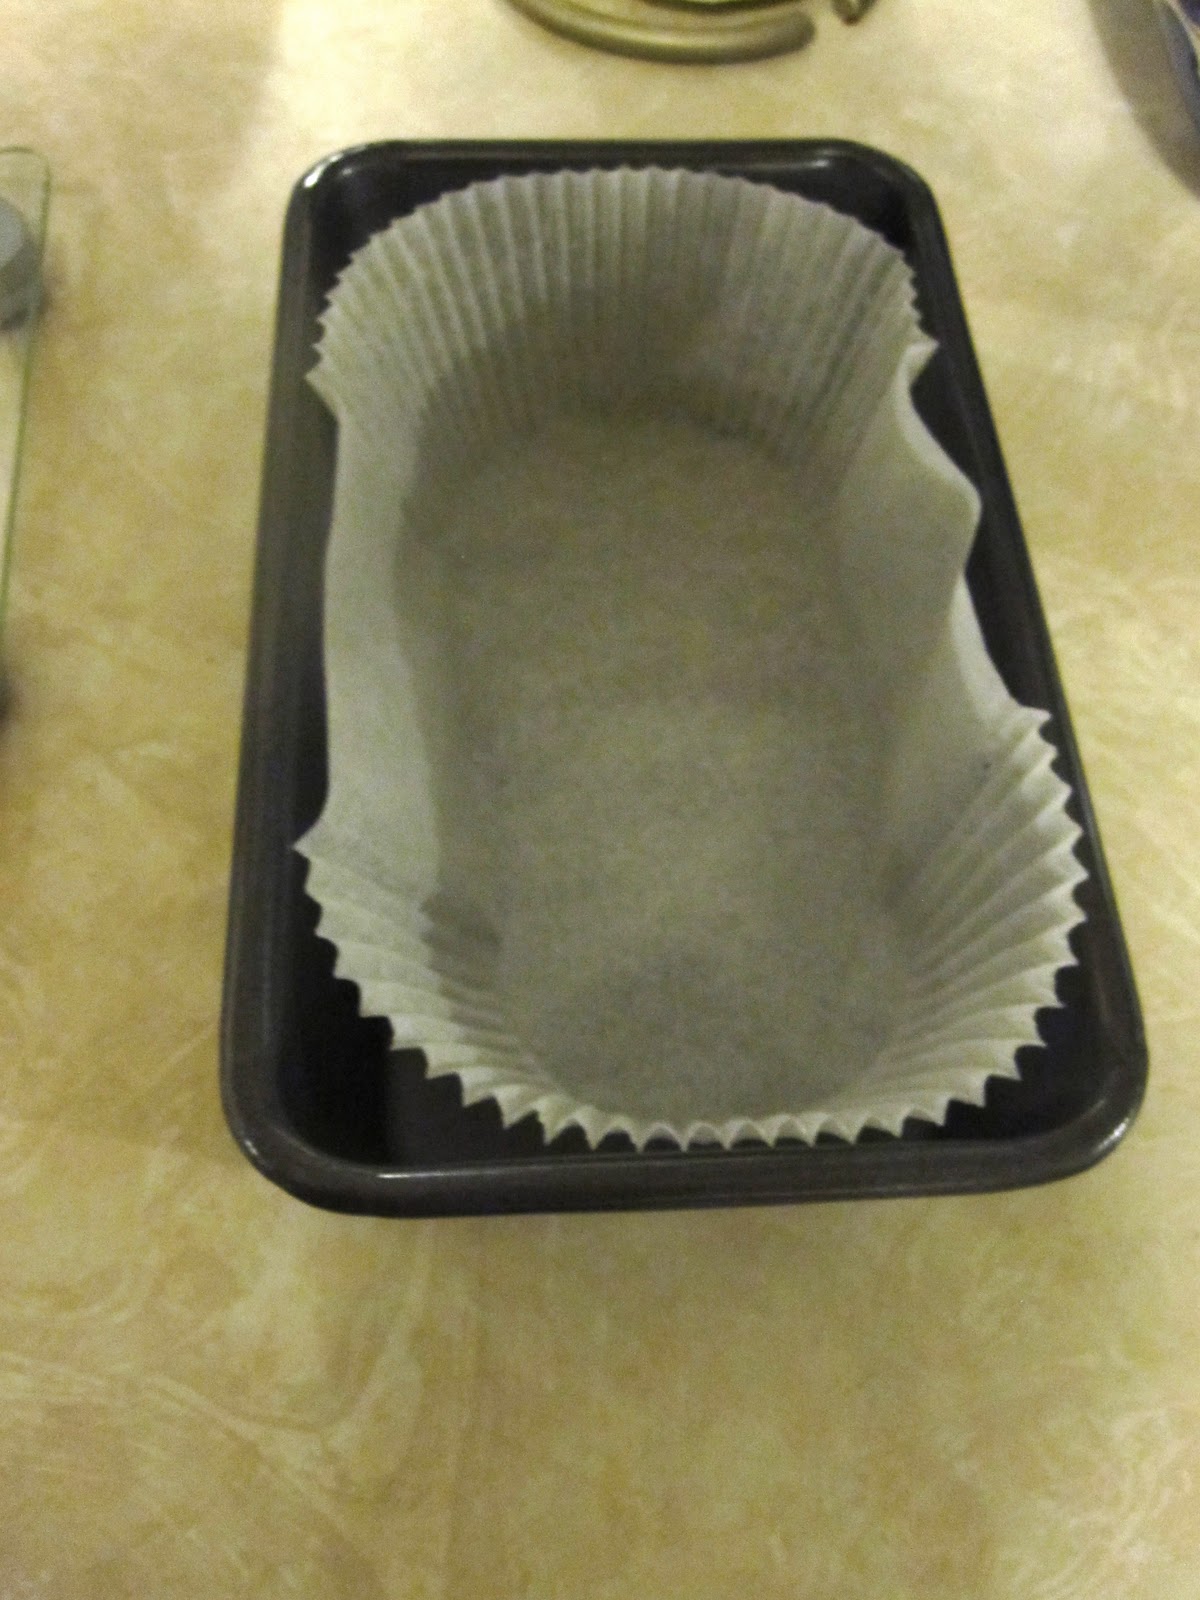
1. Pre-heat oven to 170C. Butter and line a 1kg/2lb loaf tin or use a handy loaf tin liner such as these ones from Lakeland. Love them!

2. Tip flour and butter into a large bowl and rub together until you have the consistency of fine crumbs.

3. Cut the marzipan into small cubes, approx 1cm square (no bigger). Stir these into the crumbs, along with the soft brown sugar.

4. In another bowl, lightly whisk the eggs and then stir in the mincemeat. Pour this mixture into the flour mix and stir gently until combined. The batter will be quite thick.


5. Scrape the mixture into the prepared tin. Level the top as best you can and sprinkle with the demarara sugar. Bake for 1 hour, or until the loaf is golden brown and a skewer comes out clean.

6. Place tin on a wire rack to cool for 10 minutes and then tip out onto the rack until completely cool.

Notes: this teabread keeps well (4-5 days) as long as it is tightly wrapped.


Tuesday, February 22, 2011

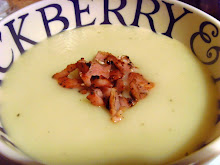
Green soup


One of the best things about hosting Christmas ourselves this year was that we were able to make turkey stock from the carcass. This is not something we are very good at remembering to do with our regular roasts, I'm not really sure why. We're probably just too lazy. But it is, of course, simplicity itself. Especially in the Aga - just bring it all to the boil on the top and then pop it into the simmering oven until you remember to get it out several hours later!

Our freezer is packed full of pots of stock and it is so flavoursome - it adds so much flavour to soups and risottos in particular. I have a few favourite 'go to' soup recipes that I make regularly but really, with stock so flavoursome, it doesn't matter what you put in your soup. The end result will probably be delicious. Last Friday I took a look in the fridge and didn't seem to have enough of anything to make a particular soup. Instead, I decided to make a mixed green vegetable soup using up little bits of all kinds of veg. I wasn't expecting a particularly great result, but it was absolutely delicious as well as being extremely healthy (...don't tell anyone about the cheese toastie I had alongside). It's lovely green-ness made me feel all Spring-like and uplifted!

Here is what I did...

Green Soup
Serves 4

Ingredients:
A selection of green vegetables. Here is what I used...

2 leeks, sliced
2 spring onions, sliced
1 stick celery, sliced
1 large potato, cubed
1 courgette, roughly chopped
1 cup frozen peas
small handful chopped cabbage
1 pint good quality turkey, chicken or vegetable stock
Dash of sherry vinegar (optional)

1. Heat a little olive oil in a heavy-based saucepan. Add the leeks, celery and potato and sweat for a few minutes until just starting to soften.

2. Add all the other vegetables and then the stock. Stir and bring to the boil. Simmer over a gently heat (or in the simmering oven of an Aga) until vegetables are tender. I left mine in the simmering oven for around 25 minutes.

3. Whizz to a smooth consistency with a stick blender. Taste and season with salt and pepper to taste. Stir in a small dash of sherry vinegar to taste.

4. Pour into warmed bowls and garnish with chives, if you have any to hand!

Friday, February 18, 2011

Chipotle chilli beef


 Both my husband and I love a good chilli con carne. It was, I think, the first thing he ever cooked me. Those were in the early days when I thought that he could only cook items made with mince (chilli, spag bol and shepherds pie were the first three meals he made - much as I loved them, I was relieved when a beef and ale stew made an appearance).

The only problem with our love of chilli is the eternal debate as to what makes a really good chilli. We have quite different opinions on this matter. For him, chilli must be made with minced beef. Whilst I will concede that minced beef is the more traditional option, I actually prefer mine to be made with actual chunks of meat. Slow-cooked casserole-style.

We also disagree about what else should go into a chilli. My husband is keen to add whatever may be in the fridge/cupboards. This often involves sweetcorn. Much as I like sweetcorn, I do not like it in my chilli. Nor do I want carrots. Or mushrooms. Or courgettes. For me, onions, garlic, kidney beans and bell peppers are all I require.

Our final chilli dispute erupted one evening when I dared to served jacket potatoes alongside my chunky meat chilli. This was a step too far for my beloved. For him only rice will do. We do agree on the toppings though - guacamole, soured cream and a little grated cheese.

Last week, whilst taking stock of the surfeit of jars occupying 2 full shelves of my fridge, I spotted a half-used jar of chipotle chilli paste. This was last used to great success in my chipotle chicken stew. I decided to adapt my regular chilli recipe and use the paste to add a smoky richness to the dish. The result was something of a triumph - the flavour was fantastic and it was, I think, one of the best chillis I've ever made. A couple of squares of good dark chocolate added at the end also added an extra dimension as did the long, slow cooking. I couldn't help feeling that it would be rather good made with diced venison too. Another time, perhaps?

I can only apologise about the terrible photos - there must have been a smear on the camera lens...

Chipote chilli beef
Serves 4
Based on this BBC Good Food recipe


1 onion
2 cloves garlic
2 bell peppers (one red, one green)
2 heaped tbsp chipotle chilli paste
1 tsp ground cumin
500g diced stewing beef
1 400g tin tomatoes
1/2 pint beef stock
1 tsp sugar
1 tsp dried marjoram
410g tin of red kidney beans (or feel free to use other beans - black beans are good too)
2 squares good quality dark chocolate
To serve: your choice of soured cream, guacamole, fresh coriander, grated cheese, rice, tortillas etc...

1. Pre-heat oven to 170C*. Roughly chop onions and slice the peppers.

2. Heat a little oil in a casserole and then gently fry onions until they are transluscent and soft. Add the peppers and crushed or finely chopped garlic. Set to one side.

3. Add a little more oil to the pan if necessary and brown the meat on all sides. You may need to do this in batches so as not to overcrowd the pan. Set meat to one side and put vegetables back into the pan.

4. Sprinkle over the cumin and marjoram and spoon in the chipotle paste. Give a good stir to combine and cook for a minute or two before re-adding the meat and stirring to combine.

5. Pour in the tomatoes and stock. Add sugar and plenty of salt and pepper and give it all a good stir. Bring up to simmering point.

6. Place lid on casserole and pop in the oven. Cook for at least forty-five minutes, but preferably longer at a lower temperature* if you have the time. Check on it every now and again and add a little more water/stock if it is drying out. After this time, add the kidney beans and cook for a further 15-20 minutes with the lid off if the sauce needs reducing somewhat.

7. Before serving, check the seasoning and add salt and pepper as required. Stir in the dark chocolate and sprinkle with fresh coriander before serving.

*As with many beef casseroles, this is better the longer and slower it is cooked. I brought mine to the boil on the boiling plate of the Aga and then tranferred to the simmering oven for 2 1/2 hours.

Tuesday, February 15, 2011

Banoffee cupcakes

I have a confession.

I am not a huge fan of the cupcake.

I'm not quite sure how to explain myself. I like the look of them. I like the cute-ness factor. But I just can't help feeling a little... cheated... by a cupcake. I'm more of a big cake sort of girl. I prefer a slice. Also, much as I love buttercream, I just can't quite cope with the amount that is smeared atop a hummingbird bakery-style cupcake. It looks promising, but I usually end up feeling rather sick.

However, these completely divine banoffee cupcakes have stolen their way into my heart. They are very seriously good. The combination of banana and fudge chunks within and caramel-flavoured buttercream and dulche de leche on top is simply too good to resist (though I do find myself wondering how good this would be in large cake format). In my quest to conquer my cupcake antipathy I've tried a lot of cupcakes but these really do take the number one spot for my 'best-ever-cupcake'.


I was drawn to these beauties via the nice lady from the Baking Mad website. For those who haven't discovered this excellent site, I suggest you go take a look. The site belongs to Allinson flour, it would seem but in a rather subtle sort of way. Silver Spoon and Billingtons sugar are also affiliated and the products are loosely promoted here. But mainly it is a superb archive of recipes, baking tips, competitions as well as being home to a baking blog.

I was asked to try out the banoffee cupcake recipe and sent a box of baking goodies to help me along: Allinson flour, Billingtons sugars and Silver Spoon cake decorating goodies. Having waited all week for my bananas to reach sufficient ripeness, I attempted the cakes on Saturday evening with a couple of visiting friends. Glasses of fizz in hands, we got busy following the detailed instructions on the site. A nice feature of the recipes is the ability to click each stage as you go along so that you can easily find your place. Handy.

Mixing the cake batter was very straightforward and we all got rather over-excited about the fudge chunks. Upon tasting the Silver Spoon fudge chunks, Claire and Joni (of lamb tagine fame) decided to carry out a taste test and declared the fudge chunks 'a little soapy'. We were a tad worried about this but were reassured upon tasting the cakes - they seemed to have semi-melted into fudgy deliciousness. I look forward to using the remaining chunks in cookies or blondies in the near future.


The recipe states that it makes 12 cupcakes. I suspect this is 12 super-sized ones as I managed to make 24 reasonable sized cakes from the batter (slight problem as the husband is away and 24 cupcakes is a lot for one girl to get through!). The buttercream icing is made with natural icing sugar so has a lovely caramel flavour and colour - I'd not used this before but it is a good discovery. We were momentarily flummoxed with the icing as there was no direction about adding milk and we couldn't get it to mix - hopefully this will be changed on the website. One other slight problem we had was that the icing started to 'melt' somewhat and didn't hold its shape too well. This could be because our kitchen is quite warm due to the Aga. However, we persevered - one of us piped the icing whilst the others added the chocolate decorations and pieces of dried banana. I got quite excited by the heart-shaped decorations, it being Valentine's Day and all.

Anyway, the recipe can be found here. I suggest you try it. Totally delicious. I might even have one now. For breakfast...


Monday, February 07, 2011

Tuna and caper pâté


The husband and I are fond of a pre-dinner drink (or two). The trouble is that with that pre-dinner drink, we usually feel the urge to indulge in a pre-dinner nibble. This, I have no doubt, is one of the key reasons for our overly expansive waistlines. (This, and our fondness for cheese, proper puddings and cake). Whilst we know that eating earlier would help ease this habit, we're not actually willing to forgo this favourite part of our day. It is the time we relax post-work, talk through the day's events and generally unwind whilst one of us potters round the kitchen creating dinner.

We try to keep our snacking under control and stick to reasonably 'healthy' nibbles. Low-fat hummous with carrot sticks, olives or tomato salsa spread on melba toasts are staples in this house. We love them, but we get tired of them too. When friends are here, or at weekends, we are more adventurous and make more fancy canapes but mid-week, it is all about low effort. Whilst browsing through some of my favourite food blogs the other day, I stumbled accross a tuna and caper pâté on the Kitchen Diaries Challenge blog which rather caught my fancy. I find the salty tang of foods like capers, olives or anchovies just perfect for awakening the taste buds prior to the main event. I had most of the ingredients to hand in the cupboard and simply improvised for the rest. It took mere moments to make - a 'bung it all in and whizz it all up' recipe. The best sort for mid-week really.

Served moments later with a crisp glass of white and some melba toasts, it was a very delicious 'snackette' (as we like to refer to such things). It would make a nice starter too and, as it uses low-fat mayo, is pretty healthy too.

Do you like a pre-dinner 'snackette'? If so, what do you tend to choose?

Tuna and caper pâté


Ingredients:

1 tin of tuna, drained
half a small red onion or a shallot, finely chopped
2 heaped tablespoons low-fat mayonnaise
juice half a small lemon (to taste)
2 heaped teaspoons capers, well-rinsed
1/2 tsp paprika
handful flat-leaved parsley

1. Place all ingredients except lemon juice and capers into food processor and whizz to combine.

2. Add lemon juice a little at a time, tasting after each addition until the balance seems right.

3. Add the capers and pulse briefly so they are combined but not completely broken up. You want a little texture here.

4. Scrape into a serving dish and (ideally) leave for an hour or so in the fridge for the flavours to combine. If greedy and rushed like us, serve immediately with melba toasts or crudités. Or spread on crostini, as suggested by Maggie at Kitchen Diaries Challenge.

5. Serve with a crisp glass of white wine.

Monday, January 31, 2011

Nigella's Chocolate Orange Loaf Cake


Like her or not, almost everyone has something to say about Nigella. Men I know who are usually uninterested by cookery are almost all enthusiastically appreciative of her talents! Women tend to me more divided. Some find her sultry ways in the kitchen irritating and demeaning. Some wish they were like her. Some wish they actually were her.

I think she is just a tiny bit marvellous. And I'm prepared to tell you why....

1. She is a cook, not a chef. She understands the home kitchen and the home cook.

2. Her books are so much more than a collection of recipes - they are a good read and often have the ability to make me laugh out loud.

3. A sense of fun pervades her food - she doesn't take herself too seriously.

4. If you've got it, flaunt it. Nigella has. And she does.

Approving of my admiration for Nigella, my husband kindly bought be her latest tome for Christmas. For various reasons, I wasn't able to follow 'Kitchen' on the television so was particularly pleased to discover the new recipes.

I'm a sucker for cake and so it was no surprise that it was a cake which first caught me eye. A chocolate orange loaf cake, to be precise. After the excess of Christmas, I couldn't really find a good excuse to bake such a thing, especially as we are trying to healthy ourselves up a bit after a few months of totally over-doing it on the food front. But then I spotted an announcement on Maison Cupcake about a new event celebrating the wonders of Nigella; Foreve Nigella. The theme for this month is 'seduced by chocolate'. It was clearly meant to be.


Donning the frilliest, kitschest apron I own, I set to work. (I had glanced briefly at the silk negligee but the thermometer showed minus two, so the thought was shortlived). The cake is a simple one to make, using mainly storecupboard ingredients and cocoa rather than chocolate. I love a simple cake now and again, don't you? This is not to say that I don't love icing and buttercream and layers and chocolate scrolls and decorations. I do. I assure you that I do. But sometimes, something a little plainer hits the spot. And makes me feel a little less naughty. After all, cake without icing is practically a health food, is it not? And this one contains oranges so it really must be good for me, no?

Anyway, having read the instructions, I set to work. If I were Nigella, I would have reached for my shiny Kitchenaid mixer. But I'm not. So I didn't. Instead I used my Kenwood. Not quite so beautiful perhaps, but equally effective. I whizzed and mixed, and then poured and scraped the contents into a loaf tin lined with my new loaf-tin-liners. I'm particularly pleased with these and I'm sure that Nigella would approve - she likes a shortcut as much as the next man.


Having seductively licked a bit of the mixture off my finger, I popped the cake-to-be in the oven and waited. The waiting was quite difficult, I must admit as this cakes smells WONDERFUL as it bakes. Upon removal, the cake looked and smelt divine but I managed to wait until it was cool before greedily gobbling down two slices before bed. Not good as I was planning to take the cake as a present for my mother the next day. Nevermind. She understood and between us, we enjoyed the remainder.


What can I tell you? Nigella triumphs again. This is a very delicious bake - the orange is a subtle and welcome addition to this otherwise plain cake. It is also lovely and light. I'll definitely be making this again. The theme for this month's challenge suggests that I should be making a chocolatey something to seduce my sweetheart for Valentine's Day. Instead I have seduced myself. I shall definitely be making this again.

Do you know your onions?


Recently I was contacted by the folk responsible for promoting British onions. To be honest, I was a little surprised that such a product should be in need of any form of promotion and was interested to discover an entire website devoted to this most humble of vegetables.

Humble,  maybe. Indispensible, certainly. Barely a day goes by in which I don't chop and onion to begin the base of a soup, stew, pie or roast. If I run out, I panic. Without onions, I am somewhat lost in the kitchen. To me, they are a vital flavour-adding essential which forms the bases of so many dishes I prepare.

Onions grow extremely happily here in the UK and buying British is something I try to do whenever possible. The British Onion people were kind enough to send me a box full of onions and challenged me to produce my perfect recipe for onion gravy. Along with a plentiful supply of onions, they included some storecupboard staples which I might like to use in my gravy. I was also encouraged to include my own 'secret' ingredients if it pleased me.

The challenge made me smile as it made me think of my husband who, given the choice, would have gravy with everything. Whilst I couldn't contemplate a Sunday roast without gravy and I do love a rich onion gravy with my sausages, I don't feel the need to have gravy with every piece of meat or pie that comes out of the kitchen. My other half does. Even shepherd's pie which to me seems most peculiar as it is essentially meat simmered in 'gravy' with potato on top.

So. I knew this challenge would make him happy. A very unscientific straw-poll amongst friends revealed that everyone has their own idea of the perfect gravy. Some like it thick, some like it thin. Some like it pale and some like it dark and glossy. Some like 'bits' in it. Some prefer it smooth. Which sort should I make?

I decided to please myself and make gravy in the way I most enjoy it. But then again I was stumped. The type of gravy I like with a roast chicken (pale, quite thin and made mainly with roasting juices, a splash of white wine and a touch of redcurrant jelly) is totally different to the gravy I like to pour over my sausages (thick, dark and glossy with lots of onions). How to decide what to make?

In the end, I present you with two gravies. One is the kind of gravy I make when I'm roasting meat - in this case, beef. The other is a rich onion gravy I made to serve with venison sausages and mash. Both were delicious. Both involved British onions. One used the onions as in a 'supporting role'. The other is entirely about the onions.

Firstly though, you might be interested to see inside that box...


There were familar ingredients I turn to regularly for gravy-making: Worcestershire sauce, Marmite and tomato sauce. There was also a pot of English mustard and an intriguing jar of mushroom ketchup. Sadly, I'm no longer able to eat mushrooms so this is something my husband will be experimenting with at a later date. I bet it would add an excellent savoury quality to the gravy though.

So first up, we have a plate of sausage and mash....


All that is missing is the onion gravy. Let's make some shall we?

Red Onion Gravy
Serves 2


Ingredients:

2 red onions
1 tbsp olive oil
2 small knobs of butter
1 tsp sugar
1 tsp Marmite
1 scant tbsp plain flour
350ml boiling water
1 tsp redcurrant jelly

1. Cut onions in half and slice. Heat oil and small knob of butter in a heavy-duty casserole dish. Add onions and sugar and sweat for a few minutes until just starting to soften.

2. Place lid on the casserole and continue to cook onions on a fairly low heat for around 15 minutes until really soft and sticky. Aga-users might like to do this in the roasting oven, rather than on the top.

3. Boil the kettle and pour approx 350ml boiling water over the Marmite and mix together to create 'stock'. Sprinkle flour over the sticky onions and stir well to incorporate. Gradually add the Marmite stock a little at a time, stirring well to combine after each addition and bubbling on quite a high heat. You may not need to add it all, you may need to add a little more, depending on how thick you like your gravy.

4. Add the redcurrant jelly and season well with salt and pepper. Bubble away for a 5 minutes and adjust seasoning to taste. If it seems too sweet for your liking, add a little Worcestershire sauce. If not sweet enough, add more redcurrant jelly.

5. Just before serving, add a little knob of butter and stir in. This is not essential but does make for a lovely, glossy gravy.

6. Pour into a jug and pour liberally over sausages and mash!


Gravy to accompany a roast:

This is the method I use most often. In this instance I was making gravy to accompany roast beef, but I've included alternatives for other roast meats...


Gravy-making starts before the roast even enters the oven! Chop an onion or two into quarters and, if you have one, a carrot into large chunks. Place these in the roasting tin and sit the joint on top. These vegetables will provide extra flavour to your gravy.

Once the meat is cooked, set aside to rest on a carving board, covered in foil.

Pour excess fat out of roasting tin (leave around 1 tbsp along with the juices) and set on top of the hob on a medium-high heat. Sprinkle over a tablespoon or so of flour and mix into the fat and juices, taking care to scrape up all the sticky bits from the bottom of the tin.

Add a good splash of wine. White for chicken, turkey, pheasant or pork. Red for red meats and other game. Bubble away, stirring and scraping all the while.

Next add stock. Often I will use water from the vegetables mixed with the relevant stock cube for this. If a poultry joint came with giblets, I boil these up whilst the bird is cooking to create a flavoursome stock.

Add stock slowly, stirring well between each addition. Quantity will depend on how much juice came from the roast and how many people you are serving. For this beef joint, I used about 400ml stock for four of us.

Once stock is added, add the 'extras'. For interest, this is a very rough guide to what I add depending on the joint:

Beef - 1 tsp Worcestershire sauce or 1tsp dark soy sauce, 1 tsp tomato ketchup and a 1/2 tsp of English mustard.

Lamb - 1 tsp Marmite and 1 heaped tsp redcurrant jelly

Chicken and feathered game, including duck - 1 tsp redcurrant jelly and 1 splash Worcestershire sauce

Vension - 2 tsp redcurrant jelly and splash Worcestershire sauce

Pork - 1 tsp Marmite, pinch dried sage

These additions are all dependent on taste. I always taste as I go and add a little of this or a little of that depending on what I feel it needs. If the gravy tastes bland, I add a little more of something! Remember to season with plenty of salt and pepper.

Strain the gravy into a jug so that you have a smooth gravy (though the onions and carrot to taste quite delicious as a cook's perk!).

Serve with roast meat and all the trimmings....