Sunday, April 27, 2008

Happy 'Birthday' to Food, Glorious Food!


Tomorrow I will have been blogging for one year. It was a wet, rainy afternoon when I decided to see how easy it would be to set up a blog up. I was playing at it really. I'd just baked a
rather scrumptious chocolate pudding (which I've since made several times) and suddenly felt the urge to share its deliciousness with the world at large (!) So I thought up a name, chose some colours and scribbled down my first post.

Blogging has exceeded my expectations in almost every way. Firstly, I didn't think I'd last more than a few weeks. I thought that I'd run out of things to talk about. 128 posts later and it is fairly clear that I have plenty to say. Almost anyone who knows me would be unsurprised by this as I almost always have something to say.

Secondly, it didn't occur to me that anyone other than my family (and possibly one or two friends) would read what I wrote. I remember well the great thrill I felt when
someone who wasn't a friend or family first left a comment on one of my posts. Thank you Caroline. As it happens, only a few of my friends and family do read my blog. Those that I expected might be interested are not, whilst others I would not have dreamed to be interested in a food blog, check in fairly regularly and constantly surprise me with comments about dishes they've spotted here. My Mum, of course, reads from time to time (hello Mum!). She even tried out one of my recipes the other day and loved it: the ultimate compliment.

But ultimately, it is fellow food bloggers that encourage and inspire me. It is thanks to them (or should I say you?) that I have had such an enjoyable and delicious year. Over the past 12 months, I've rarely cooked the same thing twice (save a few particular favourites such as this, this and this). I've been inspired and tempted on countless occasions by fabulous recipes, tips, ideas and gorgeous photography.


The photography element has been another great surprise to me. I started out totally clueless, but having discovered the joys of the macro setting, understood the importance of natural light (shame that I do most of my cooking once it is dark) and got very used to lukewarm food I'm finally making a little progress (I think) on the photos. I hope they are getting better and that they give a good idea of what I cook. Again, I have fellow food bloggers to thank for helping me on my way here. What fun it has been!

Both Julia from
A Slice of Cherry Pie and Nilmandra of Soy and Pepper have tagged me for a six word memoir. The rules are that I must choose six words to describe myself. Harder than it sounds, but here goes:

Warm
Sensitive
Greedy
Generous
Inquisitive
Stubborn

Thank you to all my readers and fellow food enthusiasts for making my first year of food blogging such a memorable one.

One Perfect Ingredient: rocket and cashew pesto


Along with many food bloggers, I was lucky enough to get my hands on a copy of the new book by Marcus Wareing: 'One Perfect Ingredient'. In this book, Marcs uses everyday ingredients to create 120 dishes aimed at the home cook. It is organised by ingredient, so, for example filed under 'peas' you find pea and broad bean salad with Manchego cheese, gratin dauphinoise with peas and leeks and pea and bacon velouté. He pushes the idea of 'everyday ingredients' somewhat in my mind - how often do you just happen to have a pot of brown shrimps sitting forlorn in the fridge? Ditto mangoes. But on the whole I like the idea.

I'm always wary of cookery books written by chefs. All too often they are full of overly cheffy recipes that are hard to reproduce at home in a domestic kitchen without a brigade of sous-chefs chopping and clearing up after you. On the whole though, I was impressed with this book. There are the occasional signs that this is a man who probably doesn't do his own washing up (a tasty sounding recipe for Savoy cabbage with nut butter sounds simple but in fact uses a whopping four different pans). But most of the recipes seem fairly simple, well-explained and wholly achievable. And most of them are enormously tempting; an initial read-through found me eagerly grabbing the post-it notes to start bookmarking recipes to try soon. Amongst those that caught my eye were sea bass with a pine nut crust and red wine vinaigrette, carrot and coriander galette and orange syrup cakes. Photos in the book are simply and beautifully shot and are refreshingly short of cheffy flourishes. I would have liked to see more though personally - I'm a very visual person and am probably over 50% more likely to try a recipe if it is accompanied by a photo.

I decided to start with one of the books simplest recipes: linguine with rocket and cashew pesto. I'm pleased to say that it was a resounding success and I'm sure it will become a regular addition to my weeknight suppers. Everything is whizzed together in a food processor and the flavour makes a good change from basil pesto.


For four people, you'll need around 100g rocket, 100g cashew nuts which should be toasted in a dry pan, 40g freshly grated Parmesan and 100 ml extra virgin olive oil. Add the oil slowly - you may not need to use it all.

The pesto was great with the suggested linguine but I found some other used for the leftovers - I also found the flavour better the next day, once the flavours had had time to mingle. Spread on crostini and topped with a slice of cherry tomato (or sundried tomato), the pesto made for pretty and delicious little canapés...


Mixed with natural yoghurt, the pesto was also delicious along with cold sliced lamb stuffed into pitta breads, following last week's Sunday lunch.


I'll definitely be trying other recipes from the book. As far as chef-written (as opposed to cook-written) books go, Marcus Wareing has succeeded on coming up with a selection of interesting and exciting recipes which on the whole use simple ingredients and basic techniques. As such, the book had a fairly broad appeal - there is enough to interest the experienced cook and yet the recipes are clear enough for the less confident.

Wednesday, April 23, 2008

Lemon amaretti creams


Very occasionally, I wonder if
Nigel Slater and I are actually the same person. He is certainly my favourite writer of cookery books. His 'Kitchen Diaries' are just as readable as a good novel, detailing his thoughts as he cooks his way through the year, feasting of the best of the seasons' offerings. He talks so much sense. Open any page at random and I find myself nodding along with him, in total understanding. Take this, for example on the randomly opened page 100: 'I stir-fry the leaves with mushrooms. The result is a clean and fresh little vegetable dish. No rice, I can't be bothered'. Oh I know how he feels. How often have I whipped together an impromptu stir-fry to find that cooking rice just seems like too much trouble.

I hope he won't mind the direct quote. I'm assuming he won't, seeing as I'm being so complimentary about his glorious prose and suggesting (or should that be insisting?) that anyone who doesn't own this book, go out and buy it. Or, easier still,
click here and buy it. In any case, he won't mind, as he and I are practically the same person...

Take this gorgeously creamy, lemony little dessert, for example. In his introductory spiel, he says that he generally favours the kind of pudding that involves a great big bowl in the middle of the table that everyone can just dive straight into (reminding me of a Nigella comment about how she generally loathes 'portion control'), but that he finds a 'certain elegance' in a dessert served in pretty individual dishes. I agree and upon reading this recipe for lemon amaretti cream pots I knew it would be a hit after the
slow-roasted lamb that I served up on Sunday. Better still, I gave me a good nudge to dust off the empty jars in my cupboard and whip up some wonderful home-made lemon curd...


I've been planning to fill my pots for a few weeks, having read about a
great event being run by Pixie at You say Tomato... and Rosie at Rosie bakes a 'peace' of cake. They are challenging food bloggers to make preserves, chutneys, jams or curds and post about them. Really, I've been planning to make something a little more interesting than lemon curd and hopefully, I'll still get around to it. But once I spotted this recipe, I knew I had to make some. Furthermore, I thought this lemon curd recipe would be a good one to share as it is perfect for preserving novices. It really is the simplest thing in the world to make - you just throw the ingredients in the pan and keep stirring until it thickens.

For those nervous about the paraphernalia that goes with preserving, do start with a simple curd as you don't need any special equipment. Old jam jars are perfect. Wax disks and cellophane disks to seal over the top are optional really, but easy to pick up in any kitchen shop. Still not convinced? Just read the recipe and wallow in its simplicity. Really not convinced? Believe me when I tell you that this is so totally superior to any shop-bought version that you may never go back. It was so delicious that I ate so much on the spot, straight from the saucepan, I almost made myself sick! Don't do as I did, tie pretty ribbons on your jars and give a couple away - they make great gifts.

Here is the recipe for the lemon curd, afterwards, you'll find the recipe for the creamy lemon pots.

The easiest lemon curd ever
Original recipe courtesy of
'Leith's Cookery Bible'
Makes around 3 jars


Ingredients

2 large lemons
3oz butter
8oz caster sugar
3 eggs, lightly beaten

1. Wash jars in hot soapy water and rinse with hot water (or wash on hot dishwasher setting). Pop in oven on lowest heat to dry out.

2. Grate zest of lemons - just the zest, no nasty bitter white pith!

3. Squeeze the juice.

4. Place all ingredients in a heavy-based saucepan over a low heat and stir continuously until mixture is thick and coats the back of the spoon. At this point remove from the heat.

5. Pour into the warmed jars, seal immediately. Once cool, label and keep in fridge for up to 3 weeks.


Nigel Slater's lemon amaretti creams, from
The Kitchen Diaries
Serves 6


Ingredients

284ml carton double cream
250g natural yoghurt
280g really good lemon curd (preferably homemade)
100g amaretti biscuits

1. Take a large bowl and whisk the cream until it starts to thicken into soft, billowy peaks. Fold in the yoghurt and the lemon curd with a large metal spoon.


2. Bash the amaretti biscuits into small pieces (pop them in a freezer bag and bash with a rolling pin). Fold them into the lovely lemony, creamy mixture.

3. Scrape the mixture into individual serving dishes or glasses; the prettier the better. Cover with clingfilm and chill for at least 2 hours for the flavours to mingle.

4. Serve them with little crisp biscuits of some kind or another.
These orange poppyseed ones would go quite well.


So, this is my (first) entry for Pixie and Rosie's 'Putting Up' event. If you have a taste for tangy curds, then do check out the blood orange curd that I made earlier in the year too.

Sunday, April 20, 2008

Slow-roasted lamb with gratin dauphinoise


You may well be wondering what on earth the above picture has to do with lamb. Or gratin dauphinoise. Virtually nothing. But I felt the need to share it nonetheless. What is it? Well, it is the ground floor of Exhibition Hall 1 at the Barbican in London. And what it lining that floor in neat little rows? Bottles of wine. Yes, really. Bottles of wine. On Wednesday I participated in the first round of judging for the
International Wine Challenge. It was the first time for me and it was slightly daunting, to say the least. I was assigned to a panel of four as the most junior member and we tasted our way through a whopping 138 wines of all varying styles (and qualities), trying to reach consensus on whether they merited a medal. I was absolutely staggered by the organisation that goes into this competition. Each wine is tasted in the first week by a panel. Any that are rejected are re-tasted by one of a team of 'super-jurors' to check that nothing medal-worthy has slipped through the net. All the goodies are re-tasted in week two in order to assign scores and medals. Quite something.

It has been a busy week with wine tastings in Norwich, Chelmsford and London so I was really looking forward to the weekend and the chance to catch up in my kitchen. Today, I had seven for Sunday lunch - the sun came out at the perfect time and we enjoyed Prosecco sitting in the garden. Very civilised. I had bought a very large leg of lamb from
my favourite local butcher but wanted to do something a little different from the usual roast.


I decided that I would like to slow-roast the joint at a low heat until the meat was falling off the bone. To prevent it drying out I would throw some wine into the pan and cover with foil. Of course, had I one of those huge cast iron oval casserole dishes, I would have used that. But I don't. And it seems silly to buy one just for one dish. So I used a high-sided roasting tin. Despite cooking the joint for over five hours, it wasn't falling off the bone as I had anticipated. It was delicious and very easy to carve but just not quite how I had imagined. I was a bit concerned that it might just seem very overcooked (I usually like my lamb pink), but this wasn't the case due to the wine.


To go with the lamb, I cooked one of my favourite potato dishes: gratin dauphinoise. To me it always seems like such a decadent, luxurious potato treat and everyone always tucks in greedily. Everyone has their own way of making this favourite, but I am very particular about how it is done. If anyone hasn't tried making this before, then do try this version; it is totally foolproof and very easy. The most important step is to start cooking the potatoes in the creamy mixture in a large non-stick frying pan before transferring to the baking dish. Someone explained the science to me once - something about releasing the potato starch as soon as possible to kick-start the cooking process. There is nothing worse than underdone potato gratin. Unless you ask my friend Joni who firmly believes that nothing in life is worse than a bad olive.

I don't use cheese in my gratin dauphinoise - it isn't necessary. It tastes almost cheesy without the cheese. You probably won't believe me, but it is true!

Slow-roasted lamb


Ingredients

1 large leg of lamb, bone in (mine was 3kg and would have easily fed 10)
few sprigs rosemary
few sprigs thyme
1 large onion
1 bulb garlic plus 3 cloves garlic
vegetables (I used carrot and half celeriac)
1 bottle of white wine

1. Pre-heat the oven to 180C. Remove lamb from fridge at least half an hour before putting in the oven. With a sharp knife, cut slits in skin of lamb and push slices of garlic and sprigs of rosemary in alternate slits.

2. Roughly chop the onion, carrot and celeriac (or other veg). Place in centre of deep-sided roasting tin (or large casserole). Slice garlic bulbs in half around the centre and add to the pan. Place the lamb on top and roast at the high temperature for half an hour uncovered.

3. After half and hour, remove the lamb and turn temperature down to 150C. Pour bottle of wine into the pan. Yes, really. The whole bottle. Cover in foil (or place lid on casserole). Return to oven for at least four hours, basting occasionally.

4. After four hours, remove the foil and turn heat back up to 180C for 20 minutes if you feel you would like the skin a little browner. Remove from oven and leave to rest before carving.

5. Pour the fat from the pan and use the juices and veg to make a tasty gravy. Push through a sieve and serve with potatoes and vegetables.

Notes - I served this with leeks, peas and parsnip puree as well as the dauphinoise potatoes.


Gratin dauphinoise
serves 6


Ingredients

1.5 lb potatoes
5 fl oz milk
5 fl oz double cream
1 clove garlic
nutmeg
butter

1. Pre-heat oven to 180C. Peel potatoes and slice very finely, preferably using a mandolin or food processor.

2. Place potatoes in a large non-stick frying pan along with the cream, milk and crushed garlic. Season well with salt, pepper and a little nutmeg.
salt and pepper


3. Heat gently for around 15 minutes until the cream starts to thicken. Take care not to burn and stir so that all the potatoes are evenly coated.

4. Pour the entire mixture into a buttered, ovenproof dish. No need to arrange the slices neatly - it will look wonderful without any artistic talent. Dot with butter and then bake in the oven for around an hour.


5. Remove and serve immediately or allow to cool and re-heat the following day. You can even cut out neat shapes using a pastry cutter and re-heat on a baking sheet.

Wednesday, April 16, 2008

Kiwi fruit muffins


Hands up who really loves kiwi fruit? I'm interested. Really. I've yet to come across anyone who names the kiwi as their favourite fruit. Don't get me wrong, I've nothing against the kiwi. I quite like it in fact. Especially the little black seeds. But I can't really get excited about a ripe kiwi fruit in the same way I might about a perfectly ripe and juicy pear or a luscious strawberry. It is not something you'd often find lurking in my fruit bowl either - I just wouldn't buy them, unless I was making a fruit salad or some exotic fruit dessert.

That was until recently. Over the last few months there have been rather a number of kiwis lying at the bottom of my fruit bowl, looking a little dejected. You see, at this time of year,
Abel and Cole struggle to keep the fruit selection all that varied in the weekly organic box. So citrus fruit and kiwis have been the order of the day. I've tried hard to rise to the challenge, carefully peeling and then eating the odd kiwi fruit. But as fast as I can eat them, they seem to multiply. They won't even go mouldy (...which, dare I say it, would at least give me a valid excuse to dispose of them...)

I decided that action was required and first hit the web for
inspirational kiwi recipes. I was underwhelmed with the selection, to say the least. But then my saviour arrived in the form of the excellent Abel and Cole cookbook. I spied a recipe for kiwi fruit muffins. Really. Sounds unlikely, doesn't it? But look - here they are...


Obviously, I had to make them. In the style of this excellent cook book, no scales are required. Just a regular sized mug and a touch of gentle mixing. I was rather pleased with the results. Not in a 'move over blueberry muffins,here come kiwi muffins' kind of way. Just that the muffins themselves were rather good. I've bemoaned my lack of muffin-making skills
in the past. Previously, my muffins haven't been as risen and puffy as I would like. This time around they were pretty good. My preference would still be for some other kind of flavouring, I think, but actually the cinnamon was rather good with the kiwi. Definitely a good way to use up the kiwis - my only regret is that it didn't use up quite enough. I think the muffins could easily have carried a little more of the fruit. Here is recipe, re-written my way, but I really do suggest that you invest in this gem of a book.

If anyone has any good kiwi recipes they'd like to share, I do still have a few lurking in the bowl!

Kiwi Fruit Muffins
Makes 12


Ingredients

1 egg
1/2 a cup of milk
2 tbsp olive oil

1 1/2 mugs of plain flour
1 tbsp baking powder
1 tsp salt
1/2 mug of caster sugar, plus a couple of tablespoons extra for sprinkling
1 tsp cinnamon, plus a bit extra for sprinkling

1/2 to 1 mug of peeled kiwi fruit, chopped into small pieces
butter for greasing

1. Pre-heat the oven to 220C. Combine the egg, milk and olive oil in one bowl.

2. Sieve the flour, baking powder and salt into a large bowl and add the sugar and cinnamon. Combine. Carefully mix the dry and wet together, taking care not to overmix. It doesn't need to be perfectly smooth.

3. Gently fold in the kiwi fruit.

4. Grease a muffin tray with butter (or use muffin cases) and dollop mixture into each hole. Fill about half-full.

5. Sprinkle over a little more sugar and cinnamon...


6. Bake in the oven for around 25 minutes.

7. Cool on a wire rack (or obviously break into one whilst still warm and burn your tongue as I always do with any form of baking).
P.S. Not quite sure what happened to this one!! Something of a mutant...

Sunday, April 13, 2008

Black salsify and hummous that works


Sometime the week before last, I returned from work and sat outside with a glass of wine. It was a touch on the chilly side, but it felt pretty great to be sitting in the garden again, enjoying daylight at 7pm. Since then, we have had snow, hail and rain. A little sun, but not enough to warrant another evening al fresco. I can't wait until it warms up and I can eat the first meal of the year outside.

To accompany the glass of wine, I decided to have another go at making hummous (or hummus, if you prefer). My previous attempt tasted rather... horrible. I didn't want to be defeated by what should be a fairly simple snack to prepare. I think the reason for my failure last time was a little over-enthusiasm on the tahini paste. Less is clearly more. I held back this time adding just 2 tablespoons worth and the result was spot on. If only this sight awaited me every evening after work...


Before I divulge the secret of my hummous success (...no real secret, as I fear I am slow on the uptake and most have been making their own for years...), let me introduce an extremely unattractive vegetable:
black salsify.


Not the prettiest of vegetables, is it? No. I received these black, muddy twig-like roots in last week's veg box and wasn't too sure how to tackle them. Hey, I wasn't even sure that I wanted to tackle them at all. It is quite hard to believe that they could be tasty. I sought advice from various sources - most people told me that they had never come across the vegetable. I
read that it is also known as the 'oyster plant' due to its faintly oyster-like flavour. Hmm - kind of hard to imagine. Oysters kind of taste of the sea. I couldn't really imagine that in root vegetable form.

I decided that I would prepare them fairly simply so as to taste the full flavour. I decided to boil them until soft and then pan fry the pieces in a little butter. Once peeled, the roots looked a little like thin parsnips. It took over 40 minutes until the little pieces began to soften. I was getting impatient - it had better taste good if I had to wait that long! I served the black salsify with roasted duck breast and I have to confess that I was underwhelmed... It was still a touch undercooked really, which was part of the problem. The flavour did not remind me of oysters. If blindfolded, I think I might have thought they were artichoke hearts. Only not quite as nice. Not a vegetable that I'll rush to buy again, but perfectly inoffensive. Next time I find it in my box I think I'll try to be a little more adventurous. Any suggestions most welcome!
* I've just taken a look at 'The Great Vegetable Challenge' entry on black salsify - their experience with this vegetable sounds rather similar to my own, including the somewhat embarassing after-effects!!*


Anyway, onto better things. Here is the hummous...

Hummous with sun-dried tomatoes


Ingredients

1 240g tin of chickpeas
1 large clove garlic, finely chopped or crushed
juice of a lemon
2 tbsp tahini
olive oil
2 tbsp chopped sun-dried tomatoes
pinch of salt (to taste)
paprika

1. Drain the chickpeas and whizz in a blender along with the garlic, tahini, tomatoes and lemon juice.

2. Add olive oil with the blender whizzing until everything comes together in a nice smoothish paste (around 3 tbsp). If too dry, you can always add a little water to loosen.

3. Season with salt and a little paprika to taste.

Notes - you could omit the tomatoes, of course, or substitute them for roasted peppers, pesto, or anything else that takes your fancy!).

Coming soon: kiwi fruit muffins, a deconstructed Mont Blanc (!), two simple salmon suppers, really good chocolate brownies.

Friday, April 11, 2008

Spiced rhubarb cake


My obsession with this year's rhubarb has got a little out of control. I'm prepared to admit that. It started quite innocently with the rhubarb and ginger crumble, continued fairly reasonably with a creamy rhubarb fool, started to get a little out of hand with a heavenly rhubarb pavlova and resulted in my falling for this satisfyingly moist spiced rhubarb cake. After the pavlova, I promised myself that I would hold back from purchasing more rhubarb, but once I spotted this cake in this month's edition of BBC Good Food Magazine, I knew I had to have it. Refusing was futile.

But I know it is time to move on. Embrace the new treasures that Spring has to bring. Before I do move on though, I thought I'd better share this treat of a cake. It is not overly spice, just a pleasing gentle warmth from the ginger and mixed spice. Next time I'd be tempted to up the ginger, or perhaps add a little chopped stem ginger for added oomph.

As for the original recipe, you'll find it in the May edition of BBC Good Food. Below, is my version. I have always hated recipes that ask you t weigh out liquid ingredients, especially when they are sticky as here with the golden syrup. Weighing golden syrup is a ridiculous activity. I meant to measure it out for you in something more useful - like tablespoons - but forgot. My only advice would be to lightly flour the bowl for weighing it out so that it slides out more easily. Or, if you have the kind of scales which enable you to weigh stuff in any container, place the food processor bowl on to them, set the scale to zero and pour the syrup directly into the mixture.

Spiced Rhubarb Cake
Makes around 20 brownie-sized slices


Ingredients

5 oz softened butter, plus a little extra for greasing
10 oz self-raising flour
2 tsp mixed spice
1-2 tsp ground ginger
1 tablespoon stem ginger, finely chopped (optional)
4oz dark muscovado sugar
9oz golden syrup
1 tsp bicarbonate of soda
2 eggs, beaten
10oz rhubarb, cut into 2 cm lengths
Icing sugar, for dusting

1. Heat the oven to 180C or 160C fan. Put kettle on to boil. Butter and line a deep 20cm square cake tin.

2. Sift the flour and spices into a bowl and lightly mix together.

3. Place butter and sugar into a food processor and beat together until light and fluffy. Add the golden syrup and whizz in the processor.

4. Dissolve the bicarb of soda in 200ml boiling water and gradually pour through spout of food processor whilst the blades are whirring. Pulse in the flour and then add the eggs, one at a time, mixing slightly between each addition.

5. Stir in rhubarb and stem ginger, if using.

6. Pour mixture into the tin and bake in the centre of the oven for 50-60 minutes, until the cake springs back when pressed and is nicely browned on top.

7. Leave to cool in the tin for five minutes and then turn out 'upside down' onto a wire rack to cool, so that the rhubarb (which will likely have sunk to the bottom) is now on the top. Do this carefully - the rhubarb will have made the cake very moist and therefore a little tricky to handle/prone to splitting!

8. Dust with icing sugar and cut into slices. Eat within 3 days.

Tuesday, April 08, 2008

A sort of Hungarian goulash


I seem to be a bit behind on the blogging front - I have a huge backlog of delicious dishes to share and not enough time to post them. I'm almost at the point of cooking a week's worth of unbloggable food, just so I can catch up. That is sad really, isn't it?! Tonight I was planning to make spag bol, but as I have no spag, it looks like it'll be just 'bol'. I've thrown a large potato in the oven though, so hopefully that'll make up for the lack of 'spag'. Either way, I won't feel the urge to photograph or blog about it which means that, for once, I'll be eating a piping hot supper! Anyway, on list of things to post are a deconstructed 'Mont Blanc', kiwi fruit muffins (really), spiced rhubarb cake, successful hummous, two salmon suppers and a partridge in a pear tree...

I've been feeling especially inspired by the recent acquisition of several new cookery books. A couple of weeks ago, I received an exciting addition to my weekly veg box: The
Abel and Cole cookbook. It is chock full of imaginative recipes that I actually feel like cooking. More to the point, they are the sorts of recipes that require no scales or precise ingredients - it is all just 'a mug of x', 'a large handful of y' and (my personal favourite) 'a dollop of z'. You don't come over all faint if you've forgotten a vital ingredient - you can just leave it out, or substitute in most cases. It is the sort of useful book that inspires confidence.


So much so, that last week I actually tried three recipes from it. Or sort of. Keith Abel might be a touch upset if I credited him with this goulash recipe. I didn't posses many of his suggested ingredients so I improvised. I decided this was fine as Hungarian goulash is a loose sort of term, applicable to all kinds of stews and soups. There is no definitive recipe. After some research, I have decided that the key parts are paprika and beef. And probably peppers of some kind. Oh, and sour cream, either stirred through or 'dolloped' on top. I didn't have peppers or sour cream, but I wasn't deterred. My heart was set on goulash and I wasn't going to let a small thing like missing most of the key ingredients put me off.

Anyway, all that is important here is that the end result was delicious. Richly flavoured with a pleasing paprika hit. Certainly not authentic, but absolutely one to repeat. This is odd, in fact, as goulash used to be the one dish I really couldn't eat as a child. It graced our school menu once a fortnight and I used to dread it and push it around my plate. Funny how things change...

A sort of Hungarian Goulash
Inspired by 'Gazza'a Goulash with Rosemary Dumplings' from the Abel and Cole cookbook, page 26
Serves 2-3


Ingredients

400-500g stewing beef, cut into 1 inch chunks
1 large onion, sliced
1 large clove of garlic, finely chopped
1 large red pepper (I didn't have one, but I'd use one next time)
1 tablespoon paprika (preferably smoked)
1 tablespoon tomato purée
2 mugs of stock (beef or chicken)
1 bay leaf
1 bouquet garni
2 tablespoons soured cream or creme fraiche to serve
fresh chopped parsley

1. Pre-heat oven to 160C. Heat olive oil in a lidded casserole dish and brown the meat quickly on a high heat. Do this in batches, so as not to overcrowd the pan. Remove with slotted spoon and set to one side.

2. Add onions to pan (with a touch more oil if necessary) and fry for a few minutes. Once starting to soften, add the pepper, if using.

3. When onions and peppers are soft, return the beef to the pan along with the garlic, paprika, tomato purée, bay leaf and bouquet garni. Stir together until combined.

4. Add the stock and bring to the boil. Give a good stir and season with salt and pepper.

5. Place in oven for an hour and a half, until the meat is soft and tender. You may need to check very now and again to ensure it doesn't dry out. Add more stock if necessary.

6. Serve with noodles, rice or mash. Top with a dollop of sour cream and plenty of chopped parsley.

Saturday, April 05, 2008

Smoked mackerel pâté


Whilst I love going all out when entertaining and spending time creating three, or even four courses to laze over, the truth of the matter is that I don't really have enough plates, knives or forks to allow this. Or rather, I do, but they don't all go together. Furthermore, I have a 'slimline' dishwasher which most certainly doesn't fit all the paraphenalia dirtied by serving multiple courses for eight. Call me selfish, but I loathe washing up.

What I tend to do therefore, is serve a maincourse and pudding (occasionally two) and then make some substantial eatie bits for everyone to tuck into with drinks before siting down to the main event. Sometimes this means getting small and dainty with some
nice canapés, but more often than not I'll make something a bit more hearty for everyone to dig into in a messy, informal sort of way. Pâté of some kind or other is usually my top choice, served with wedges of crusty bread - people can just dig in and have as much as they want. Usual favourites are chicken liver or smoked trout. Last week, I dished up the usual favourite chicken liver but decided to make a smoked mackerel version as well.
zsf
I was really pleased with this moreish treat - the leftovers didn't last long the next day and it was clear that my furry companion for the day was rather put out that I'd scoffed the lot without so much as a sideways glance...
asd
Smoked mackerel pâté
serves 8 as a starter

Ingredients

3 smoked mackerel

200g soft cream cheese (I used half-fat Philadelphia)

1 heaped tablespoon low-fat natural yoghurt

1 heaped tablespoon horseradish sauce (more or less to taste)

handful chopped spring onions or chives

small handful chopped parsley

juice of half a lemon

1. Remove skin and any obvious bones from the mackerel, flake with a fork.

2. Place in food processor along with all the other ingredients and blitz until you have a reasonably smooth consistency (I like a few lumps in mine so tend to leave it quite chunky - you could even mash everything together in a bowl rather than using the processor).

3. Taste. Season with black pepper. Add more lemon juice if required.

4. Serve with melba toast, crusty bread or toasted pittas.

Wednesday, April 02, 2008

Rhubarb pavlova


I promised you rhubarb pavlova. And I would never break a promise. Here it is in all its meringuey, creamy, rhubarby glory.

I've been having a bit of a love-affair with rhubarb of late, this being my third rhubarb related post in as many weeks. Well, forced rhubarb is something to be celebrated. A glimmer of colour in a season otherwise weighed down with roots, roots and more roots. Not that I don't love roots, you understand. But it is nice to have a bit of colour. Don't you agree...?

Rhubarb syrup
Pavlova is one of my favourite dinner party puddings. Almost everyone likes it. You can make the meringue in advance. And you can keep it seasonal by topping the cloud-like base with whatever fruits are in season. What's not to like? It is also one of the few pudding recipes that I can whip up without consulting my recipe book - I know that to each egg, I should add 2 ounces of caster sugar. How easy is that?

I usually make this in the summer with red berries - strawberries, raspberries and redcurrants. But you can really choose anything. Slightly tart fruits are best due to the sweetness of the meringue - kiwi, pomegranate or passion fruit are great choices. Pavlova is a dessert that hails from New Zealand and was named in honour of Russian ballerina Anna Pavlova. The idea is that the meringue should have crisp outside and a marshmallow-like interior - they key to achieving this is the addition of cornflour and vinegar. Unlikely, it may sound, but trust me on this!

I'd never tried topping a pav with rhubarb, but I thought the tartness would work well, to say nothing of the pretty-in-pink colour.

Rhubarb pavlova
Serves 8

Ingredients:

For the meringue:

4 egg whites

8 oz caster sugar

1 teaspoon raspberry vinegar (or another fruit vinegar, cider vinegar or lemon juice if desperate!)

1 teaspoon cornflour

For the topping:

Approx 10 medium stems forced rhubarb

2 tablespoons sugar (to taste)

Half a pint double cream

Handful pistachio nuts (optional)

1. Start the meringue the night or at least 3 hours before. Pre-heat the oven to 150C. Whisk the egg whites in a whistle-clean bowl until stiff. You should be able to turn the bowl upside down without the whites falling out, but you may not want to try this!

2. Mix the cornflour with the caster sugar and whisk into the egg whites a little at a time until the mixture is glossy. At the last minute stir or whisk in the vinegar.

3. Next you need to form the base. Ideally one of those brilliant non-stick sheets of black teflon type stuff is just the thing. If not, greaseproof paper on a large baking tray will do! Spread the meringue mixture out on the sheet in a rough circular shape - with a spoon try to make a depression in the centre. Take a skewer and swirl around the edges to create peaks. It doesn't have to be perfect - a rough messy shape is perfect. If you have a very stiff mixture, you could get all excited and pipe it in artistic fashion, but really, life's too short, if you ask me.

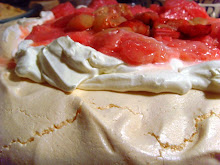
4. Pop in the oven and bake on the low heat for one to one and a half hours. When it is done, the exterior should be crisp but not in any way brown...

5. Whilst it is in the oven, get your rhubarb on the go. Chop into 2cm pieces and pop into a saucepan. Sprinkle over a ramekin full of water and a tablespoon or two of sugar. Stew on a low heat for soft but not too squishy. Taste and add more sugar if needed - you want it reasonably tart. Drain with a sieve and retain the juices. Chill the rhubarb.

6. Make a little rhubarb syrup with the juice - pour into a small pan, add a little more water if you haven't got much and another tablespoon of caster sugar. Heat and bubble to reduce until syrupy in consistency.

7. Once the meringue is done, it need to be cooled. Hence I suggest you make it the night before. When ready to serve, whisk the cream until blobbable. Blob over the meringue and top with rhubarb and drizzle with the syrup...

8. I had this lovely idea of sprinkling over some chopped pistachio nuts. I forgot. Until the next day, when I was polishing up the leftovers. The idea was a purely aesthetic one - I love pink and green together.